BRE Datsun 510


ABC Hobby BRE Datsun 510 #46 body on Tamiya M-05 chassis.

After smashing up the Honda S800 body too much, I got a replacement.  This is an ABC Hobby BRE Datsun 510, #46.  This one is closer to a 1/12 scale body, compared to the S800 and Mini bodies, which are 1/10 scale versions of smaller cars.

Brock Racing Enterprises (BRE) set up some Datsun 510’s for racing, and entered them in the 1971 and 1972 Trans-Am “2.5 Challenge” for smaller engined cars.  Datsun destroyed the competition both years (though Alfa tried to cheat to avoid their fate in 1971), and the series was shut down when the European manufacturers picked up their toys and went home crying.

The body shown here also comes with bumpers and better headlights, but I decided not to use any of them since I expected to beat it up racing anyway.  Unfortunately I must have scored the body when trimming the paint mask, because it almost immediately split right up the left front corner between the red and white areas.

Fitting the body over the wheels was a bit challenging, and required some creative trimming around the wheel wells to keep it from rubbing around corners.  Unfortunately the M-05 battery compartment pushes the battery wires into this body, which flexes it on whichever side the battery protrudes from.  It’s a tight fit, but it works.

Malifaux: Terrain

We finally made time to play another game of Malifaux.  Frank, Andy, JM, and I played two games side-by-side on a 4×6′ board set up with terrain set up for two adjacent 3×3′ boards.  This was a good showcase for my Malifaux terrain, so I took some pictures.

A Ronin attacked by mechanical spiders in the woods

Frank played his Viktoria crew against my arachnid-heavy Ramos crew.  Andy’s Colette box set tried to fend off JM’s Freikorps.  Frank crushed me utterly in 4 turns, while JM destroyed Andy’s dancers in 6 turns.

After trying and failing to enjoy the Terraclips terrain, we’ve fallen back to using area terrain pieces on a Terrainguy map.

The terrain here is an amalgam of pieces from a variety of sources that I’ve collected over the last decade or so.

Malifaux terrain: city and outskirts

Some of the buildings are Mordheim terrain from the box set. Others are completely scratch built and hand painted by Frank.  Some are made from inkjet printed walls glued to foam core. The hobo village around the swamp is plastic O scale railroad terrain.

The grave stones and piles of skulls are from Michael’s craft store during Halloween season.  The graveyard was scratch built by Frank.  There are railroad trees, cast resin stumps, and strips of cloth for roads.  The barrels were store bought pre-painted terrain.

Colette versus the Freikorps in the streets of Malifaux

I scratch built the swamps and rough ground area for dual use with DBA and Malifaux.  They’re made of thin plastic with rocky sand glued on, followed by paint and flock.  The water areas are done with glossy varnish slopped on over the paint.

Frank scratch built the board fences for Warhammer Fantasy, and I built the stone walls using Hirst Arts plaster molds.

Overall, I like the way this terrain looks, works, and stores better than Terraclips.  I could see adding a few standalone Terraclip buildings to this kind of game board, but I don’t think I’ll be trying to lay out an entire board of Terraclips terrain again any time soon.

Playing Malifaux reminded us all how much we enjoy the game, and we plan to play again soon.  Unfortunately the game seems to be changing faster than we can keep up with, since we don’t play regularly.  Luckily it’s still enjoyable with older models.

Sakura S Zero

Sakura Zero S chassis with HPI Honda NSX GT body

In anticipation of On-Road racing at PT Raceway, I decided to get a second on road car so I could race in two classes instead of just one.  I chose the Sakura Zero S chassis from 3Racing because it looks very good for its price, it’s a kit, there are many replacement and hop-up parts available, and it gets good reviews.

The Sakura Zero S is an entry level version of the Sakura Zero chassis. The main differences are that the S version has plastic parts instead of aluminum; fiberglass instead of carbon fiber; gear diffs instead of ball diffs; and it costs about 1/3 as much.  It’s a 4 wheel drive touring car chassis with a twin horizontal plate design.

This was a very fun kit to put together.  Its plate chassis is very different than the other kits I’ve built recently: the Tamiya M05 and HPI Savage XS.  Unfortunately, the Sakura also suffered from Crappy Screw Syndrome, just like… well, apparently this is just like every RC kit everywhere.  This time, instead of starting out driving the 3mm screws straight in with a 2mm driver, I threaded every hold with a screw that had a larger 2.5mm head.  This destroyed my hands, but I stripped fewer screw heads (unfortunately more than zero). As much as I didn’t like the phillips head screws in the Tamiya kit… at least the heads didn’t strip easily.

Sakura Zero S chassis with HPI Honda NSX GT body

The chassis has very adjustable suspension geometry, but the stock dampers don’t allow unlimited adjustment of ride height. I doubt this will be a problem in the short term. It doesn’t look as durable as the M05, but it’s also not a giant block of plastic.  I think at the speeds I’ll be running at the track, it won’t matter.

Other than the screw heads, there are a few problems with the kit.  The first and most universally well known problem with the Zero S chassis is that the stock motor mount is inconvenient, because you can only access one of the motor screws by sticking your tool through a hole in your spur gear.  This is inconvenient with some pinion sizes, and impossible with smaller spurs.  There’s a vertical motor mount part available, but this requires you to also use a new top plate and flip your differentials to swap the side each belt runs on… and that causes your belt to run into your battery on the other side. This kit is not ideal if you’re planning on changing pinions often… but it’s still a lot better than changing pinions on the HPI Savage XS.

The other minor problem I have is that the turnbuckles seem to have undersized flats, making them difficult to turn without slipping.

For a body, I was in a hurry and couldn’t find anything I fell in love with, for sale at the same place as the chassis.  So, I settled for “acceptable and inexpensive” instead. This is an HPI Racing Honda NSX GT.  It retains a bit of the car’s distinct look, especially the air scoop on the rear roof.  Hopefully I won’t have any problem with traction roll, because I don’t think the scoop will last long if the car is upside down.

The body fits the chassis perfectly.  Figuring out where to drill the body mounting holes is a pain, though. You can’t drop the body onto the car and mark them until the posts are cut to approximately the right height, but you can’t cut the posts until the body is on the car to see where it sits.  I ended up measuring the body posts in relation to the center of the wheels, and transferring their locations onto the body using the center of the wheel cutouts as a reference point.  It worked, but it felt like there should be an easier way.

Since I’m going to race this instead of admire it on a shelf, I used the external headlight stickers instead of the internal light cans.  I think it’d look a lot better with the light cans… until I hit a wall and crack the body, in which case I’d rather have more room to repair it inside instead.

For electronics, I used what I had on hand: a 27T brushed motor and ESC I replaced in the RC10, and a Hobbyking Orange Rx Spektrum receiver.  I’ll start out with this slower setup, and once I like how I’m handling it (or once I burn out the motor) I’ll probably upgrade to 17.5T brushless. So far I don’t see hugely different times at the track between the three other cars I drive there (Tamiya M05 with stock 27T brushed; XXX-SCB with 17.5T brushless; RC10 with 17.5T brushless), so I expect the current limitation is my own driving skill more than the technology.

Unfortunately I couldn’t make it to the first on-road race day on December 1, and I won’t be able to make it on the 15th either. Maybe they’ll run on-road on the 22nd, but if not I can make it on the 29th.

XXX-SCB: New Body

Losi XXX-SCB with body painted by Alan Ferrency

After a summer of bashing the XXX-SCB in the yard, and then rolling it over trying to tune it for racing at the track, the original ready-to-run body was cracked at the front shock corner, and generally really beat up.  I ordered a new transparent body to paint up myself, and here’s the result.

I don’t like modern, garish complicated paint jobs very much, so I went for a cleaner, simpler look.  The general contours of the colors was lifted from a real Lucas Oil Offroad Series pro buggy, but I used yellow instead of white.  I got the numbers printed at the same time I made decals for the RC10, but the rest of the stickers are for manufacturers whose parts are on the car.  I’m not a huge fan of the “rolling billboard” livery look, so I didn’t cover every possible surface with advertising, but I think the limited use of stickers add to the scale look.

At this point I have the car handling really well on the carpet track, I just need to get out on race day and see if I can manage to not crash for 5 minutes in a row.

Games with Ezra, Part 1

Ezra, about to start a game of Hordes of the Things.

My son Ezra is now 5 years old, and he has enjoyed playing games of all sorts for as long as he’s been able to play.  Here are some of the games we have enjoyed playing together so far.

He has a great capacity for learning game mechanics, and a long enough attention span to finish a game that he’s truly interested in.  Most of the time he’s able to handle loss well enough to want to play again. The biggest challenge I’ve had in finding good games to play has been that he’s only just starting to learn to read.

For now I’m limiting this list to games that adults can play with kids, and those that are surprisingly appropriate for children (or at least for Ezra) instead of the ones everyone knows work well with kids.  This isn’t a game review, and I won’t be teaching how to play the games; but I will mention any changes we made to make the games more playable.

Cartagena

One of the first “real” games we played together was Cartagena.  When we first started playing, I removed the “move backwards to draw cards” mechanic and turned it into a “play one, draw one” game.  This helped him learn the mechanics and the strategy of skipping over full spots to move forward more quickly.  In the last year or so, we’ve started playing with the full rules instead, but we don’t play as often as we did.

Carcassonne

Carcassonne is fairly commonly known to be good with kids, except for the farmer scoring mechanic.  The Hunters and Gatherers version can work a bit better, because scoring hunters is a bit easier, but I find it to be a bit more bland, and young kids still have a hard time thinking ahead far enough to know whether to place a hunter or not.

Castle Panic

And our third entry in “Games that start with CA” is by far Ezra’s favorite and most played game.  At its height we were playing for hours on end, and I’d get sick of it before he did, but at this point he rarely maintains interest long enough to finish a session anymore.
Castle Panic is especially good with young kids, because it is a cooperative game.  You play with open hands, make plans together, and accomplish goals with each others’ help. We both prefer playing this one with the Wizard’s Tower expansion.  Although there are cards with words, they all have unique pictures, and when we were playing this game regularly, Ezra could recognize and summarize every card in the base set even though he wasn’t really reading any of them.  The most challenging aspect of this game, for grown-ups and kids alike, is to make plans for your whole turn before you start trading in your cards.

HeroQuest

Marla found a copy of HeroQuest at a yard sale for around $3, and it was a great investment.  I’ve finished more dungeons with Ezra than I have with adults. We played this one semi-cooperatively: I played the dungeon master and controlled the two spellcasting characters under Ezra’s guidance as the party leader.  He controlled the barbarian and dwarf: Kick in the door, and kill whatever’s on the other side of it!  When there were decisions to be made involving traps and searching, I had Ezra make the decisions since he wasn’t looking at the map.

Heroica

I’m not sure what it is about Heroica that encourages just about everyone who plays it to make up new rules and change the ones that are already there.  This is an incredibly simple dungeon crawl with no reading required, and it also has Lego, so how could any kid refuse? It’s theoretically competitive, but realistically players are usually leap-frogging each other through the dungeon.

Lionheart

I found Lionheart at a yard sale before I had any kids, and for years I attempted to trade it away.  I’m glad I didn’t, because it has been a lot of fun with Ezra.  This is a board-based miniature wargame for 2 players.  The mechanics are easy to pick up, and the combat doesn’t even require math skills.  I expect it’d be hard to find these days, but it’s a lot more worth playing than I expected it would be.

Dune Express

This is a fun little print-and-play area control game.  It has no language components used during gameplay, and there isn’t much for players to remember.  We play the basic rules, but haven’t had to make any changes to play well together.

Zombie Dice

Zombie Dice is a quick “push your luck” game with simple rules.  Ezra’s good at managing his risk in this game, and he’s just as likely to win as any adult.

Zombies!!!

For Zombies, we skip the event cards, and there are no other language dependent components used during play.  This makes the game a bit less fun and flavorful, and it can take longer without the help of additional weapons, so I also reduce the number of board sections we need to get through before reaching the helicopter.

Dungeon!

I’m only listing Dungeon here because it was a major disappointment, and did not meet our expectations.  It’s too simplistic for Ezra, he gets bored too quickly. There aren’t enough decisions to make, and there is very little character development.  For a simple, fast dungeon crawl, we prefer Heroica.

En Garde

This one is listed for ages 14+, but that’s ridiculous.  The truth is, almost every game with plastic or metal parts produced today must list an age of 13+ or 14+ because they cannot afford to have their pieces tested for toxicity.  We play the simple or slightly advanced versions of the rules, with no other changes.

Uno

I don’t love Uno, but there were some times when Ezra couldn’t get enough of it; and he consistently beat both his parents and his sister.  He also likes Harry Potter Uno, or Crazy Eights if there aren’t any Uno cards around.

Loot

I’ve played this with both kids a few times, but it isn’t that good with only 2 players.

The Sorceror’s Cave

This is one of the first dungeon crawl games I played with Ezra.  It’s extremely dependent on good luck to succeed, which totally drove away Martine.  Ezra fared better and enjoyed playing it, but we quickly moved on to other games with a similar theme.

Wings of War

Ezra loves starting games of Wings of War, but rarely finishes them.  He likes playing with the plane miniatures, and isn’t very good at flying predictably. But early on, he shot me down the first time our planes were within shooting range, so maybe that’s why he keeps coming back…

Hordes of the Things

I’ve started introducing Ezra to a few different miniature games, but at this point I have to wait until he asks to play so I don’t drive him away with my enthusiasm.  He has finished several games of Hordes of the Things, using all of the rules (all of the rules that happen to come up) but with a limited set of elements. The easy way I’ve found to introduce young kids to the game is to limit element selection to only about 3-4 types of elements, either all foot or all mounted.  Kids can remember 3-4 different combat factors, but it requires a chart if you need to remember different factors vs. foot and vs. mounted.  We played HOTT using Mechwarrior prepainted figures, limiting element selection to Behemoth, Knight, Rider, and Hero.
I’ll write more as we discover more games worth playing, but I expect we will soon start opening many more boxes once Ezra starts reading.

A New Bike: Raphael All-Rounder

A few months ago I found a great deal on a new, hand made bike frame on the iBob mailing list.  And finally, I’ve assembled it into a great bike.

Raphael Cycles custom frame set

This is a Raphael Cycles custom steel frame and fork.  It was built to order… someone else’s order, not mine.  But it was beautiful, the specs seemed to fit my needs, and it was far cheaper and faster than ordering my own custom frame, so I jumped on the opportunity to buy it used (but never built up).

I built it with a mix of new parts and donations from an older bike, my blue 1983 Trek 520.  Here’s a brief summary of the build, off the top of my head:

  • Sun CR18 rims with Shimano hubs: generator on the front, 8 speeds on the rear
  • 32mm Panaracer Pasela tires with plenty of clearance under the rims
  • New Velo-Orange Grand Cru crankset and fenders
  • Old Shimano Deore XT rear derailer
  • Older Suntour AR front derailer
  • Shimano Deore bar end shifters
  • Nitto stem and front rack
  • Sakae Randnner [sic] bars
  • Dia-Compe brake levers
  • Tektro CR720 brakes
The build went fairly smoothly, and after setting it up in the basement I’m happy to say I haven’t had to fine tune anything after my shakedown ride.  I haven’t ridden it far yet, but I plan to put a lot of miles in commuting, and hope to be inspired to take more non-commuting long rides as well.
The frame set itself is beautiful.  However, I do have a few minor nit picks with it.  To be clear, this is a better bike that is much better suited for the purposes I intend to use it for, than the bike I’m replacing.  None of these concerns are very important to me at this point, and I haven’t talked to the builder about any of them.  I don’t have any right to complain, because I didn’t order the bike nor was I involved with its specifications.
To paraphrase, I’ll quota a song by the Eagles: “I can’t complain, but sometimes I still do.”
The pump peg behind the seat tube is in a very convenient location.  Luckily I never use frame pumps, however, because I don’t think a pump could fit between the fender and seat tube.  I haven’t made the rear fender line perfectly parallel to the wheel, so I could probably squeak out a few more millimeters of room there, but I don’t think it would be enough to fit a pump.
There is noticeable fender-toe overlap.  I have not previously noticed this on other bikes I’ve ridden, even with the same size tires and fenders, on the Trek 520 that wasn’t built for this kind of setup (but has a similar geometry).
There was no rear brake cable hanger.  I used a Surly hanger, but unfortunately the seat clamp slot was quite narrow.  It required me to file down the brake cable hanger, in order to be able to tighten the seat clamp enough to keep the seat tight.  I could’ve filed down the seat clamp slot instead, but I didn’t want to break my new paint.
I’m not a fan of the overall shape of the bike when it’s set up with my preferred cockpit dimensions; though, it looks fine without any parts on it.  It was apparently specified as a 59mm frame, but the head tube makes it look smaller than my 57mm frames.  Part of this is because the fork is longer than on my other bikes, and part of it is because the head tube has an extended top, so it looks far shorter.  The stem is very high, so I could fit my front decaleur to the bag without cutting it down and refitting it from its previous use (aka “I’m lazy”).
On the other hand, there are a lot of minor details that I absolutely love on this bike.  All of the fender mounting points have threaded inserts facing the correct direction, so I don’t have a bunch of brackets and clamps all over the place to hold the fenders on.  I like the contrasting paint on the head tube (though the color is a lot closer to teal than the royal blue it looks like here).
This is my first time using the Velo-Orange 50.4 BCD cranks, and I must say: if these are easier to set up than the TA Cyclotouriste cranks they’re modeled after, then I’m not interested playing with the TA cranks.  You need a very narrow front derailer in order to be able to upshift successfully without pegging the derailer cage with your crank.  This old Suntour derailer is the only one I had on hand that would do the job at all, but I may look for a better alternative.
I’m very happy with the way this bike turned out!  I’m still not ready to get rid of the Trek that it replaced, but I have an even older Fuji frame and fork, if anyone’s interested…

Here are links to Raphael Cycles blog posts documenting the construction of this frame and fork.  It’s very interesting to see the process that went into building this bike.

Update: A few observations after riding this for a week or so:

  • This is the most comfortable bike I’ve ever ridden. 
  • The toe clip overlap is not a problem in practice; it only shows up at very slow speed.  
  • The builder states that this is an early frame and not representative of his current work.

Fall-In 2012

Last weekend was Fall In! in Lancaster, PA.  I drove out with Rich and Larry as usual, but unfortunately JM couldn’t attend this time.

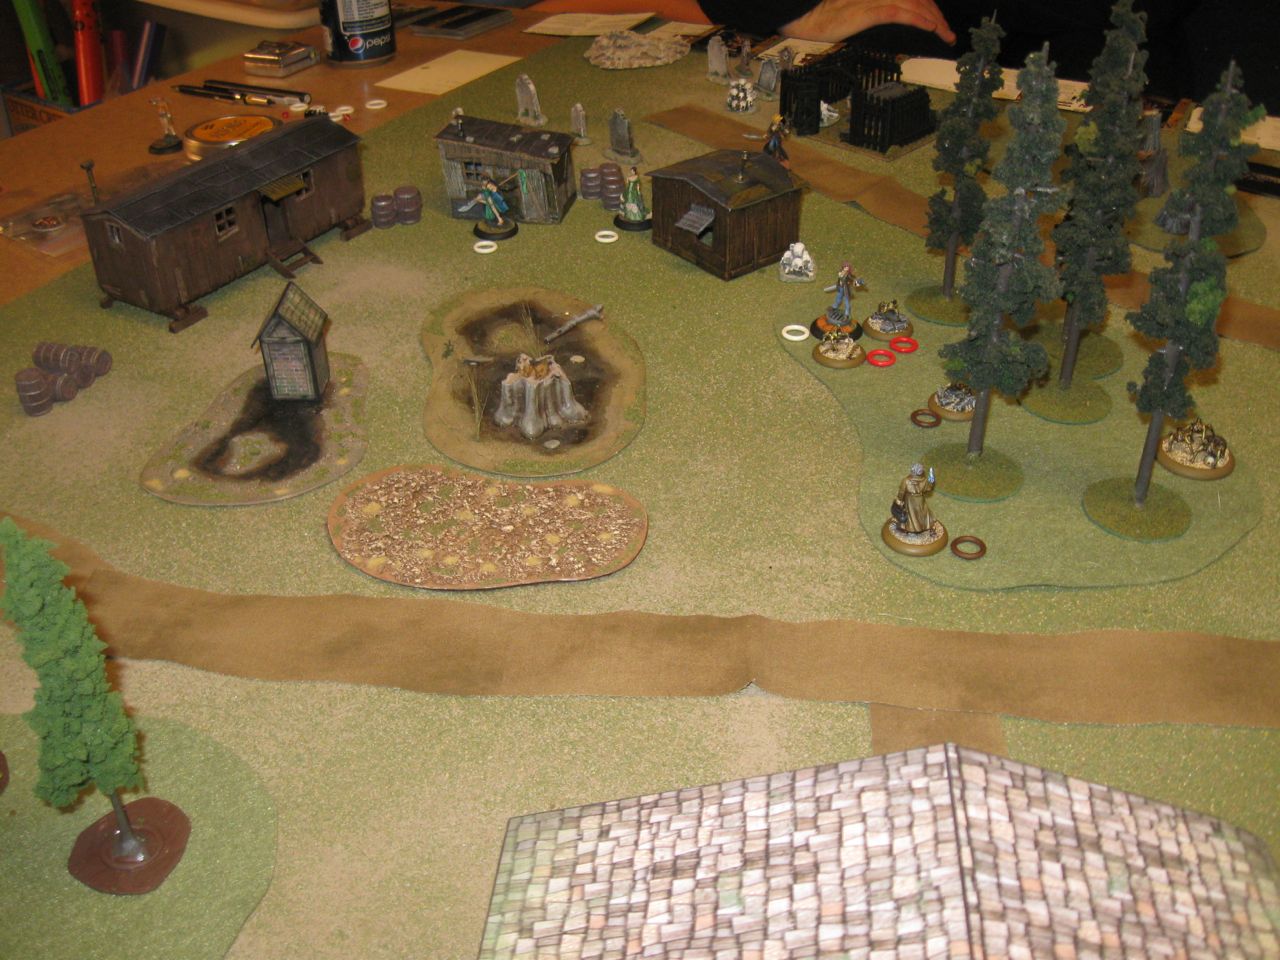
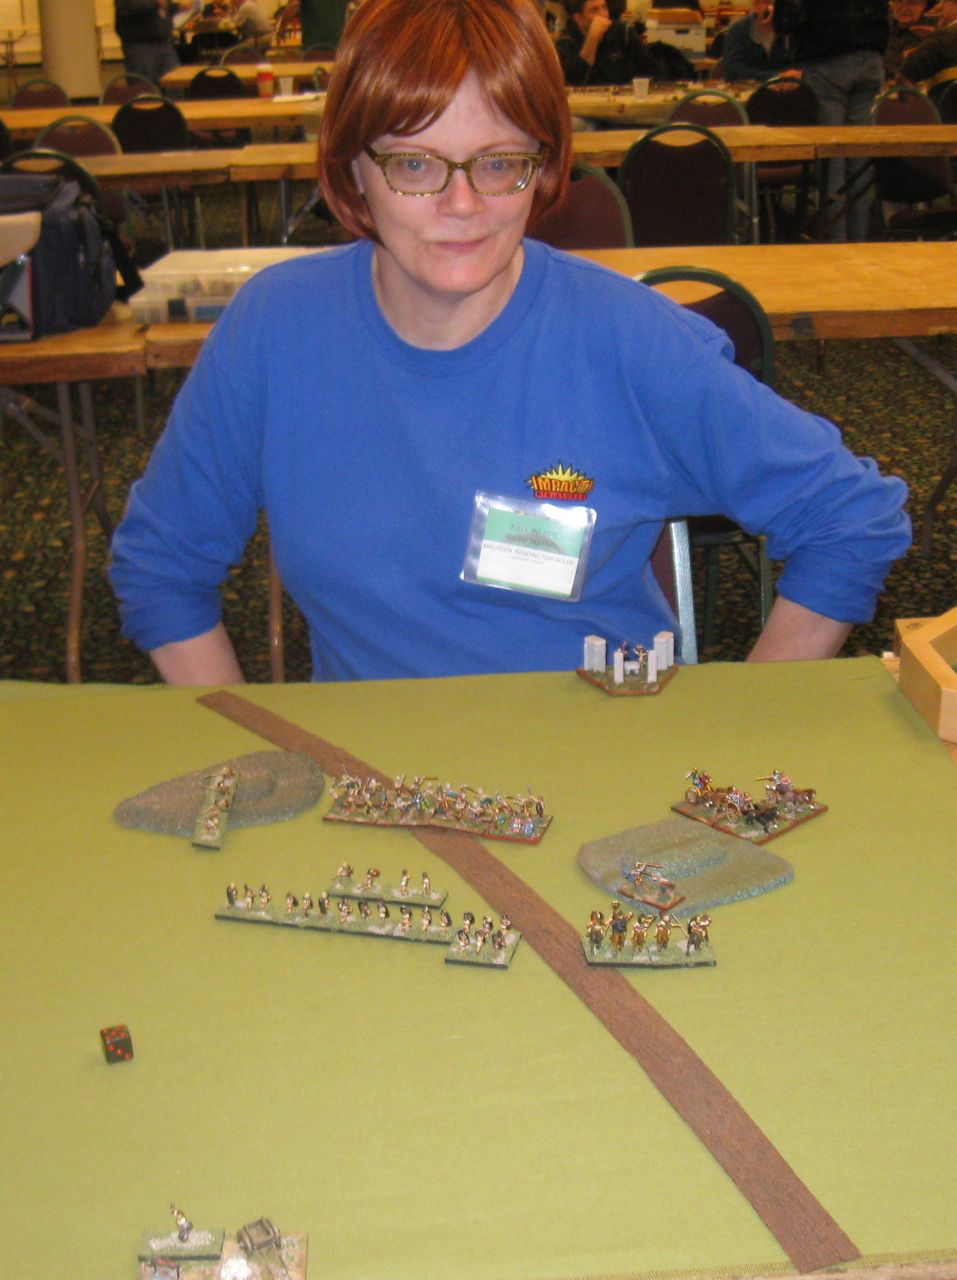
Fall In 2012: Maureen Reddington-Wilde
playing Gauls in the Warbandia event.

This was an unusual convention for me.  For the entire weekend, I didn’t use any army that fought after 50AD, but my chosen army dates were even earlier: no later than about 250BC.

Thursday

Thursday night, Larry ran Warbandia. Eligible armies need at least 6 warbands, and I didn’t have many choices.  I brought my Celtiberians, since I painted them fairly recently. In the first game, I beat Maureen Reddington-Wilde and her Gauls 4-0.  The second game against Mike Guth’s Visigoths was worthy of an epic poem, but unfortunately I’m no poet, so all it gets is a compound sentence.  In one turn both of our generals were killed, tying the game at 3g-3g; but unfortunately it was Mike’s turn next,  and he was able to kill one of my elements without me killing any of his, so he won 4g-3g.  In the final round, I lost to Paul Georgian and his gauls, 0-4g.

Friday

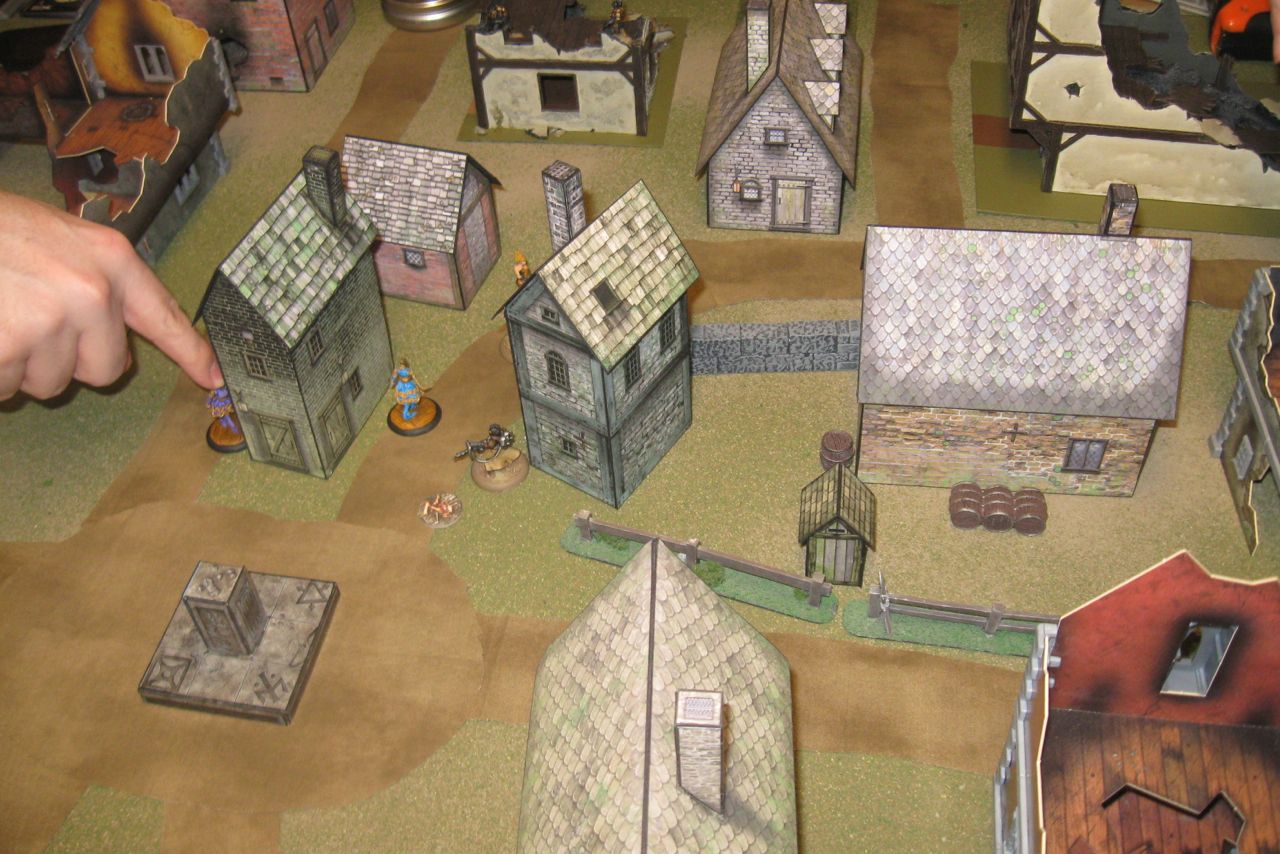
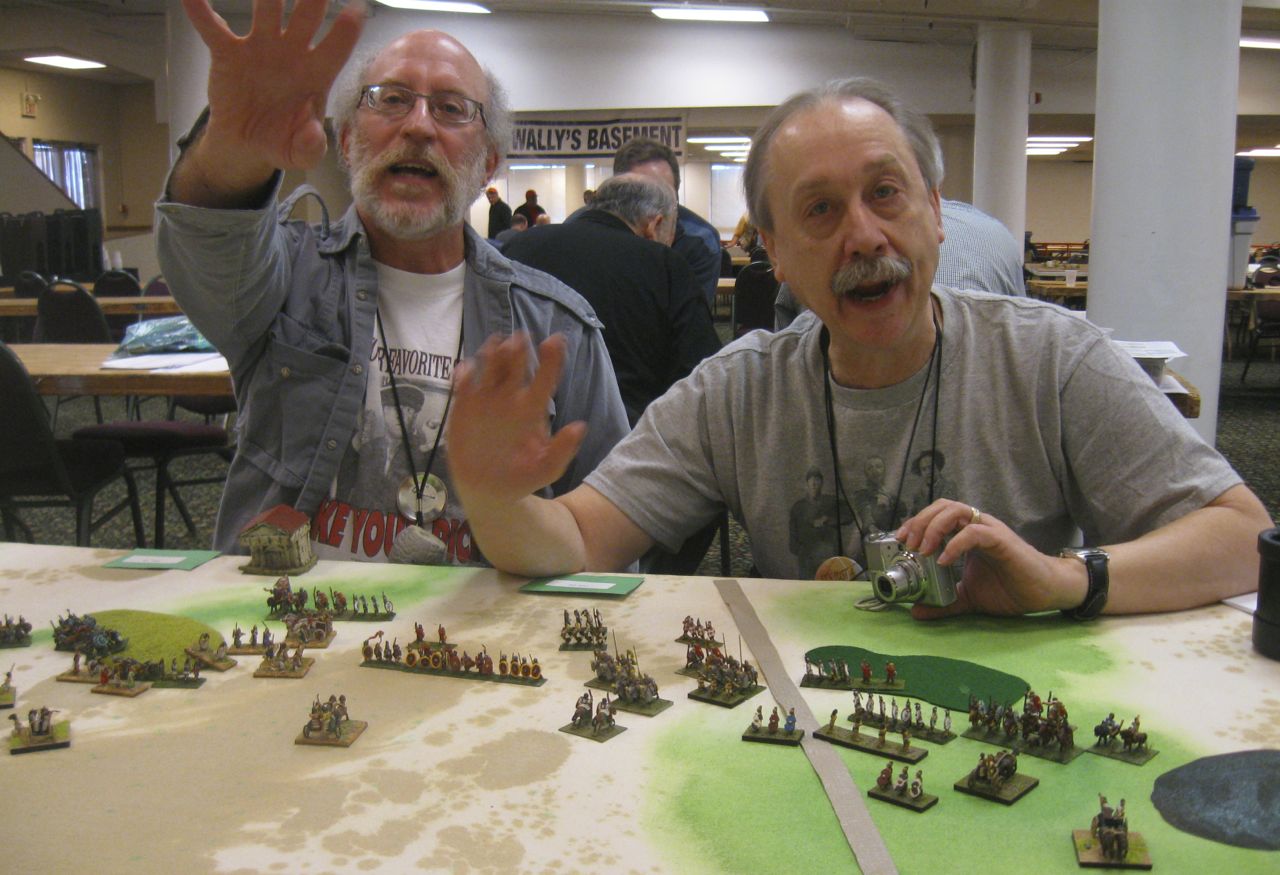
The Stooges telling us we did it wrong.

Friday was BBDBA doubles.  Since JM wasn’t around, I found an alternate partner: Chris Brantley.  We played triple Hittites, the later list with heavy chariots instead of all light chariots.

Our first matchup was against the Stooges and their Patrician Romans (East). We were doing okay for a while, but then we started rolling combat dice. Chris’s command lost 3 chariots in one bound, punching a big hole in the center of our line.  We were able to regain some ground, but not enough; we lost 6-94 after our C-in-C command broke.  We made a few mistakes in the center, such as missing an opportunity to close the door on the enemy’s general.

Bill Brown and Will Michael run forward with their pikes.

In the second round, we faced Will Michael and Bill Brown with their Scots Common army.  This was the most interesting Pike army I’ve ever faced, mainly because they decided to split their pike into each command and use it on the attack rather than holding it back and using it as a huge static defense.  They deployed away from their camp, which pulled us into their trap.  We deployed heavily in front of their camp, to encourage them to deploy their third command there to defend it.  Unfortunately, our C-in-C wasn’t on that side of the board, so they smartly decided to give up their camp, and concentrate all their forces on our C-in-C.  We won their camp, but we weren’t fast enough to kill 4 more elements in their C-in-C command before they broke ours and won the game.  It ended 14-86 in their favor.

Unfortunately, for the Nth time in a row there were 9 teams for BBDBA, which is just the completely wrong number to have.  In the third round we got a bye, which just sucks.  I’m there to play, not to win a free 80 points without playing a game.  I had a good time playing in the other two games, and I’m not sorry we lost.

In the evening, Chris Brantley ran Ars Militaria: a Book II event using double blind deployment.  This ended up being very interesting, but it’s not how I’d prefer to play DBA every time.

David Kuijt built stands to hold curtain-like screens across the center of the board.  After placing terrain and choosing our board edges, the curtain was put into place and we each deployed our armies based on knowing only the terrain and not the enemy’s deployment.

I brought Later Achaemenid Persians.  In the first round I lost to Dave Schlanger and his Early Gordyenes.  In the second round I beat Alex Bostwick’s Seleucids despite his attempt to force-push the terrain when I wasn’t looking.  In the last round, David Kuijt beat me with Greco-Bactrians.

The blind deployment worked fairly well without any cheesy moves taking place.  Nobody had time to find any obvious ways to break things, and the armies were matched well enough that there weren’t any problems.

However, I do think the screens affected the metagame and deployment choices somewhat.  Maneuver is more important if you aren’t sure where your enemy is going to be, which affects both army selection and deployment.

Saturday

On Saturday morning, I ran DBA Matched Pairs.  As at Historicon, we only had 15mm armies show up, which was a good thing, because the 25mm boards weren’t available yet this time either.  We had some inexperienced players joining in, so we took our time to teach them well and only got 3 rounds in before time ran out.

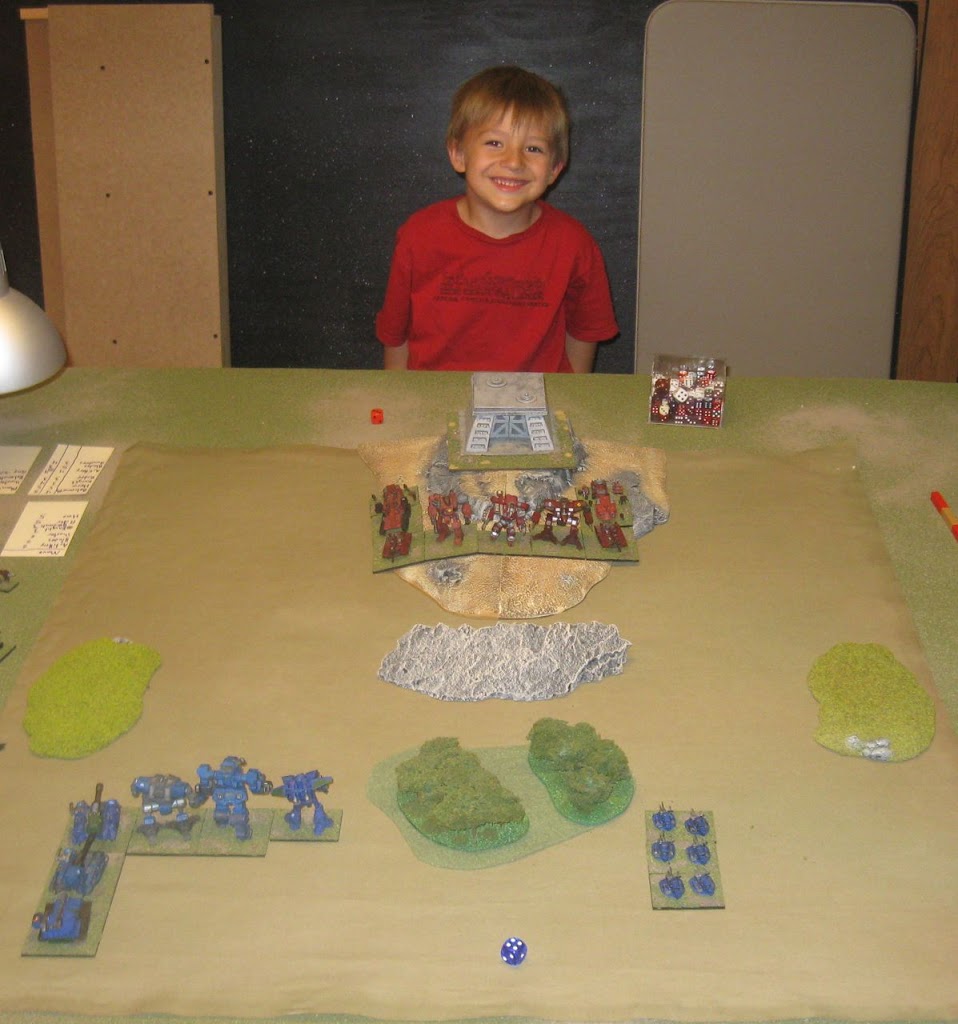
In the afternoon, I played in the Two Davids sci-fi event, 61 Cygni: Blood, Dirt, Plasma-bolts.  This event use a ruleset inspired by HOTT, written by David Kuijt with the goal of implementing Mechwarrior/Battletech themed battles a bit better than HOTT manages.  There were 8 players on a huge board, the map of Rio de Janeiro that they used for Monsterpocalypse HOTT at Historicon.

The main problem with using HOTT for large scale sci-fi battles is that the guns are huge, but the HOTT shooting ranges are tiny to nonexistent.  David’s rules implement direct and indirect ranged fire at much more plausible ranges, while maintaining most of the feel and rules of HOTT under the surface.  Overall, the rules worked fairly well; but I think they need a bit more polish to really handle the feel of Mech battles effectively.

Unfortunately I didn’t get any pictures of this visually impressive event.

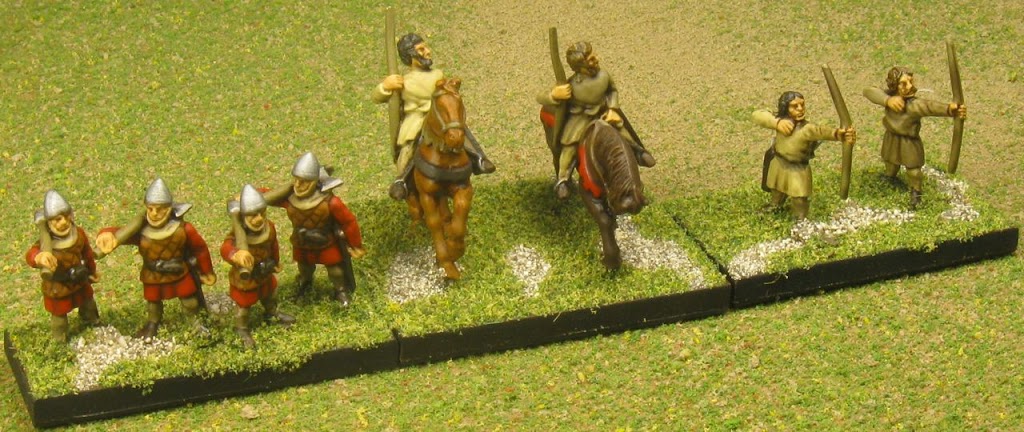
David Mitchell’s Skythians kicked butt.

On Saturday night was the Two Davids campaign event: Death To Assyrian Oppression!  This event pitted a half dozen Neo-Assyrian Later Sargonid armies against a gamut of historical enemies.  I played Skythians.

My 5 rounds:

  • Dave Schlanger attacked, I lost and lost my general.
  • Rich Gause attacked, and I lost
  • Jack Sheriff attacked, and I lost; but I killed his general.
  • I attacked David Mitchell and his Skythians, and lost again.
  • Maureen Reddington-Wilde attacked with her Skythians, and I beat her.

I ended up with only 2 points, but at least it wasn’t negative!  In other news, Alex Bostwick was taken over 6 times in 5 rounds (with one suck-up tile) and came in last place with -1.

Thanks to everyone for another great convention!  I hope to see you at Cold Wars 2013.

DBA Army III/62b: Early Polish

I painted this Early Polish army to be an ally of Early Russians in BBDBA.  Unfortunately, JM didn’t make it to Fall-In, so we haven’t had a chance to use it yet.

DBA army III/62b: Early Polish; Essex miniatures.

The figures are all Essex Miniatures except for the sword-wielding knights with crests, and the musician; those are Black Hat (Gladiator), I believe.  This was not an army pack; JM chose all the Essex figures during the early part of the Wargames Miniatures Essex clearance sale.

For the heraldry, I spent a lot of time perusing a wonderful Polish heraldry web site.  I especially like this easily browsable scan of a Polish heraldry catalog.

Although there are a lot of wonderful designs there, I like to tie the look of my army together so it’s not too garish.  I decided to divide the army into three houses, each with an element of knight, bow, and spear.  The remaining elements used red highlights but otherwise didn’t use any specific heraldry

I had to make an attempt at the Polish national Dr. Seuss birds.  Fo the others, I chose designs primarily for the way they looked, without any consideration for when they were used historically.  I tried to choose designs different from designs I might use on my Serbian, Hungarian or other Eastern European armies. I left the red caparisons plain, but mirrored the triple rose heraldry on the blue caparisons.

This army painted up fairly quickly since it doesn’t have any optional elements.  I’m not sure when I’ll use it.  Lately, every army I paint up has been used less and less.  I almost need to have a specific event to paint for, in order to ensure that every new army is used in at least 3 games.

RC10: Viper Mk II Complete

Here is my completed RC10 body with livery based on a Viper Mk II from the modern Battlestar Galactica show.

I designed custom graphics using Inkscape.  I found information about the font used in the show on a Galactiguise post.  A semi-crippled version of the font is available for free download there.  After getting everything right, I sent my file to Cafe Press and had a transparent bumper sticker printed with my designs on it.

RC10 gold pan with Battlestar Galactica Viper Mk II livery.

The print quality is what you’d expect from an inkjet printer: it has high resolution, but a grainy quality where it’s mixing dots to get the color you’re looking for.  The bumper stickers are supposed to be waterproof and durable for outdoor use, so I expect this will work as well as any RC car stickers.

I recreated the 3rd squadron “VIGILANTES” seal for use on the nose. The rest of the markings are typical of a Mk II Viper, though not necessarily identical.

I also finally got around to building the wing. I don’t like the way wings look most of the time, so I kept this one transparent.  I don’t expect it’ll make any difference in performance on the relatively slow carpet track.

You can also barely see the new “stock” motor I installed.  Hopefully the sensor wire won’t get too botched up, hanging out like that.  I haven’t had a chance to get to the track to verify I’m using the right size pinion, yet.

HPI Savage Flux XS SS Initial Review

After building the Honda S800, I was itching for a kit that took a bit longer to build.  I also wanted to give the kids more opportunity to participate in the build and in driving the resulting car.  Ezra wanted a Monster Truck, so I searched for one available in kit form and found the HPI Savage Flux XS SS.

The HPI Savage is their 1/8 scale nitro powered monster truck.  “Flux” makes it electric.  “XS” makes it extra small, with the body being approximately 1/12th scale. “SS” is the Super Sport kit edition.

I finished building the truck, with intermittent help from the kids; but according to Ezra’s definition it isn’t a Monster Truck yet.  A monster truck has to be a truck, but it also has to have monsters on it.  We hoped to find some good stickers for this during the halloween season, but haven’t succeeded yet.

I haven’t driven the car very much yet, so this initial review will be primarily about the kit build itself.  It was definitely a more involved, slower build than the Tamiya M-05 chassis.  Some of this was the fact that it’s 4wd, some is because of the design, and some of it is because of frustration during the build. There are some parts of this kit’s design I really like, but other aspects are pretty bad.

The basic design is quite solid.  The first section of the build is putting together the front diff and suspension arms. The second part is the rear diff and suspension arms.  The front and rear half of the truck are nearly identical: the diffs and bulkheads are the same, and all 4 A-arms are interchangeable.  The main differences are the front and rear hubs (also identical side to side) and the bumpers. Overall this symmetric design makes it more convenient to deal with spare parts.

The front and rear are joined with a two part plastic center chassis that is reminiscent of the twin plate design used on the larger Savage.  The diff and motor are stuffed into it in a single piece, and the servo is buried in there somewhere as well.

One complaint I’ve heard about this truck is the difficulty of maintenance on various parts.  I think there is some truth to this: it’s a very tight truck, some parts are hard to get to, and most of the stock screws absolutely suck (more about that later).  But it’s not as bad as many would have you believe.  This is a lot more evident if you build the kit and see how things go together (and come apart).  You can remove the front and rear diffs for servicing with only a handful of screws.  The center diff and motor do make it a pain in the butt to change pinions often. They can be removed pretty easily; the problem is wedging them back into place with the front and rear dogbones where they need to be.

The absolute worst thing about this kit is the hardware.  Most of the screws are metric M3 with 2mm hex drive heads. The 2mm hex drive is simply too small for the screw material they chose.  The sockets can’t handle the torque required to drive the screws very far into fresh plastic.  I tried several different 2mm hex wrenches, and they all had the same problem: some of the sockets are oversize, and the screw material is soft, so the head ends up stripped.

I ended up stripping at least half a dozen screws during assembly, and had to extract several destroyed screws and replace them.  Luckily, the non-HPI replacement screws I bought work much better.  Several more screws are still stripped, but I managed to drive them all the way in, and hopefully I’ll never have to remove them.  The problem most kits have is accidentally stripping out the plastic.  These screws cause too many problems in the other direction.

For this body, the kids decided they wanted a light blue color, with a white roof and black trim.  They planned to add skull and crossbone and lightning stickers on it, but we haven’t found any reasonable options for either of these yet.

“But, that car isn’t blue,” you say.  An astute observation!  The only light blue Lexan paint I found was very old, and the can got me about 2 seconds of spray time before running out of pressure.  So now, the car has a light dusting of metallic silver-blue, and I filled out behind it with red.  It’s not totally horrible looking, but it was definitely not what we were aiming for.

This is the first time I’ve used Fasmask liquid masking for the interior of the body. The windows came with precut masks, but I masked the roof, bed, and lower edge of the truck.  The Fasmask worked pretty well, but I need to make a few changes next time.  Here are my newbie tips for using Fasmask:

  • Follow the directions when they say that multiple thick coats will make it easier to remove the masking material.
  • Don’t bother trying to paint the exact edges of the area you’re masking.  If you can do that, you should just paint the lexan paint on by hand instead.  Go over your lines far enough to ensure a thick layer where your design ends, and then cut the design into the mask.  This gives a much cleaner edge.
  • Don’t start masking if you’re in a hurry. It takes a long time for each coat to dry, and you need several of them. 
Looking on the Internet, I figured out how people test their maximum speed, for what it’s worth: strap on a portable GPS, and press Go.  I geared this truck down a bit, with the larger spur gear the truck comes with, and it’s being powered by a Duratrax Element (by Castle) 3900kv sensorless brushless setup.  With 6c NiMH batteries, I got up to 27mph in the alley behind the house.
This is no speed demon in its current form, but it’s still way faster than I should be letting the kids play with at this point, so I have no problem with that. 
Now we just need to go find some place to bash it before it starts snowing.