BRE Datsun 510


ABC Hobby BRE Datsun 510 #46 body on Tamiya M-05 chassis.

After smashing up the Honda S800 body too much, I got a replacement.  This is an ABC Hobby BRE Datsun 510, #46.  This one is closer to a 1/12 scale body, compared to the S800 and Mini bodies, which are 1/10 scale versions of smaller cars.

Brock Racing Enterprises (BRE) set up some Datsun 510’s for racing, and entered them in the 1971 and 1972 Trans-Am “2.5 Challenge” for smaller engined cars.  Datsun destroyed the competition both years (though Alfa tried to cheat to avoid their fate in 1971), and the series was shut down when the European manufacturers picked up their toys and went home crying.

The body shown here also comes with bumpers and better headlights, but I decided not to use any of them since I expected to beat it up racing anyway.  Unfortunately I must have scored the body when trimming the paint mask, because it almost immediately split right up the left front corner between the red and white areas.

Fitting the body over the wheels was a bit challenging, and required some creative trimming around the wheel wells to keep it from rubbing around corners.  Unfortunately the M-05 battery compartment pushes the battery wires into this body, which flexes it on whichever side the battery protrudes from.  It’s a tight fit, but it works.

Sakura S Zero

Sakura Zero S chassis with HPI Honda NSX GT body

In anticipation of On-Road racing at PT Raceway, I decided to get a second on road car so I could race in two classes instead of just one.  I chose the Sakura Zero S chassis from 3Racing because it looks very good for its price, it’s a kit, there are many replacement and hop-up parts available, and it gets good reviews.

The Sakura Zero S is an entry level version of the Sakura Zero chassis. The main differences are that the S version has plastic parts instead of aluminum; fiberglass instead of carbon fiber; gear diffs instead of ball diffs; and it costs about 1/3 as much.  It’s a 4 wheel drive touring car chassis with a twin horizontal plate design.

This was a very fun kit to put together.  Its plate chassis is very different than the other kits I’ve built recently: the Tamiya M05 and HPI Savage XS.  Unfortunately, the Sakura also suffered from Crappy Screw Syndrome, just like… well, apparently this is just like every RC kit everywhere.  This time, instead of starting out driving the 3mm screws straight in with a 2mm driver, I threaded every hold with a screw that had a larger 2.5mm head.  This destroyed my hands, but I stripped fewer screw heads (unfortunately more than zero). As much as I didn’t like the phillips head screws in the Tamiya kit… at least the heads didn’t strip easily.

Sakura Zero S chassis with HPI Honda NSX GT body

The chassis has very adjustable suspension geometry, but the stock dampers don’t allow unlimited adjustment of ride height. I doubt this will be a problem in the short term. It doesn’t look as durable as the M05, but it’s also not a giant block of plastic.  I think at the speeds I’ll be running at the track, it won’t matter.

Other than the screw heads, there are a few problems with the kit.  The first and most universally well known problem with the Zero S chassis is that the stock motor mount is inconvenient, because you can only access one of the motor screws by sticking your tool through a hole in your spur gear.  This is inconvenient with some pinion sizes, and impossible with smaller spurs.  There’s a vertical motor mount part available, but this requires you to also use a new top plate and flip your differentials to swap the side each belt runs on… and that causes your belt to run into your battery on the other side. This kit is not ideal if you’re planning on changing pinions often… but it’s still a lot better than changing pinions on the HPI Savage XS.

The other minor problem I have is that the turnbuckles seem to have undersized flats, making them difficult to turn without slipping.

For a body, I was in a hurry and couldn’t find anything I fell in love with, for sale at the same place as the chassis.  So, I settled for “acceptable and inexpensive” instead. This is an HPI Racing Honda NSX GT.  It retains a bit of the car’s distinct look, especially the air scoop on the rear roof.  Hopefully I won’t have any problem with traction roll, because I don’t think the scoop will last long if the car is upside down.

The body fits the chassis perfectly.  Figuring out where to drill the body mounting holes is a pain, though. You can’t drop the body onto the car and mark them until the posts are cut to approximately the right height, but you can’t cut the posts until the body is on the car to see where it sits.  I ended up measuring the body posts in relation to the center of the wheels, and transferring their locations onto the body using the center of the wheel cutouts as a reference point.  It worked, but it felt like there should be an easier way.

Since I’m going to race this instead of admire it on a shelf, I used the external headlight stickers instead of the internal light cans.  I think it’d look a lot better with the light cans… until I hit a wall and crack the body, in which case I’d rather have more room to repair it inside instead.

For electronics, I used what I had on hand: a 27T brushed motor and ESC I replaced in the RC10, and a Hobbyking Orange Rx Spektrum receiver.  I’ll start out with this slower setup, and once I like how I’m handling it (or once I burn out the motor) I’ll probably upgrade to 17.5T brushless. So far I don’t see hugely different times at the track between the three other cars I drive there (Tamiya M05 with stock 27T brushed; XXX-SCB with 17.5T brushless; RC10 with 17.5T brushless), so I expect the current limitation is my own driving skill more than the technology.

Unfortunately I couldn’t make it to the first on-road race day on December 1, and I won’t be able to make it on the 15th either. Maybe they’ll run on-road on the 22nd, but if not I can make it on the 29th.

XXX-SCB: New Body

Losi XXX-SCB with body painted by Alan Ferrency

After a summer of bashing the XXX-SCB in the yard, and then rolling it over trying to tune it for racing at the track, the original ready-to-run body was cracked at the front shock corner, and generally really beat up.  I ordered a new transparent body to paint up myself, and here’s the result.

I don’t like modern, garish complicated paint jobs very much, so I went for a cleaner, simpler look.  The general contours of the colors was lifted from a real Lucas Oil Offroad Series pro buggy, but I used yellow instead of white.  I got the numbers printed at the same time I made decals for the RC10, but the rest of the stickers are for manufacturers whose parts are on the car.  I’m not a huge fan of the “rolling billboard” livery look, so I didn’t cover every possible surface with advertising, but I think the limited use of stickers add to the scale look.

At this point I have the car handling really well on the carpet track, I just need to get out on race day and see if I can manage to not crash for 5 minutes in a row.

DBA Army III/62b: Early Polish

I painted this Early Polish army to be an ally of Early Russians in BBDBA.  Unfortunately, JM didn’t make it to Fall-In, so we haven’t had a chance to use it yet.

DBA army III/62b: Early Polish; Essex miniatures.

The figures are all Essex Miniatures except for the sword-wielding knights with crests, and the musician; those are Black Hat (Gladiator), I believe.  This was not an army pack; JM chose all the Essex figures during the early part of the Wargames Miniatures Essex clearance sale.

For the heraldry, I spent a lot of time perusing a wonderful Polish heraldry web site.  I especially like this easily browsable scan of a Polish heraldry catalog.

Although there are a lot of wonderful designs there, I like to tie the look of my army together so it’s not too garish.  I decided to divide the army into three houses, each with an element of knight, bow, and spear.  The remaining elements used red highlights but otherwise didn’t use any specific heraldry

I had to make an attempt at the Polish national Dr. Seuss birds.  Fo the others, I chose designs primarily for the way they looked, without any consideration for when they were used historically.  I tried to choose designs different from designs I might use on my Serbian, Hungarian or other Eastern European armies. I left the red caparisons plain, but mirrored the triple rose heraldry on the blue caparisons.

This army painted up fairly quickly since it doesn’t have any optional elements.  I’m not sure when I’ll use it.  Lately, every army I paint up has been used less and less.  I almost need to have a specific event to paint for, in order to ensure that every new army is used in at least 3 games.

RC10: Viper Mk II Complete

Here is my completed RC10 body with livery based on a Viper Mk II from the modern Battlestar Galactica show.

I designed custom graphics using Inkscape.  I found information about the font used in the show on a Galactiguise post.  A semi-crippled version of the font is available for free download there.  After getting everything right, I sent my file to Cafe Press and had a transparent bumper sticker printed with my designs on it.

RC10 gold pan with Battlestar Galactica Viper Mk II livery.

The print quality is what you’d expect from an inkjet printer: it has high resolution, but a grainy quality where it’s mixing dots to get the color you’re looking for.  The bumper stickers are supposed to be waterproof and durable for outdoor use, so I expect this will work as well as any RC car stickers.

I recreated the 3rd squadron “VIGILANTES” seal for use on the nose. The rest of the markings are typical of a Mk II Viper, though not necessarily identical.

I also finally got around to building the wing. I don’t like the way wings look most of the time, so I kept this one transparent.  I don’t expect it’ll make any difference in performance on the relatively slow carpet track.

You can also barely see the new “stock” motor I installed.  Hopefully the sensor wire won’t get too botched up, hanging out like that.  I haven’t had a chance to get to the track to verify I’m using the right size pinion, yet.

HOTT: Red vs. Blue part II

HOTT: Mechwarrior Red army.

 So, I was playing in Hordes of the Things matched pairs with my Red vs. Blue armies, and David Schlanger got another chance to see them once they were based up.  It just so happened that the flea market was open at that time… and that one of the vendors had a large stock of Mechwarrior figures available for sale.

Dave visited the flea market, and shortly came back to show off his purchase.  “Look, I got an entire army for only $17!  You should get some more foot bases, they’re only 4 for $1!”  And so it begins: Tag Team Enabling.

After my game was finished, I went to the flea market and ended up with an entire army, instead of only a few more bases.  During the next game, Dave came back to show off his second complete army.

At that point, we had to drag David Kuijt into the mix if we were going to keep up our momentum.  Unfortunately, it turned out we had already bought all 5 main factions.  The solution was obvious: I sold my new army to David.   Then, he and I both bought more figures for our own armies.

HOTT: Mechwarrior Blue army.

By the time the flea market was about to close, we had bought enough figures that the vendor started giving us mechs for free.

In the end, I now have over 48 points of both Red and Blue.  There are still a few more figures I’d like to pick up: an airboat for the Blue army, and a few more aerial or anti-aerial units for Red.  But I can find those from Internet sources without too much difficulty.

We’re keeping track of our HOTT troop classifications on a wiki page.  We’ll update it as we discuss possible changes.

A summary of basing conventions: All vehicles are mounted, and infantry are foot.  Tanks are knights; mechs can be behemoths, heroes, aerial heroes, or magicians as appropriate. Untracked vehicles are typically Riders, and ground based large guns are Shooters.  Foot is either Blade or Warband.

I’m already enjoying teaching HOTT to Ezra as well as a friend and his son.  For teaching a young player, I’ve limited element selection to only mounted elements to start with.  Behemoths, Knights, Riders, and Heroes provide sufficiently interesting troop interactions.  Since they’re all mounted, it’s a lot easier to remember all of the troop factors.  As Ezra improves his abilities, I’ll introduce more troop types.

I expect we’ll see some Mechwarrior HOTT events at a future HMGS convention.  In the mean time, I enjoy the opportunity to play more games with a new generation of opponents.

DBA Army II/39b: Ancient Spanish Celtiberians

On my family vacation in New Hampshire over Fourth of July week, I brought a painting project: DBA army II/39b, Ancient Spanish Celtiberians.  Thanks for trading me this army, Jeff!   I needed it for the Two Davids campaign theme at Historicon, for the Punic Wars theme.

Corvus Belli Celtiberians: 3Cv(gen), 2LH.

These are all Corvus Belli figures.  The pack I got from Jeff Franz came with only round shields.  I didn’t think this was appropriate, so I ordered a pack of oval Spanish shields. Unfortunately they didn’t arrive before I left town, so all of these figures were painted without shields while I was on vacation, and then the shields were added and painted after the fact.

Corvus Belli Celtiberians: 6x3Ax,
or Raiders in the campaign.

Corvus Belli Celtiberians: 4x2Ps, 1 camp follower.

The figures are painted with simple flat colors, followed by a wash of Army Painter Strong Tone over the entire army.  This is quick and effective, and when your army’s shields are its focal point, you don’t need much more anyway.

The shields were primed black and then their patterns were painted, preserving enough of the black primer to define lines between the shield segments.  Also simple, but effective.

Unfortunately, during the campaign, the army was utterly slaughtered 4 games in a row.  It was a fun army to play, but rolling 1’s doesn’t get you very far.

HOTT: Red vs. Blue, part I

HOTT Mechwarrior: Foot based as hordes, obsolete.

At Cold Wars 2012, I purchased enough prepainted Mechwarrior miniatures to build a matched pair of HOTT armies: Red vs. Blue.  I based them up for HOTT Matched Pairs at Historicon, using 25mm basing.

Initially, I based all foot as Hordes.  After discussion with the Davids, we’ve decided this isn’t the best troop categorization, so I rebased everything.  Here are images of a few of the bases before I ripped the figures up and started over.

HOTT Mechwarrior: Knights are now on square bases.

At HOTT Matched Pairs, I took this matched pair:

Red:

  • Tanks: 3xKnight (gen)
  • Mechs: 3xBehemoth
  • Helicopter: 1xFlyer
  • Foot: 2xShooter
Blue:
  • Mechs: 2xBehemoth (gen)
  • Tanks: 2xKnight
  • GEVs: 3xRider
  • Helicopters: 2xFlyer
  • Mech: 1xSpear
HOTT Mechwarrior: Knights are now on square bases.

In three games, we used these armies twice.  Both times, my opponent chose Red, and I ended up with Blue.

With these compositions, Red looks like it should be able to gain air superiority, due to its shooters and flyers outnumbering Blue’s flyers. In practice, this didn’t happen.  In both games, the Red general put their shooters together, and I was able to attack somewhere else with my Flyers. I was able to destroy the enemy Flyer and avoid their shooters.
I won both games, and also the third, taking first place in the HOTT matched pairs tournament.

DBA Army I/2a: Early Egyptians

Apparently it has been a while since I posted last. I finished my Early Egyptian army shortly after my previous post, but haven’t had a chance to get pictures up until now.

DBA Army I/2a: Early Egyptians.  Essex Miniatures.
Early Egyptian horde and Pharoah. Essex Miniatures.

As seen in my previous installment, the archers were all painted identically, and different ink washes were applied for comparison purposes.  Everything else was flat-painted with Army Painter strong tone dip applied.  This provides a passable look for the army without a lot of effort, which is just about right for my current level of painting inspiration (low).

Early Egyptian blades and raiders. Essex Miniatures.

Nobody makes an Early/Middle Kingdom Egyptian Pharoah on a litter in 15mm, as far as I can tell.  So I had to settle with the 4Bd option instead.  I used the Pharoah on Mule figure from Essex, but I had to use a deeper base to fit everything.

I used a different basing technique than I’ve used in the past for dry armies.  This time I painted the laser-cut masonite bases with sand colored paint, glued sandbox sand directly to the base, and left it unpainted.  It gives a “good enough” look without as much effort as painting and drybrushing the sand as I have with some other armies.

There isn’t much else interesting to say about this army, so I’ll just let the pictures speak for themselves.

Early Egyptian Archers. Essex Miniatures.

Early Egyptian psiloi. Essex Miniatures.

Ink Wash Comparison

Devlan Mud is Dead! Long Live Devlan Mud!

Games Workshop’s Devlan Mud wash has been a commonly used weapon in my painting arsenal since I got back into painting miniatures 3 years ago.  It works well straight out of the bottle, and produces reasonable results in areas where I’m not that interested in painting in highlights and shadows, but when I also don’t want to dip the whole figure.

Unfortuantely, Devlan Mud is no longer available, since Games Workshop recently completely revamped their paint line.  When I was at Legions for Stoogecon, I picked up 3 possible replacements to try out:

  • Games Workshop’s Agrax Earthshade wash, which seems to be their replacement for Devlan Mud
  • Army Painter Dark Tone Ink (not the Quickshade dip)
  • Reaper Master Series Paints Brown Wash

I meant to get Army Painter’s Strong Tone Ink for a better direct comparison with the Quickshade.  Oops! That will have to wait for now.

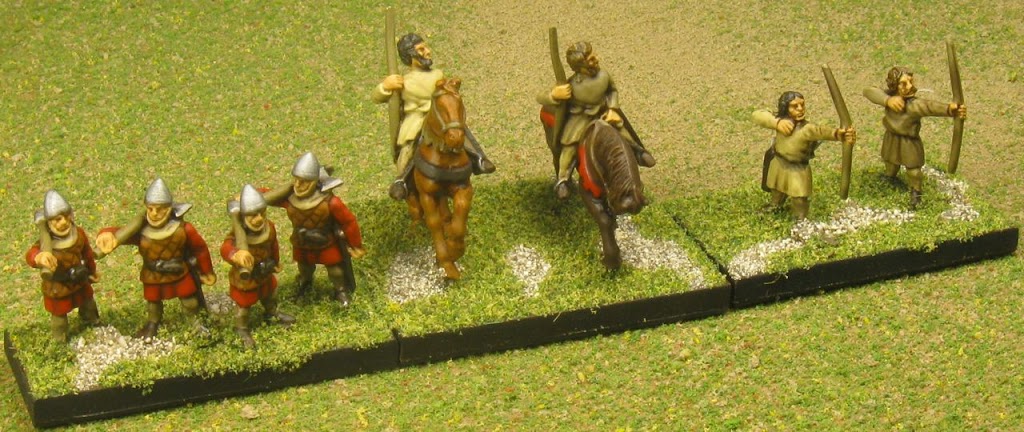
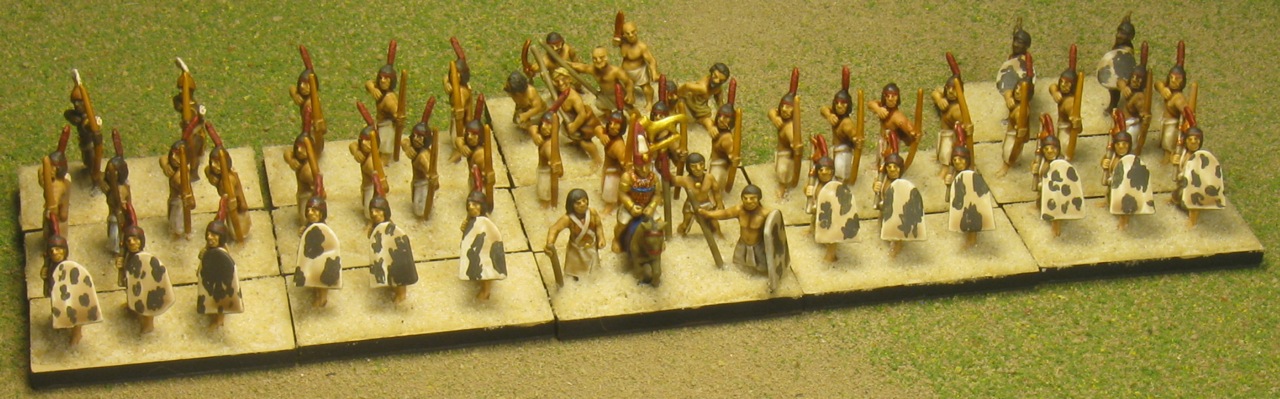
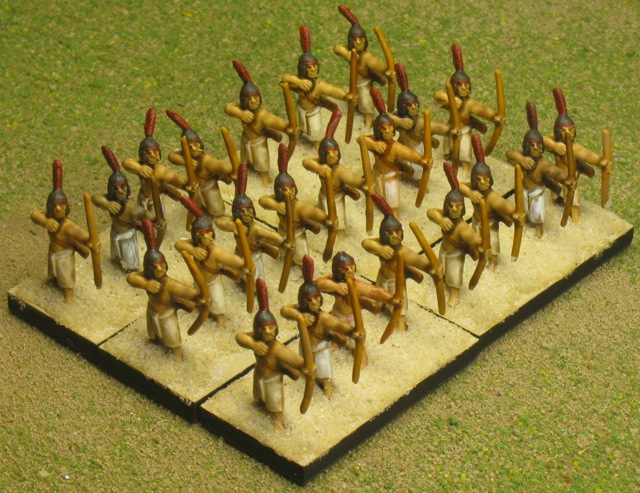
I was painting a DBA Early Egyptian army, so on one stick of archers, I painted all of the figures identically but applied different washes to each.  On another stick, I used Army Painter Strong Tone Quickshade.  These figures are almost entirely flesh and white.  I liked this for comparison purposes because white is notoriously difficult to shade well, and it doesn’t disguise the color of the ink wash at all.

I also used these inks and washes that I had on hand for more comparison:

  • Didi’s Magic Ink, Brown
  • Games Workshop Gryphone Sepia wash
  • Games Workshop Ogryn Flesh wash
  • An old Reaper flesh ink with water added

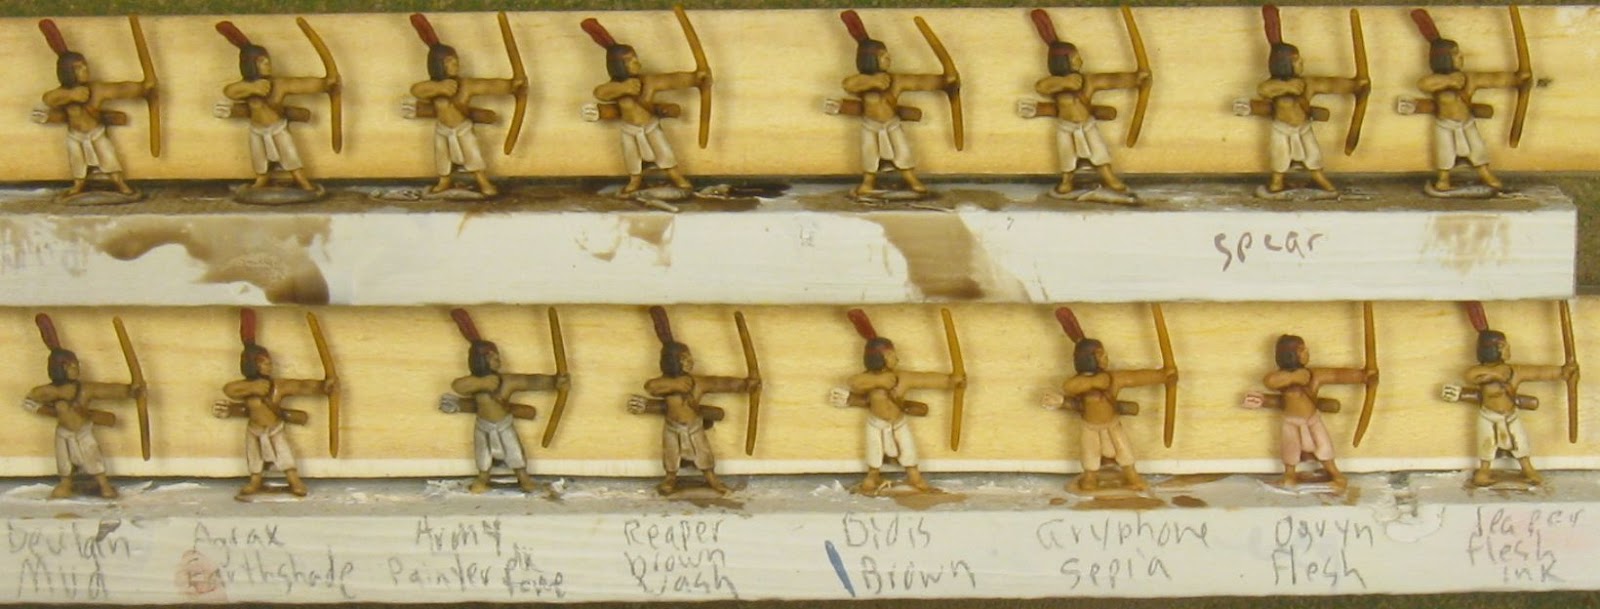
Here is a comparison shot detailing the results.

Ink Wasy Comparison: Essex Early Egyptians. Army Painter Strong Quickshade on top, washes below.

And here are the results, left to right.

First, a comparison between Devlan Mud and Agrax Earthshade.  I think Devlan Mud is a bit less red/orange than Agrax Earthshade, but they’re both very neutral.  My Devlan Mud was old, and probably doesn’t work as well as it did when it was new, but the Agrax is doing a better job of staying in the cracks and not coloring the high spots and flat surfaces as much.  As seen on the red feathers, the overall tone of the Agrax-shaded figure is lighter than the Devlan-shaded figure.

Agrax Earthshade is also a much better direct replacement for the Army Painter Strong Tone Quickshade dip.  Overall, if it were my only choice, I’d be happy to replace Devlan Mud with Agrax.

Unfortunately, some of Devlan Mud’s flaws are still apparent in Agrax Earthshade.  It still smells like a combination of distilled bong water and moldy coffee grounds.  It’s still really expensive and comes in tiny bottles that let the liquid evaporate too much.  I’ve also found that all of the GW washes behave badly if they either dry out, or if you add water or just about anything else to them to thin them out.  This shortens their effective shelf life even further.

The new bottles prevent your local store’s in-house painters from using the wash and then putting it back on the shelf, but I didn’t find the new “keep your lid open” feature any better than their previous attempt several bottle designs ago.

Army Painter’s Dark Tone Ink seems to work as well as their Quickshade does, but I bought the wrong color so I can’t effectively compare colors with the Agrax.

The Reaper Brown Wash seems closer to the old Reaper inks than to GW’s washes.  It looks more opaque in the bottle, and doesn’t stay in the cracks as well as the other modern Wash products do.

I’ve been using Didi’s Magic Ink for almost as long as the GW washes. It has two major benefits over the GW products: it comes in much larger, less expensive dropper bottles, and it smells nice.  Brown is a very good direct replacement for GW’s Gryphone Sepia, but it’s too light to replace Devlan/Agrax.  Didi’s ink is much thinner than the GW washes, more of the consistency of water.  It stays in the cracks well, but it is hard to get it to darken things as much as you might like to.

Games Workshop’s Gryphone Sepia and Ogryn Flesh wash are also no longer available in GW’s new paint line.  They work just like Devlan Mud and Agrax Earthshade, but they’re different colors.  I would be interested in testing their new replacement versions, but I haven’t had a chance to do this yet, and I might not since I don’t run out of these colors as quickly.

The old Reaper Flesh Ink is not a modern wash.  My bottle is probably about 10 years old, and may not be available anymore, I’m not sure.  It requires thinning with water and your favorite additives to flow properly and fill in the cracks.  Here, I applied it using only water to thin it out, and it worked fairly well.  However, at this point I wouldn’t bother using this product unless I was doing something like airbrushing.

Overall, Agrax Earthshade is the clear winner of this exercise, with one caveat.  If Army Painter Strong Tone Ink works as well as the Dark Tone, I would probably prefer it due to its superior dropper bottle and price point.

I hope this helps someone else in the market for a replacement for their precious supply of Devlan Mud.  In the future, I’ll try to do some more comparisons including Army Painter Strong Tone, as well as various black/almost-black washes.