Here is my latest Hordes of the Things army: Professor Hans’ Metal Minions. I just made that up. I finished this army before Cold Wars, but didn’t get a chance to post about it yet.
 |
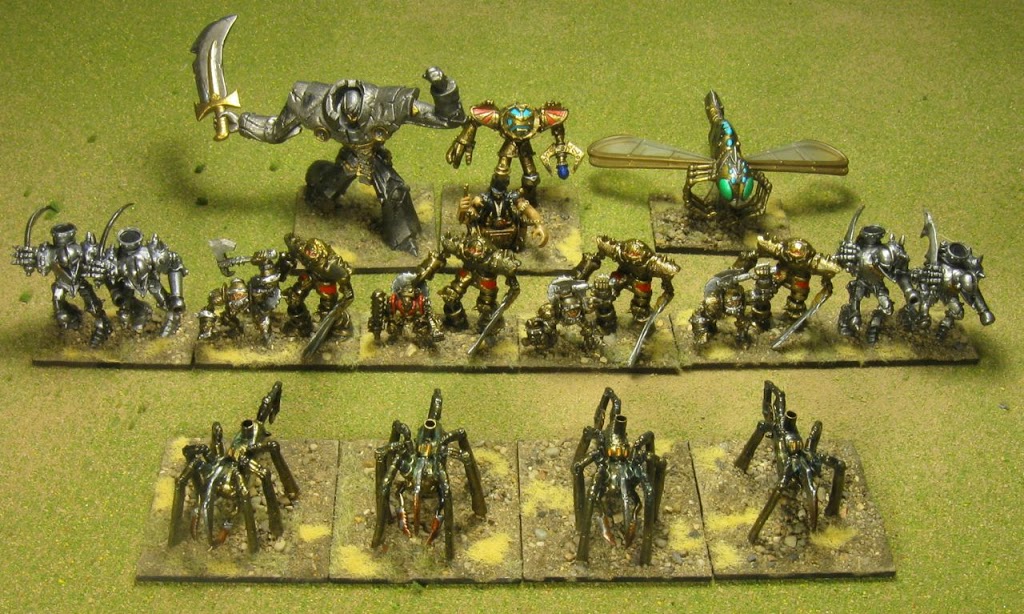
| Professor Hans’ Metal Minions |
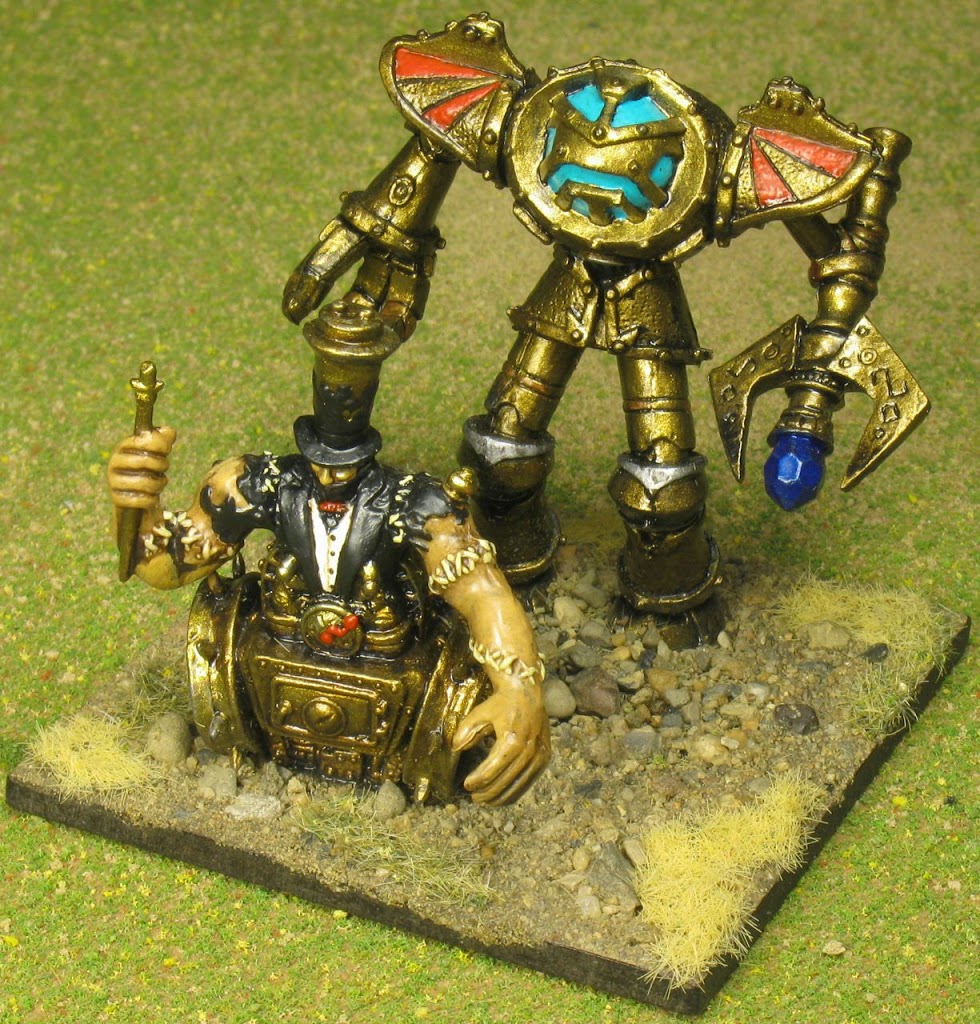 |
| Professor Hans and his Avatar: Magician General. |
Professor Hans was afflicted with Polio at a young age. For years he studied Science, Technology, and the dark arts of Alchemy to try to find a solution to his frustrated confinement. After receiving a small mechanical assistant robot from his uncle, he began experimenting with building ever more complex mechanical bodies.
Eventually he invented a mind-machine interface that allowed him to give his creations the autonomy they deserved. This army is the result of years of experimentation with transplanting insect and animal brains into mechanical bodies.
His work must continue until he feels he can successfully transplant his own brain into a suitable host body. In the mean time, his army gives him the tools he needs to find human subjects for further experimentation.
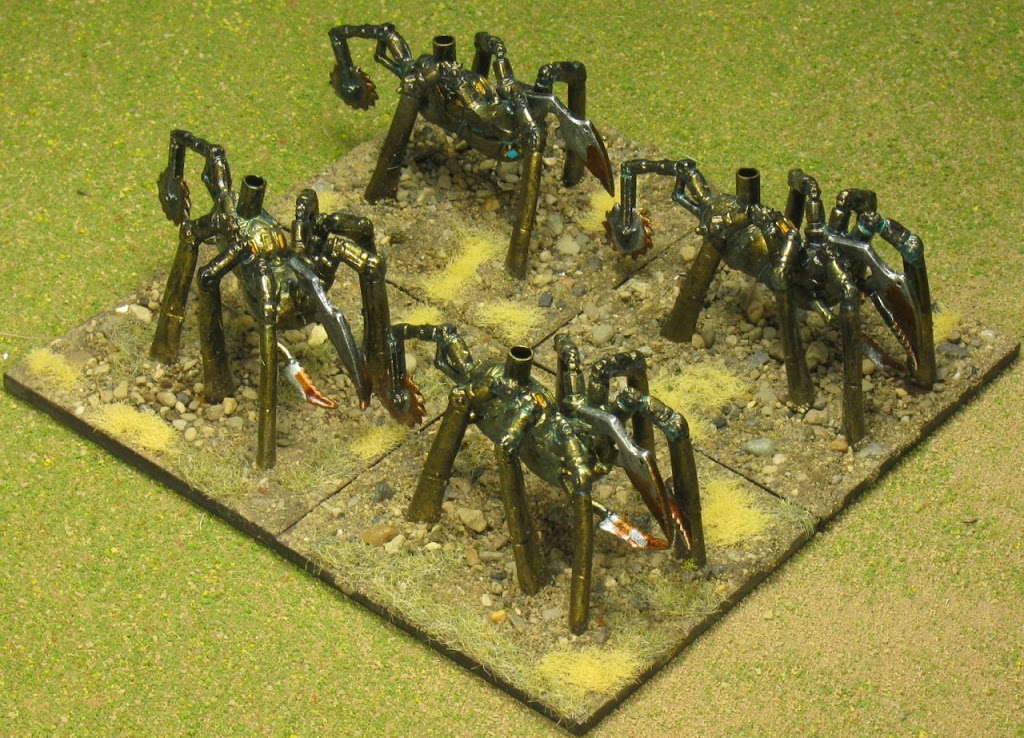 |
| Professor Hans’ Brass Spiders: 4x Beast |
This army is built primarily out of Mage Knight figures, but there are a few from other prepainted sets: Dungeons and Dragons and Dreamblade. I repainted, touched up, and/or converted all of the figures in one way or another.
Professor Hans is a figure called “Gent” from the Dreamblade series of prepainted miniatures. I repainted him with a brass colored integrated wheelchair. In his hand he holds the Aetheric Impulse Controller for his Avatar, who can shoot its Aetheric Wave Gun at enemies that Hans has a particularly strong interest in. Hans’ Avatar is a repainted Mage Knight figure.
 |
| Professor Hans’ Camel Backs: 2x Shooter |
His brass spiders are early creations that use a spider’s brain to control their steam powered bodies. They are Mage Knight figures that originally had riders. I removed the riders, filled in the seats, added smoke stacks, and repainted them all. These are Beast elements.
The Camel Backs are an early success with Hans’ use of the mammalian brain. They carry steam boilers on their back and shoot cannons instead of spitting. These are Mage Knight figures repainted silver with brass highlights. They are Shooter elements.
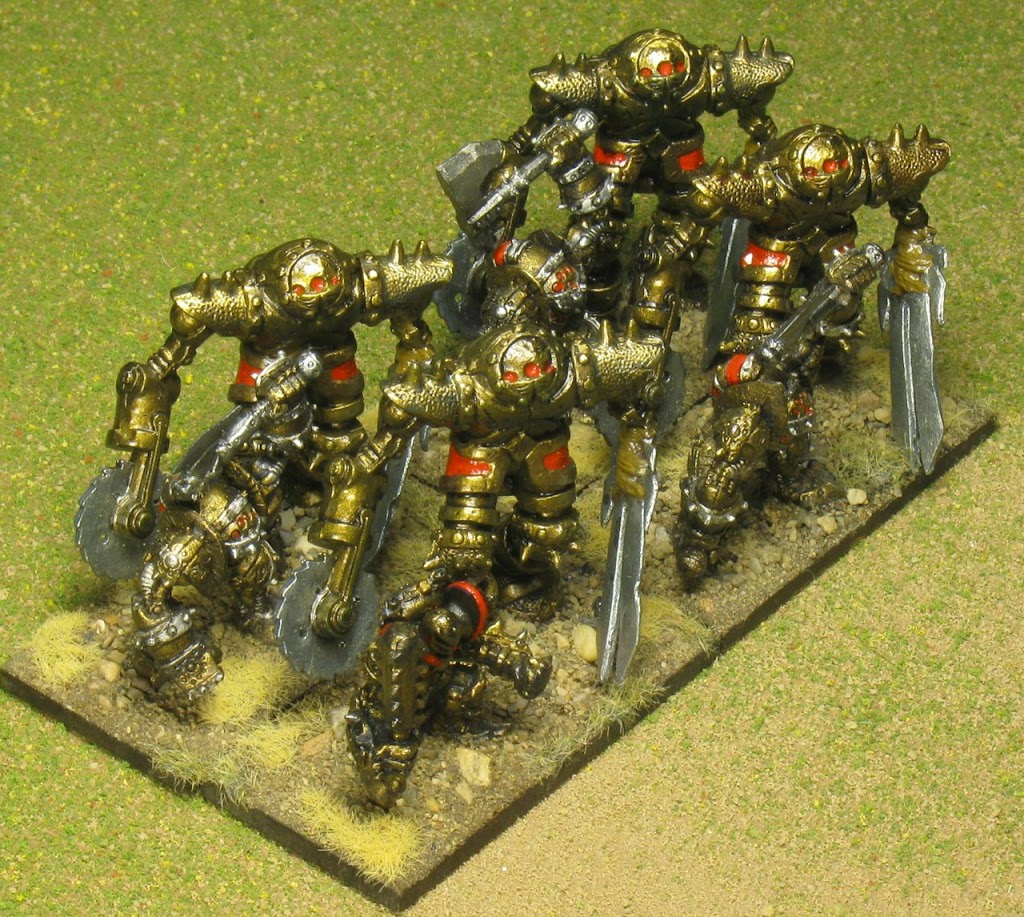 |
| Professor Hans’ Turtle Men: 4x Blades |
The Turtle Men use brass bodies controlled with the brain of a snapping turtle. They are mixed Mage Knight figures, also repainted in a better brass color with matching color highlights. They’re Blade elements.
Papa Bear is a giant steel mech controlled with the brain of a bear. It’s a Dungeons and Dragons prepainted figure. Most of the paint is original, but I changed the highlights from copper colored to brass so they’d match the rest of the army. This is a Behemoth element.
The Dragonfly combines Hans’ insect brain interface with a flying mech that uses his newer, smaller power sources. It’s a flyer. This is also a Mage Knight figure that had a seat and a rider. I filled it in and repainted portions of the figure.
Now all I need is a stronghold!
 |
| Professor Hans’ Papa Bear: 1x Behemoth |
 |
| Professor Hans’ Dragonfly: 1x Flyer |