Historicon 2011: Friday, Saturday

Friday: Monsterpocalypse

After BBDBA on Friday night, the only event was the Two Davids giant Hordes of the Things game: Monsterpocalypse Episode 2: Rise of the Terrasaurs – There goes Tokyo!

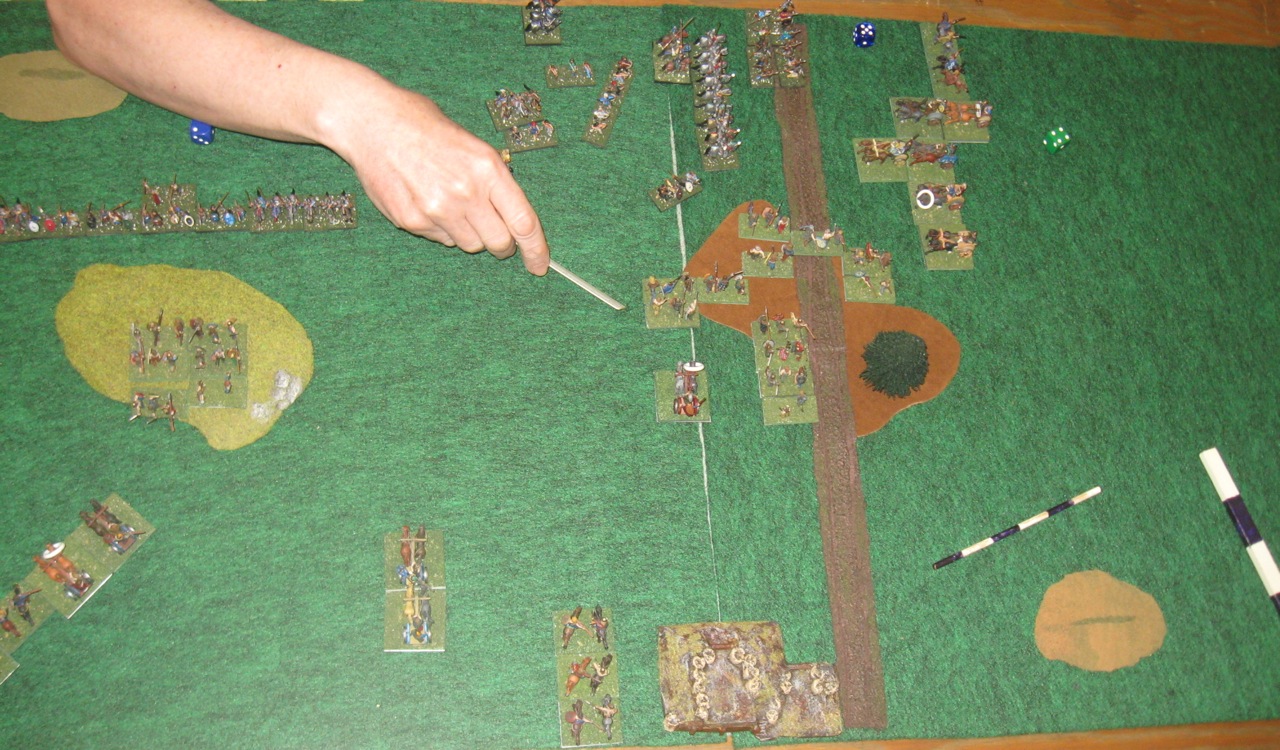
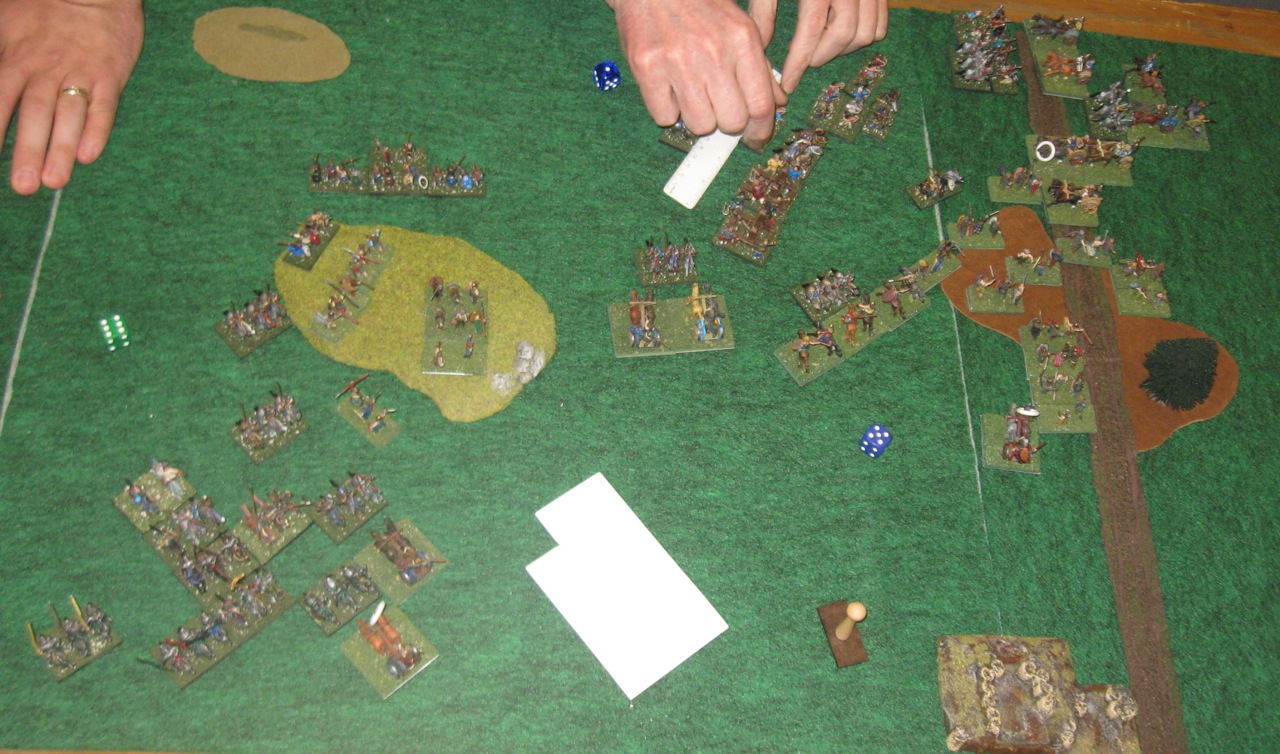
This was an 8 player HOTT game played on a huge board using rebased Monsterpocalypse figures.  Each player had a 24 point army, and sat next to an ally on one side and an enemy on the other. The goal was to capture objectives on the board.  Capturing an objective increased your army’s power, and decreased the power of the defensive forces in the city.  The first army to capture all 4 of their objectives won.

My aerial hero general is nuked

I was signed up for one of the IOUS slots (Insects of Unusual Size) and Rich Gause took the other.  Apparently we left our hive mind at home.  I deployed in a completely stupid way and boxed myself in, spending several turns to even get out of my deployment zone.  Dave Schlanger decided not to flank my general and kill it in the first 2 turns of the game, but it didn’t extend my lifetime very much.  Instead, both of the defense forces to our right beat the crap out of Rich’s bugs. 

Soon, Jon Bostwick rolled a 6 and brought out his nuke (a god, in HOTT element terms).  This killed off several of Rich’s elements, broke his army, and then started wandering towards the center of the map.

Eventually I unboxed myself, got some PIPs, and flew away.  Alex Bostwick, to my left, used a Jedi mind trick to convince me to attack the nuke, and it was a total disaster.  We didn’t understand how multiplayer attacks were resolved, and didn’t realize we couldn’t cooperate to flank and destroy it.  When it came back to Jon’s turn, he nuked my aerial hero, which broke my army.  On my turn, immediately after Jon’s, I rolled a 1 for PIPs, and the rest of my army evaporated instantly (in HOTT, demoralized elements that you can’t hold on the board are removed immediately instead of fleeing).

In The Princess Bride, the ROUSes were killed by fire spouts.  I guess when your unusual size is as large as a skyscraper, a tactical nuke is just about the right scale for a fire spout.  Even though I was out of the game, I hung around to watch.  I left before it finished, but eventually the Terrasaurs captured their fourth objective and won.

Saturday: NICT

The NICT, basically the DBA annual national championship, is open to anyone who has placed first in a NASAMW sanctioned tournament (or second place, for larger tournaments).  My win at the Battle at the Crossroads this year qualified me for the NICT, so I got to sit at the big kids’ table this year.  The event was played on 24″ boards with dismounting in any bound.

Since the pyramid event I qualified in was so weird, both in terms of tournament scoring rules and special rules in use during play, I decided to use the army I qualified with: Leidang, III/40d.  This is not an awesome army within its period: it’s basically bringing blades to a knight fight.  I took 1xKn(gen), 5xBd, 3xAx, 1xSp, 1xPs, 1xBw.

In the first round, I faced Greek Alex’s French Ordonnance, on my terrain, and lost 4-1.  He really didn’t want to dismount, but he swapped in his blades to dig my auxilia out of the woods.  In the second round, Tony Aguilar beat me 4-1, also with French Ordonnance, this time on his choice of terrain, a pool table. I was playing my blades aggressively like knights, and he was playing his knights timidly like blades, but he still ended up beating me.  I tried to concentrate my forces on one end of his line, but I didn’t support myself well enough and ended up outflanked and destroyed piecemeal.

In the final round, I had a somewhat better matchup against Ron Giampapa’s Medieval Scandinavians, but I still lost: 5-1 this time.  I don’t have any pictures, but this was a straight “line ’em up, knock ’em down” affair with minimal maneuver.  The dice didn’t let me exploit any local advantages I managed to create, so my line quickly crumbled.

This wasn’t a frustrating event, but it wasn’t particularly inspiring, either.  I prefer themed events over opens, because of the variety of armies present.  Even in themes, I’m more likely to choose an army I like instead of choosing my army based on how competitive it will be.  Hopefully I’ll eventually get good enough to win despite my army choice.

Saturday: HOTT Open

Tom Thomas ran a Hordes of the Things open tournament with 25mm basing and 4 foot boards.  He had plenty of nice loaner armies, so lots of people dropped in who weren’t planning to play.  We had 9 players, which let Tom participate to even out the field.

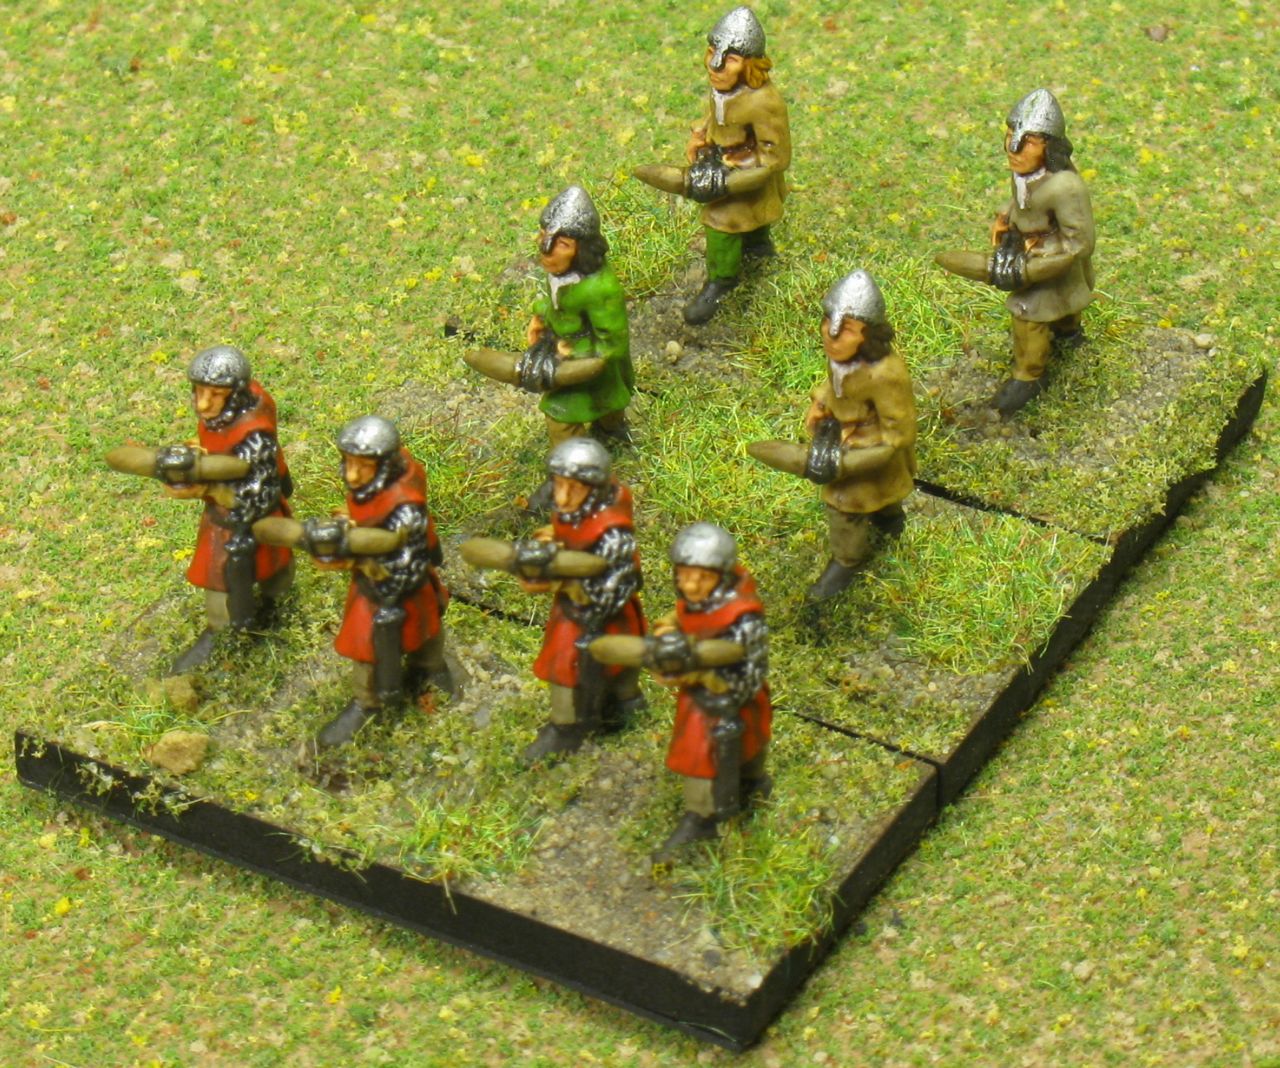
I brought a new version of the Elves of the Offwhite Tower, and got to show off my phallic symbol again… this time complete with a sheath.  My army list was: 3xSp (gen), 1xBd, 2xSh, 2xFl, 2xRd, 1xMg.  I learned a lot and enjoyed playing the army, but I am likely to change it up before I play it again.

In the first round, I played against Catherine Thomas, who played a Stark army based on R. R. Martin’s A Song of Fire and Ice series of novels.  Considering how much mindshare these books are getting among persons whose opinion I respect, I’m going to have to pick up a copy of A Game of Thrones before vacation.

Catherine’s army was very similar to something you’d see in DBA, except with a Hero.  I surrounded her with my flyers and started pestering her a lot, but she ended up killing my general and winning 8g-2. 

In the next round, I faced Jon Bostwick again, and he had another Boudicca army. This time he had a giant tree for a Behemoth, Boudicca was a hero, and the army was rounded out by a handful of warbands and a couple more chariots (riders).  He ended up killing my general, but I was ahead and won 12-8g.  For some reason, it seems like the majority of my wins this weekend were against Bostwicks…

I faced Tom Thomas in the final round, also with a Song of Fire and Ice army.  This was an interesting battle, but unfortunately we were running out of time and I had to cut it short in order to make it to the Peloponnesian War campaign event. 

My magician ensorcelled his magician, and we were at 6-6. He brought his magician back, and I killed his hero: back to 6-6 again.  He tried to ensorcell my magician, but he failed and ensorcelled himself, so it was 10-6.  He was able to bring his magician back a second time, and then ensorcelled me, bringing it to 10-6 in the other direction.  This back-and-forth could’ve gone on for some time, but I was out of time.  I hated to concede and leave in the middle of the game, and hated to cheat to lose, so I explained I was short on time and put myself in a vulnerable position for him to take advantage of. It still took a few more turns, but he killed me and won 12-6.  Sorry about that!

I learned a lot from this event, and I’m now more inspired to play HOTT more, build at least one more army, and build a few more interesting elements for my Elf army.  Larry said it was a bad idea to take both a Magician and Fliers in the same army, and I can see why: they both need 2 PIPs to move, they can’t group move together, and magicians need even more PIPs to use their spells.  But they’re both so useful!

In all of my games, I put a second rank of spear behind my general, bringing him up to +6/+6.  Eventually I realized this is silly: I should have a Hero general.  For the same 4 points, I get a +6/+6 element that moves a lot farther, isn’t quick killed by knights, and maneuvers more easily since it’s only a single element.  It’s less flexible, but that only matters if you intend to use the flexibility.

Flyers are very fun.  I thought I’d need two of them to make them useful, but I’m not sure this is necessary.  One is enough to wreak havoc behind the enemy line, providing flank or rear contacts. I also see much more benefit to taking high PIP elements than before.  I thought it would be a handicap to have fewer elements, but you have more PIPs to run the remaining elements, and they’re stronger and more maneuverable.

Saturday: Peloponnesian War Campaign


“It is 431 BC, and things are going to crap.”


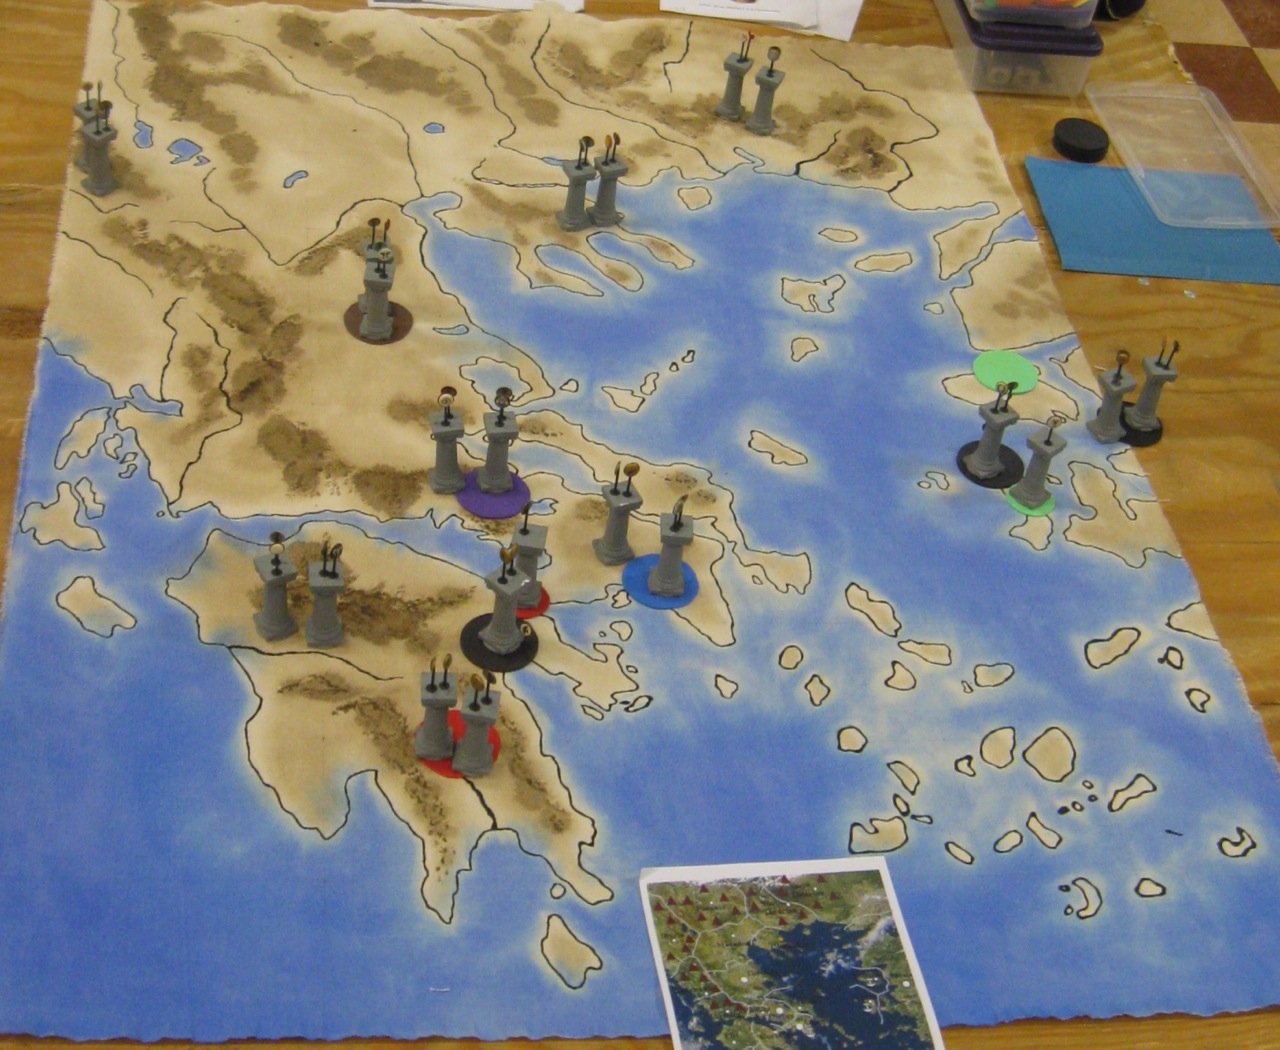
Peloponnesian Campaign Map

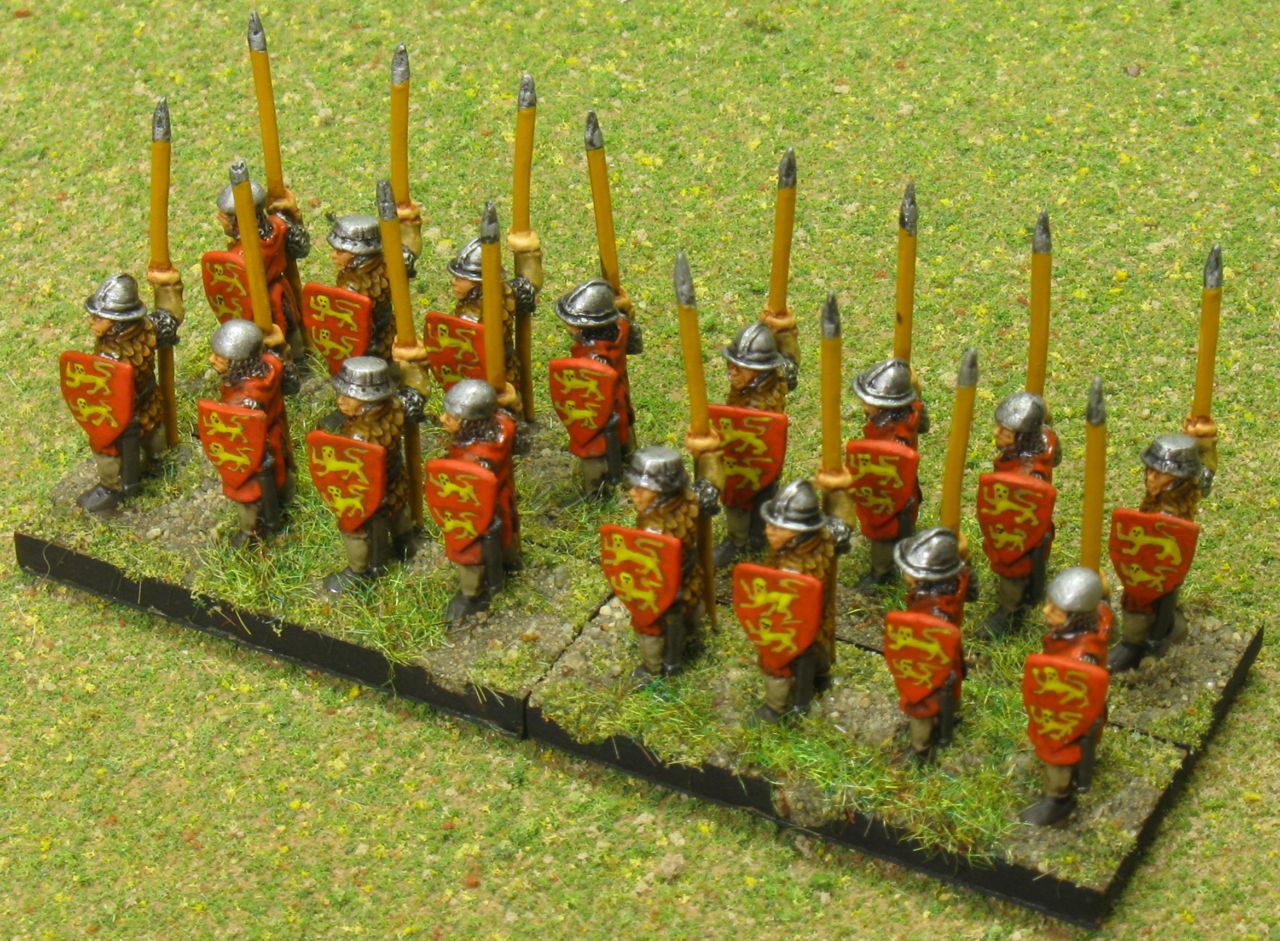
The Two Davids campaigns are the highlight of every convention and a great end to a fun weekend.  This year’s event was in ancient Greece, with a bit of Persia thrown in for good measure.  I was signed up for one of the Spartan slots, II/5a: 9xSp, 1xCv, 1xAx, 1xPs.

In the first round, I attacked Corinth, played by Alex Bostwick with II/5i.  His army was the same as mine, except with one more psiloi and one less spear.  This was a fairly straightforward hoplite battle, except for the part where he took my camp with his cavalry.  I was eventually in a position to take it back, but by then I had beaten him, 4-c.  I controlled Corinth, and had a vassal in the first turn.  Yay!  This also meant I had a big target on my head.

The Davids, who run the campaign, are becoming famous for getting the lowest numbered tiles in many rounds.  After Larry thoroughly searched the campaign tile bag, and demonstrated to everyone’s satisfaction that there was no funny business going on, Dave Schlanger drew the 1 tile in the first round.  In the second and third rounds, David Kuijt drew the 1.  Shenanigans!

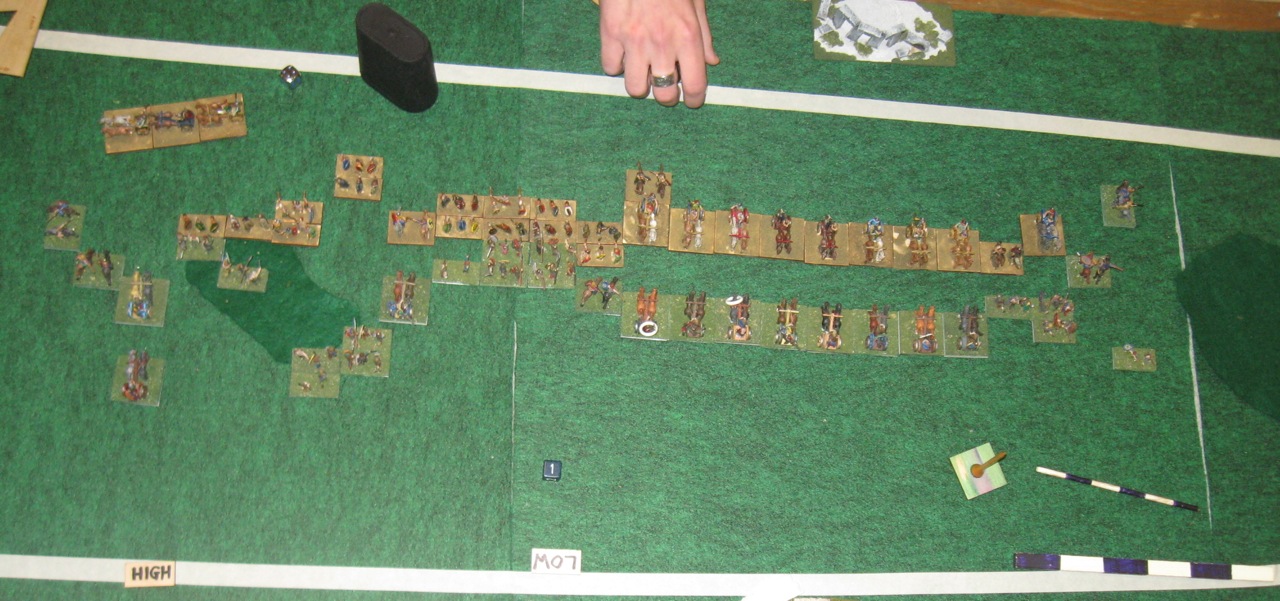
DK’s Hoplite Echelon concentrates force on my left flank

I was a pretty target, so DK attacked me in round 2.  He had an identical army composition to mine.  I set up the same terrain as in the first round, approximately.  David did something very clever, shown in the accompanying image. I’ve seen and used echelon formations before, but not in this way. He made very good use of the tactic here to deny one of my flanks while concentrating superior force on the other, for a minimum of PIPs, and while mutually supporting his own spears in the process.  By the time I saw what he was doing, I had already wheeled into a position that would take many PIPs to send my spears against him… but I was rolling 1’s for PIPs and he was rolling up my line.  He beat me 5-0, and I became his vassal.

After I saw what he was doing and commented on it, David again said “It doesn’t always work this well.”  

“So,” I responded, “when you say it doesn’t always work this well, that means you can do it but no one else can figure it out, right?”

“Yep, pretty much.”

That “pretty much” guaranteed I had to try this enough times to figure it out.  Even if it doesn’t always work, it’s important to learn more tactics so you can not only use them, but protect yourself from them and find ways to beat them.

In the third round, Mark Pozniak attacked me with his Athenians. I tried the echelon tactic, but it didn’t work correctly.  I ended up leaving my general’s flank open, and after several turns of back-and-forth combats, he eventually beat my general and won 3g-0.  I made some mistakes I should’ve avoided, but I was more interested in learning this new way than practicing what I already knew.

In the last round, Jon Bostwick attacked me, again with the same army composition I was using… and again, I attempted the echelon tactic.  Again, I left my general’s flank open, but I realized it a bit earlier and was able to protect it somewhat.  However, it didn’t help me win, and he beat me 4-0.

When I think about hoplite battles, they always seem boring and uninteresting to me.  This is probably because it’s a typical army choice for demonstrating DBA to new players, where hoplite battles are typically played out in a very straightforward fashion for the benefit of the new player.  When I actually play with hoplites against an experienced opponent, it’s a lot more fun.

I finished this year’s campaign in the middle of the pack, which was satisfying, but more importantly I learned new ways to play this army, gained a greater appreciation for it, and best of all I had fun.

Another year of Historicon is over, and no one knows where next year’s show will be.  I guess we’ll find out eventually, if the convention actually happens in 2012, but depending on where it’s held I might not end up attending.

Historicon 2011: Big Battle Doubles (Friday)

Friday’s main event is always Big Battle Doubles.  Since JM wasn’t in attendence, The Grey Wardens couldn’t make a return appearance.  Luckily, Dave Schlanger set me up with Mark Pozniak.  After we settled on playing Mark’s Ancient British, II/53, we chose the team name Woad Kill.  The final army composition was 12xLCh, 6xLH, 15x3Wb, 3x2Ps.  This is not a power army by any means, but it can definitely win through outmaneuvering (and high die rolls).

Somewhat unfortunately, Warband is a finesse troop in DBA.  I say “unfortunately” because historically these guys were more likely to yell “Waagh!” and run straight ahead.  This is only “somewhat” unfortunate because warband are fun to play the wrong way, since they maneuver so well.

Game 1 deployment vs. Doug Austin’s Bosporans with Sarmatian ally

The first image demonstrates our final defensive plan: two large pieces of bad going in the center, daring the enemy to approach our central CinC command and camp; two pieces of bad going near the board edges to constrict a flank.  It also shows the command split we used for all three games:

  • 3xLCh, 1xLH, 5x3Wb, 1x2Ps (10 el, BP: 4)
  • 3xLCh, 3xLH, 6x3Wb, 1x2Ps (13 el, BP: 5)
  • 6xLCh, 2xLH, 4x3Wb, 1x2Ps (13 el, BP: 5)

One flank command (low PIP) would hold on and try not to die for as long as possible.  The center command and other flank command would work together to attack the enemy’s weakest flank.  In this picture, the enemy deployed ideally for us, by putting most of their army on our preferred defensive flank.

During planning conversations with Mark, I had three primary concerns with this plan and command split.  First, the low PIP command consisted of both warband and mounted, and with 10 elements it might not have enough PIPs to accomplish its missions.  Second, combining two commands which were split by a piece of bad going might lead to command and control issues.  Finally, what would entice the enemy to approach us centrally?  In practice, only some of these ended up being real problems, and we only defended once anyway.

Round 1

In the first round, we faced Team Bosporan: Doug Austin and Bill Connely. They played the same army Doug used when JM and I faced him at Cold Wars: Bosporans (II/25) with a Sarmatian ally (II/26).  They also had a 0 aggression, but we won the terrain roll.  Doug set up very similarly to last year: a central low-PIP command consisting of primarily artillery and bow, with his CinC command split on both sides of that command; and the allied block of knights (with 1xLH for variety, this time) on our left flank.  The first picture above shows the final deployment.

We knew we had enough bad going troops to take and hold any piece of bad going, but our goal was not to hide in bad going and delay the game. Instead, we intended to look like a Warband army but act like a Mounted army.  The bad going provided a safe “home base” and staging area for the warbands, but it couldn’t be a final destination if we wanted to finish the game on time.

Game 1 in progress: attack the right flank.

As the game progressed, we advanced into the bad going, defended on the left flank, and attacked quickly on the right.  Our cavalry and warband reached their right flank before their knights reached our left, but Doug retreated from our advance and competently maneuvered to avoid our attack.  This would’ve gone a bit differently on 30″ deep boards, with an extra few inches to use in their backfield.  In the center, nothing really happened: they didn’t approach, so I held our central mounted in reserve to act where they were needed the most.

The End is Nearly Nigh

In the end game, my left flank warband were able to aid in the defense and even tried to pick off a few CinC elements (or at least suck away some PIPs).  We delayed the inevitable break of our low PIP command for a long time, but eventually it did break.  I allowed the elements to flee enough to get in the way of oncoming knights before trying to hold them, but there were only a few turns left.  With time running out, Doug graciously recognized they would lose eventually, and allowed the game to come to a conclusion on our right flank instead of retreating and delaying until time ran out.  In the end, we killed enough elements to break their CinC, and won 84-16.

Regarding my concerns about this plan: The low PIP command was not too large, and did have enough PIPs, even though it was acting both in the open and in bad going.  The key to success here was the fact that it had a passive mission to “not die.”  It would have failed if it were required to attack.  Command and control wasn’t a big issue in this game, because the central command was only required to work on one side of the woods.  It didn’t really matter whether the enemy approached us centrally or not: instead of advancing aggressively in the center and risking attacks from bad going, they tried to maneuver to our right flank and faced the warband there instead.  I didn’t see this flexibility before I saw the plan in action.

Round 2

Vs. Two Davids, after a few turns

In the second game, we faced Two Davids with “some kind of Romans” and Sub-Roman British (King Arthur).  They were also aggression 0, but they won terrain.  We applied basically the same plan we used in the first game to the enemy’s choice of terrain since it was similar enough to our own.

Much of this game hinged on a minor but costly mistake shown in this picture: the CinC command sent a column of warband down the road to “help” in the woods, but they ended up out of command.  This sucked PIPs from the CinC while severely hampering the ability of the right flank command to maneuver there and attack effectively.  We were able to maintain this PIP debt for longer than we expected, but eventually the Davids killed off enough elements in the woods to control them completely, and it was all downhill from there.

Another noteworthy part of this game was the Davids’ deployment and initial maneuver.  They deployed their line behind the deployment line, and placed their third command in front of their main line near the center.  As seen in the image above, they wheeled the two overlapping lines away from each other, in a beautiful maneuver I can only compare to the blooming of a flower.  It was very instructive to watch and learn from, but as David Kuijt said, “It doesn’t always work out that way.”  (Hold that thought, and read the Saturday update once I post it…)

I don’t know what would’ve happened if we had anticipated the command and control issues, and decided not to send the central warband toward the right flank.  The real battle here ended up being in the center and the right flank woods, not on the far flanks, so the extra force and PIPs would have been helpful. 

In the end, we hardly killed anything, and lost 94-6.  I enjoyed the game a lot, and seeing the flower bloom taught me enough to make it worth losing.  Command and control was more of an issue, obviously, but the low PIP command still had enough PIPs.  I think the tides could’ve turned somewhat to our favor in the woods, but the Davids had the overall PIP advantage and we were fairly evenly matched in combat, so they were bound to win if the dice acted as expected (and I’m not one to bet against them).

Round 3

Alex and Jon Bostwick, not the One True Boudicca!

The Long Island Bostwicks (Jon and Alex) read our team name on Fanaticus, and decided that they weren’t going to be outdone by us, so they took Ancient British as well. They totally out-woaded us!  They must be extroverts, or something.

Unfortunately, no one else was familiar with the recent Beastie Boys video (and trailer).  I wanted to bring a super fresh, old school beatdown to the table: “We’re the real Boudicca!”  “No, we’re the real Boudicca!”  I’ve listened to and grown up with the Beastie Boys since middle school, so as long as they’re still rapping, I know I’m not old yet…

Once again, everyone was aggression 0, and they won the terrain roll and defended.  Since we have the same army, this wasn’t a big deal.  Their command structure was different than ours: they put all of their mounted in one huge CinC command, and split their warband into two commands.  They had no psiloi, and took more warband instead.

They deployed their mounted command centrally with one warband command on their flank.  Their mounted had some elements in reserve behind the lines, and there was a road in place allowing them to redeploy as necessary.

As usual, width is better than depth.  We decided to create a longer line and outflank them on each side.  Cavalry is superior to warband, so we didn’t want to face their cav with our warband.  By putting two commands next to each other, we had enough mounted to meet their cavalry with one or two elements in reserve, and the third command’s mounted elements were still available to provide a superior force on one flank.

Their third command placement showed a bit of father-son rivalry.  Alex wanted all the warband on one flank, while Jon wanted the third command on his side.  I think Jon may have had the better answer, but Alex got his way and commanded both warband commands on our left flank.  Unfortunately, this meant that the reserve chariots were out of command by the time they reached the flank.  This sucked up their PIPs, and once I tamed their warband on the left flank it allowed us to use all three commands against their CinC command.

We were going neck-and-neck until one turn when I broke both of the warband commands: one by killing 1/3 of the elements and the other by killing its general.  After that, it was only a matter of time; but we ended up killing enough CinC elements to end the game before they lost 18 elements. We won 86-14.  No, we’re the real Boudicca!

Once again, the low PIP command had plenty of PIPs, since its mission was to advance in a straight line and attack in the open in a single line.  There was some potential for command issues on the left flank, but I kept the general in a useful position and it wasn’t a real problem.

Summary

I had a lot of fun in this event, as usual, and I’m glad to have partnered with Mark.  Thank you very much, Mark!  You won so many other events that I hope I didn’t hold you back very much in BBDBA.

Besides having fun, I learned a lot.  At the time I couldn’t identify many specific lessons, but now that I’m writing it up, they are a bit easier to identify.

  • My approach to planning in past BBDBA events seems mostly on the right track.  I considered most of the same aspects Mark did, but valued their importance differently.  It’s not clear how useful considering all possible enemies is, given the limited field you’re likely to face unless you reach the finals.
  • 10 elements aren’t too many for a low PIP command, even if they’re of a variety of element types.  The more important aspect of their success is their mission.
  • It’s very important to pay attention to command and control radius.  Yeah, I already knew that in theory, but I need to pay even more attention to it.
  • If you split a command to work on two areas of the board, you can share its PIPs with two other friendly commands.  However, you may also present that command to two separate enemy commands, making it more vulnerable to enemy attack.  If it is your CinC command, it may make the CinC easier to break.
  • On the other hand, using multiple commands against one enemy command is an important aid to your success.  Balancing this with avoiding exposing your command to too many enemy commands may be difficult.
  • The Blooming Flower tactic is an interesting, useful, and dangerous way to deploy your commands flexibly in two overlapping lines.

BBDBA seems to warp time in an odd way.  For me, time seems to be controlled by the overall flow and pace of a battle, and not wall clock time.  As a result, when I’m finished with a big battle game it feels like it was just as long as a single DBA game, and I wonder where half the day went.

Thanks to my partner and my opponents for a wonderful day of BBDBA!

Historicon 2011: Wednesday, Thursday

After Cold Wars, I said I didn’t take enough notes to write detailed descriptions of what went on, but apparently I was wrong.  This time around I expect to post even less information, so I apologize ahead of time for not remembering details such as what happened in any of the games, or my opponents’ last names.

Since JM wasn’t going to Historicon, I rode down with Diceman and slept on the floor of the Stooges’ room.  We arrived early on Wednesday, and would’ve had plenty of time for dinner before the first event if they would only have brought us our check.

A Shot in the Dark

On Wednesday night, Larry ran A Shot in the Dark.  This limited tournament required armies with at least 4 bows, so I took my Tlingit army with 10 bows and 2 psiloi.  I expected that this would be a poor army choice if I wanted to win, and I was mostly right.  Most players took the best army they could find with at least 4 bows, instead of maxing out on the shooting.  There were a lot of Medieval combined arms armies, as well as Indians.

In the first round I faced Dave, a very new player with War of the Roses English.  I ended up winning 2g-0.  The next game was against Hank Drapalski with his Medieval French (IV/64b).  As expected, he ended up dismounting all of his knights into blades.  On the last bound before we ran out of time, it was 3-3 and I shot one last element… and killed it!  Oops, no… my general doesn’t get +1 unless someone’s shooting back… so yeah, it was a 3-3 unfinished game that could’ve gone either way in the next few bounds.  So close, yet so far away. In the last round, I faced Ron Giampapa’s Early Egyptians (I/2b) and lost 1-4.

I enjoyed learning about bows in this event.  I tend to be a bit of a chaotic player, and often increase geometric complexity and let my troops mutually support each other outside the typical straight line formation.  This isn’t always what I plan. I often end up with many groups of elements, but I don’t mind as long as they’re safe and don’t require PIPs for maintenance.  In this event, I ended up using my bows basically as aggressive skirmishers, moving around in small groups and seeking out local advantages while attempting to prevent poor matchups. Because they shoot, it didn’t work horribly, but considering I only won one game it didn’t work very well, either.  Larry says “never let your bows get overlapped,” and that’s basically true, but when the field is covered with blades it often doesn’t matter anyway.

Overall, I don’t think it was a particularly competitive army choice, but it was in line with the theme so I enjoyed being able to field the army again before it’s most likely changed by the release of DBA 3.0.

DBA-RRR Open

On Thursday morning, I played DBA-RRR for the first time in the Open event.  I brought Rajput Indians, built from my Hindu Indian DBA army with additional Rajput knights and blades, and a cannon (pictures forthcoming).  This is also not a particularly competitive army in the face of firearms, but I enjoyed my limited exposure to DBA-RRR and would like to eventually get an army that takes advantage of more of the RRR-specific element interactions.  I’m not very interested in the Renaissance, so I’m unlikely to paint many armies for DBA-RRR.

In the first round, I faced Dan McKellick, another player new to both DBA and DBA-RRR, with Italian Condotta, I/1.  I lost 1-5… so he got the beginner’s luck and I didn’t, apparently.  In the next round, I faced Bill Brown’s English Civil War Parliamentarian II/22a.  I was leading 3-0 when I snatched defeat from the jaws of victory, to pull off a narrow loss at 3-4.

In the final round, I faced Brian’s Valois French, I/8c.  In the first turn he did a “psiloi” rush with only a single skirmisher to attack my lonely cannon. In DBA-RRR, skirmishers shoot at +2/+2 with 200p range, and they’re still immune to cannon fire.  He didn’t kill anything quickly, but this ended up being a tremendous pain in the ass for many turns.  I brought over a bow to help shoot at the skirmisher, but he killed it off with his shooting.  I was moving 2 blades over to help as well, when he moved behind my cannon to shoot it from the rear.  I managed to turn around, and when he shot me on the next turn I fled him off the board.  Finally!  In the mean time, he had tied up a quarter of my army with only one element. I’m surprised I lived through it as long as I did, but in the end I lost 2-4.

My elephant was basically useless in all of the games, due to its vulnerability to cannon fire, so I’m glad I was able to detach my general.  Clearly it’s not a good idea to leave your cannons vulnerable, even though they shoot 8″ in this game.

In this event I was making some mistakes, but I chalked it up to being the first time I played the game. Unfortunately I didn’t stop making mistakes as soon as I had hoped…

Team Cup

The Team Cup format requires players to form 4-player teams, and each player selects an army from a different book.  Teams are matched up against other teams, and players play against their opponent within the same book. I couldn’t build another Pittsburgh team, so I joined Tony Aguilar, Rich Gause, and Ron Giampapa to form the North and South team.  Unfortunately I don’t remember all of our team results.

There were an odd number of teams, so in the first round we got a bye.  This counts as a win, but that’s not the point: I’m here to play the game… so Rich and I played a practice game during the free slot.  I was in book II with Lysimachid, II/17; Rich was in book I with Vedic Indian, I/23.  He won 2-4.

In the first “real” round, I faced Dave again with his Later Carthaginians (II/32, no elephants).  He beat me 4-1, after I made some big, dumb mistakes I should have known better than to repeat.

In the next round I faced Larry, also with Later Carthaginians.  He took one elephant and one light horse.  In the last bound, Larry graciously allowed me to take a move back. I ended up winning 5-4 by killing double ranked warbands, but the combat rolls would’ve produced the same results if I had used my second-best move instead.

I think our team all lost our first game, and we were 2-2 in the second round, but I could be wrong.  Looking at past years’ army selections in book II, I expected to face Tamil Indians at least once, but I didn’t.

Midnite Madness

It can’t be “midnight” if it starts at 11pm, right?  Well, it didn’t end until almost 3am, so that’s close enough.  As usual, this is a single elimination event open to all armies, but the motivations are warped by the fact that it happens so late at night.  The winners advance to the next round and the losers get to sleep, so it’s never clear which is the better option.  The only loser is whoever comes in second place, since they had to stay up until the end but they still didn’t win.

I used Mark Pozniak’s Ancient British, II/53, to get some practice with them before Big Battle on Friday.  In the first round, I beat David Bostwick’s New Kingdom Egyptians, I/22, at 4-3.  In the second round I faced Ben Hatch, who was a fairly experienced DBA player who hasn’t played at conventions before.  He beat me 4-2 with his Vikings, and I truly learned the lesson that warbands are bad going troops.  Unfortunately I wasn’t able to maneuver them into bad going before they had to face blades.

And finally, sleep…

DBA Army IV/13ab: Medieval Germans

The army arrayed: DBA IV/13ab, Medieval German (Braunschweig)

One of the beautiful things about DBA is that all of the armies are the same size.  Once you paint 12 elements, you have a complete army and you never have to paint anything for that army again.

Except, it’s a lie!  A dirty, dirty lie! 

In order to field all of the available options for some armies, you have to paint far more than the 12 minimum required elements.  The winner of this dubious award is Medieval French, requiring 29 elements to field all possible options.  Apparently I got off easy painting these Medieval Germans, which only require 20 elements for the (a) list.  I painted all options except the 2x4Pk, but I included an extra Knight so I could field it as a DBA 2.2 (b) list as well by using deep sabot bases for the 6Kn elements.

The elements are 6x3Kn, 4x4Sp, 4x4Bd, 2x3Ax, 2x2Ps, 1x4Cb.  This will build the dismounting knights for IV/13a or the double-based knights from IV/13b.  In the proposed DBA 3 lists, this builds the IV/13b list with mandatory blades but no dismounting.

The Knights: 6x3Kn, or 2x6Kn, 2x3Kn.

Even though the army lists are under revision and will likely change before DBA 3.0 is released, I’m confident that I’ll be able to field a legal Medieval German army with these elements.

All of the shields are hand painted.  The foot figures use painted highlights on their red coats, but I used a Devlan Mud wash on the horses for expedience. I skipped painting lions on the horse cloths, but I bet you didn’t notice, did you?

4x4Sp.

I decided that one of the main reasons I don’t like most of the Medieval DBA armies I’ve seen is that they are too gaudy.  Typically, people either paint a wide variety of generic coats of arms that may or may not be accurate, so they can morph the army for use as any medieval army; or they accurately research 30 different coats of arms and it still ends up looking to me like a bazooka festival at a paint factory.

The best looking German army I’ve seen was painted by Scott Ludwig, and his work is directly responsible for convincing me to paint a Medieval army.  He chose a single set of heraldic devices and painted a unified color scheme across the whole army.  I decided that whether or not it was accurate, I’d do the same thing.

2x3Ax.  

Since I was looking for an ally for King Valdemar II the Victorious of Denmark, I chose the coat of arms of Braunschweig.  Otto I “the child”, duke of Braunschweig-Lüneburg, was Valdemar II’s nephew, and allied with Denmark against all enemies in the first half of the 13th century.  Things started to go wrong at the Battle of Bornhöved, where they both lost, and Otto was captured and imprisoned.

The coat of arms I chose, two gold lions on a red field, is that of Braunschweig (Brunswick).  It may be anachronistic for Braunschweig or Otto I at the time of the Battle of Bornhöved, but I found at least one source on the Internet that associates these arms with Braunschweig.  Who trusts the Internet anyway?  As a result, there are now two sources on the Internet, and the lies turn into truth by repetition…

1x4Cb, 2x2Ps.

The figures themselves are from Black Hat miniatures, part of the old Gladiator line.  These are very nice figures, I have absolutely no regrets regarding my figure choice.  They are well sculpted and highly detailed.  The faces are very distinctive, and I could see how someone might not like them, but I definitely do.  This is the same manufacturer that made the Auxilia I used in my Leidang army, and they definitely go well together.

4x4Bd, dismounted knights for IV/13a.

The Knights and Blades are technically a bit late for the Battle of Bornhöved.  They are closer to 1275 than 1227.  If I believed Denmark should be using primarily kite shields at this time, why didn’t I think the same for Germany?  It’s not like they’re very far away from each other.

Instead, I bought a few more blades to augment my Leidang in case we ever decide to field a triple army.

I am very pleased with the way this army turned out, but slightly paranoid about the accuracy.  I like to get things correct, but I’m not willing to spend money or an inordinate amount of time to ensure that they’re correct.  In the mean time, I can sustain myself with the dubious honor that comes with painting 82 microscopic yellow lions.

Rebasing miniatures? This is madness!

Madness?  This is Sparta!

To be more specific: this is my newly renovated DBA army II/5a, Later Hoplite Greeks: Spartans.  I didn’t actually rebase them, I only redecorated the bases they were already mounted on.  Not very dramatic, I know; but I don’t have a bottomless pit handy, so it was the next best thing.

The army arrayed: DBA II/5a, Spartans. Essex DBA v1 army pack.
The left half of the line: 6x4Sp.
5x4Sp(Gen), 1x2Ps.  General is on the far left.

This was the first army I finished painting for DBA, and the first 15mm figures I ever painted.  It was around 2003, and I found a few DBA v1 army packs on discount.  For the most part, the Spartan army didn’t change at all for DBA 2.0 (at the time); though more options were available in the 2.0 list.  These 12 elements were the only options provided in the original Essex army pack: 11x4Sp, 1x2Ps.  I later augmented the list with the other options available in 2.0, with slightly better basing: 1x4Ax, 1x3Cv (not shown here).

By the time I came back to DBA years later, my basing standards had improved.  These guys were painted well enough, but they looked like they were standing in a pool of toxic waste.  I repainted the ground brown, and added flock and static grass.  It’s as close as I can come to my current basing technique without fully rebasing the figures.

I also took the opportunity to reattach spears and do some touchups.  They won’t be winning any painting contests, but I’ll feel better using them… and at least I don’t have to paint another 11 elements of hoplites any time soon.

Now that I know a bit more, I don’t like these figures (or any Essex hoplites) for a few reasons.  Essex hoplite shields are too small, aren’t as round as they could be, and have no rim.  The single pose doesn’t bother me, because I prefer a “toy soldier” look for heavy foot.  However, I absolutely cannot stand forward-facing spears: they’re unusable in practice on such shallow bases, even if they more or less accurately depict fighting hoplites.  In the future if I build any more hoplites, they’ll all be holding their spears upright.

DBA Army IV/65: Wallachians

I love counting people! Let’s begin.  One impaled merchant, Wa ha ha ha!

I’m sorry, that was Count von Count, not Vlad the Impaler.  I always get those two mixed up.

Vlad the Impaler, not to be confused with Santa Claus.

Here is my new DBA Wallachian army, IV/65: 1x3Cv (gen), 3x2LH, 5xPs, 2x3Bw, 1x5Wb.

I decided to paint Wallachians mainly because the new Essex figures looked so good.  The army list is “not competitive in an Open tournament” and doesn’t fare well in DBA against most of its contemporaries.  5 psiloi in 1330-1504?  AD?  Besides, who the heck were the Wallachians anyway?

That last part is easy: Vlad the Impaler!  Vlad III Tepes, aka “Dracula” (son of Dracul, his familial name meaning “dragon”) is considered the prototype for Bram Stoker’s vampire.  Sometimes I think he’d be a good Darth Vader, given Vader’s penchant for killing people off.  Wallachia was a part of what is now Romania.

Wallachian Light Horse.

This army is from an Essex DBA 2.2 army pack.  Most of the figures are from the new Wallachian/Moldovian line, but the cavalry General consists of older figures from other lines.

Wallachian and generic Psiloi.

The Light Horse figures are very interesting.  Unlike any other Essex mounted figure I’ve ever painted, these are cast in a single piece except for the spears.  They have very nice details and sculpting, and are well proportioned.  However, the poses are quite flat.  There is enough of a variety of poses to be interesting, but they vary mostly only in their heads and armament.

Wallachian bows and generic Warband.

There are 5 Psiloi elements.  The army pack provided three elements of Wallachian spears and two elements of generic light medieval crossbowmen.  For the shield designs on the light horse and psiloi elements, I referred to Wallachian heraldry online as well as WRG’s Armies of the Middle Ages 2.  There are only a few true heraldic devices, with the rest being merhant marks. Besides being the only source I could find, this felt somewhat appropriate, since Vlad made a hobby of killing off all the nobility as painfully as possible.

The two units of bows were from the Wallachian line, but the warband was a generic horde.

Overall I’m very happy with the figures and my paint job.  I would’ve preferred to see a few more of the Wallachian-specific psiloi, but I expect that they chose alternate figures for a reason. The other non-Wallachian figures were well chosen and fill their role well.

I haven’t played this army yet, and don’t know when I will.  Besides not having many opportunities to play recently while I’m so busy with work, there aren’t many opponents I’d bother irritating with this band of light troops.  Hopefully there will be a good Eastern European themed event for me to bring them to before Murphy’s Law totally revamps the list for DBA 3.0.

Stoogecon: a Matched Pair?

Stoogecon was a few weeks ago.  As with last year’s event, the tournaments were three rounds long: an Open and Matched Pairs.  Unlike in previous years, the DBM folks showed up as well, and even managed to get as many players as “we” (the DBA players) did.  Although I mainly want to share my thoughts about my choice of Matched Pair armies, I’ll start with a summary of the day.

In the Open, we apparently all had the same idea: “everyone likes medieval knight armies, so I’ll take elephants.”  I brought Rajput Indians, III/10b. The other players had Tamil Indians, Graeco-Indian, Southern Dynasty Chinese, New Kingdom Egyptians, and Romans.

A quick summary of my Open games: In round 1, Frank with Tamil Indians beat me in a close and hard-fought match, 4-3.  In round 2, I shouldn’t have gone into the bad going, and Rich’s Chinese punished me for it, 4-1. In the last round, Larry’s Egyptians ran up to me and committed ritual suicide: I won 2g-0 on the bound Larry first contacted me.

For the Matched Pairs event, I chose Early Bedouin, I/6c, vs. Later Achaemenid Persian, II/7.  Bedouins have: 3x3Cm (Gen), 1x2Cm, 4x3Ax, 4x2Ps.  I gave the Persians 1xLCh (Gen), 2x3Cv, 2xLH, 4x3Ax, 3x2Ps.  The basic difference is the Bedouin camels are better vs. mounted, but there are fewer of them.  Bedouins have the possibility of Dunes, but with Ag: 3 to 1 they’ll rarely get to use them. 

So, is this a well-matched pair?  I’ll share my thoughts after a summary of the event.

In the first round, I played against Jim using his armies: I played Middle Imperial Romans vs. his Later Imperial Romans.  I didn’t feel like I made any big mistakes during play, but still ended up continuing my losing streak against him: 4-0. 

In the second round, we used my armies, and JM chose Bedouins.  These armies have low combat factors, so they’re fast and bloody.  I don’t remember the details of the battle, but it was a total rout: I won 6g-1. 

In the third and final round, we played my armies again and Frank chose the Persians.  Surprisingly, the Bedouins won terrain and of course placed some big central dunes. That whole “rout” thing worked so well, I tried it again… only this time I was Bedouin, so I lost 5-2.

At this point my conclusion may be obvious, but I first want to make it clear that I really enjoy playing either one of these armies against the other.  I’ve had some tense and interesting games, and even the routs didn’t look totally hopeless until the dice started rolling.  Using primarily light troops means you run faster, so you get into combat faster with less time to rearrange lines before contact; and the low combat factors mean someone dies quickly.  You’ll never end up with an incomplete game, in any case.

The basic premise of this matched pair is to take two similar but slightly different armies, with similar compositions but relative strengths and weaknesses. Bedouin camels have an advantage against mounted but a penalty against foot, and don’t suffer bad going penalties if they happen to find a dune to stand in.  Persians have more mounted, but less bad going troops.

Despite these seemingly even odds, I don’t think I’ve ever seen the Bedouins win.  It can certainly be done, and there have been some close games, but overall I don’t think the pair is as well-matched as I used to.  After Stoogecon, I considered why this might be, and came up with a few ideas.

First of all, “dunes” are mostly a red herring.  Bedouin will rarely get a chance to place dunes at all, only 6/36 of the time.  If you do get dunes, they can probably be used effectively, but I haven’t done it correctly yet.  The benefit of dunes in this matchup is not that camels fight in them without penalty; it is the camels’ ability to move through dunes as a group.  No Persian player would be dumb enough to put their Cavalry near the dunes, so the camels will only be facing foot… but the camels aren’t very good against foot.  So, deploy the dunes for disruptive PIP advantage, rather than as a central terrain to fight over.

The other problem is the nature of the armies’ advantages.  Bedouin camels are better against cavalry, which is 5 elements; but they’re worse against foot, the other 7 elements. Their advantage turns a cavalry matchup from 3-3 into a 4-3, which increases their odds of a kill from 2/36 to 4/36 and a recoil from 15/36 to 21/36. Their disadvantage against supported auxilia goes from 3-3 to 2-3: 2/36 chance of being killed up to 6/36, and 15/36 recoil up to 21/36.  Against unsupported auxilia, 3-2 to 2-2 reduces the chance of a kill from 6/36 to 4/36, while increasing the chance of being killed from 1/36 to 4/36.

So basically, Bedouins get a lesser advantage against fewer foes, and a larger disadvantage against more foes.

The overall dynamic is that the Persians are happy playing with their entire force out in the open, while the Bedouins want to keep their foot in bad going to stay away from the enemy Cavalry.  They have to choose to either stay in bad going and give the Persians both numerical advantage in the open and overall PIP advantage; or to come into the open and give the Persians combat factor advantage

Not all of these factors played into every loss I’ve seen, but in my previous attempts to use this matched pair I came away with similarly skewed result.

Overall, I have a bit of a dilemma.  I really enjoy playing this pair of armies, but I no longer think it’s an even match.  I either need to figure out how to win with Bedouin, since I already know how to win with Persia; or find another matched pair that I enjoy playing as much as this one even when I’m losing.  Any ideas?

Post Tax Day BBDBA 2011

Last weekend I drove out to Columbus, and Mike and I played BBDBA at the Post Tax Day event.  It was a fun time, definitely worth going to Ohio.  I hope to go back for future DBA events out there.

Unlike my other BBDBA tournament experience, this was a singles event instead of doubles.  I borrowed JM’s Hittite army so I could field double Hittites (I/24a) with a Mitanni (I/19) ally.  My planning ahead of time was limited to figuring out how to break the army into commands, and considering general defensive deployment (but not terrain placement).  In all three games, my commands were split as follows:

  • High PIP: 4xLCh(CinC), 9xSp, 3xPs.
  • Low PIP: 4xLCh(Gen), 3xSp, 1xPs.
  • Ally: 6xLCh, 2xAx, 3xPs, 1xHd.

I’m a bit of a wuss, so the Mitanni horde never left the camp.

Game 1: Hittites

Brian Peruski with Hittites

The first game was a Hittite civil war: I faced Brian Peruski’s triple Hittites (I/24b).  Our army compositions were similar, but he had knights instead of cavalry, and I had the Mitanni ally.

I defended, and placed fairly open terrain with two roads and woods.  My army wanted some bad going to play with, but not a lot.  I placed my Hittites first, with the spears supported and in two ranks as shown here.  This provided good defense against knights, and the symmetrical deployment allowed me to deploy my Mitanni on whichever flank I though I could gain an advantage on, while leaving chariots to protect the other flank.

Although I hoped to face knights with my spears, I didn’t expect it.  Although knights quick kill spears, the combat factors are horrible if the spears have support.

Brian deployed with one command poised to go into the woods on my right flank, and a mounted command on my left.  My choice at this point was to try to figure out which command was his low PIP command, so I could ignore it and concentrate on the other side instead.  I deployed against his mounted-heavy command, and left my right flank relatively open.

It turned out I was wrong about his commands: his mid PIP was on my right and his low PIP was on my left.  In the first turn, Brian ran down the road, and everywhere else we advanced in an orderly fashion.  This left his column of spear ahead of the rest of his force, and within striking range of my chariots.

For the remainder of the game, three chariots from my high PIP command delayed and distracted his mid PIP command on my right flank.  He was never able to bring the rest of his troops up to support his spear. In the center, we pushed back and forth until I killed off some knights and held my advantage. On my left flank, I outflanked and destroyed him.

Eventually I broke his C-in-C command in the center, after suffering a loss of 6 elements.  The final score was 88-12 in my favor.  My first win in tournament BBDBA!

Mike’s Early Crusaders are run down by Brian’s Hittites.

This game reaffirmed my faith in well-supported spears against knights.  Brian learned from his mistake of deploying his knights against my spears, and in the second game he crushed Mike by deploying his spears against Mike’s knights. 

This also provided a great example of Economy of Force.  Holding off 10 of Brian’s elements with only 3 of mine made a huge difference.  Early on, I was afraid I made a mistake by placing both roads, because they ended up providing Brian with as much mobility as they provided me.  Luckily, facing my chariots left him without enough PIPs for the rest of his force to advance.

Game 2: Medieval Swedish

John Lawitzke with Medieval Scandinavians (Sweden).

Ugh, what a nightmare.  I totally screwed this one up. 

John Lawitzke defended with his Medieval Scandinavians (IV/54c): blades and bows galore.  As in his first game against Mike, he placed a fortress of maximum sized forest and marsh in front of a waterway.

Clearly he wanted to sit inside the fortress and not outside it, so I made the only good decision all game by choosing to place the waterway at my rear.  He placed his camp centrally, and I deployed mine on my far right flank so I could deploy at least part of my force in front of the bad going.

After he deployed centrally, I started screwing up.  First of all, I didn’t deploy a strong force against his C-in-C command, but instead virtually ignored it.  Second of all, I spent way too much effort attempting to prevent a littoral landing.  I could’ve lost both camps on the first few turns, but since his army was so slow I should’ve had plenty of time to recapture them before he hit me.  Instead, I bottled up my troops and made it impossible to maneuver.

When we first met in combat, it didn’t look like a completely lost cause until after I rolled the dice.  I had some advantageous combats, but they all failed; this turned my disadvantageous combats into epic fails, and I lost several elements.  After that, I never had a combat that was in my favor for the rest of the game.

He quickly crushed the Mitanni on my right flank, and then demoralized my C-in-C command.  By the end of the game I was cheering when I simply caused a recoil.  He beat me 100-0.  Doh!

Game 3: Antigonids

Scott Ludwig with Asiatic Early Successors (II/16a).

In the third game, I defended against Scott Ludwig’s Early Asiatic Successors: Antigonos (II/16a).  My terrain placement was intended to encourage him to choose his side of the table, and to anchor his pikes on the woods on his baseline.  It worked.  The hill on my left was steep and on the right it was gentle.

I used the same symmetric deployment as in the first game, but with a single rank of spears where I assumed his pikes would be.  After he deployed where I hoped he would, I placed my Mitanni where they could play on the steep hill and restrict his options on that flank.

Scott’s command split was pretty severe.  He had 18xPk (C-in-C) and 1xLH in his low PIP command.  This is just enough PIPs to walk forward in a straight line, but it provided no room for maneuver.  The key to my survival was clearly based in not letting him poke me with his long pointy sticks.  On my right flank, his mid PIP command had 6xPs, 1xLH(Gen) in the woods.  On my left was all of his mounted in a high PIP attack wing.

He advanced his pike line with his psiloi in support on my right flank.  There was a mistake in there somewhere, but I’m not sure what the better answer would have been.  The three chariots on my right flank killed off the entire psiloi command before starting to outflank his pikes.

In the center, I really didn’t want to face his pikes.  I advanced as far as necessary to gain a hill advantage, and then sent my psiloi into “pain in the ass” mode.  They played between the lines, forcing him to shift sideways to align with my group of psiloi, and then preventing him from advancing more than 5-10mm at a time before contacting another psiloi unless he broke formation.  His troops were well trained and stayed in line, but it was virtually impossible for him to gain ground.  His 1-2 PIPs per turn were dedicated to fending off my chariot attack on his pike’s flank.

My left flank was most interesting, tactically.  I had superior numbers and terrain advantage; he had superior combat factors.  It wasn’t clear whether I’d be able to turn his flank on my right before he gained an advantage on my left.

After the death of Scott’s high PIP general.

He broke through my line with his elephants, demoralized my low PIP command, and started killing spears in my high PIP command.  In the end, I won with a bit of a Deus Ex Dice: I set up an advantageous combat against his high PIP command’s general and killed him.  With his low PIP command completely destroyed and his high PIP command demoralized, and almost no PIPs available to advance his pike line, he conceded.  He’d have been hard pressed to keep his three elephants on the board, since they were in 2 groups and cost 3 PIPs per group to avoid retreat.  In the end, I won 78-22.

This game was another great example of economy of force, but I was able to make a strong offensive strike against his psiloi since my light chariots quick kill them.  He might have been better off rotating his pike line on the bad going, letting him keep some of his psiloi in the woods.

I was really happy with my terrain placement.  It was minimal enough to look harmless, but provided exactly the function I wanted it to.  In some games my plan would be too obvious and therefore easy to ignore.  However, it’s still sometimes a good tradeoff to give the enemy the terrain they’re looking for in exchange for terrain you’re looking for. The alternative is no one getting the terrain they want, which may be just as good.

Summary

In the end, I came in 5th place out of 10 with 166 points.  Mike won a game as well, in the third round and his third game of BBDBA ever.  I didn’t even have to exercise my “bring a new player so you’ll have someone to beat” option.

This whole “BBDBA singles” thing has a lot more of the feel of a DBA event than a BBDBA doubles event.  In the end, it’s still DBA and I enjoy DBA.  Mike wasn’t sure whether he’d like the longer game length of BBDBA, especially when you’re losing, but he had a good time and continues to have enthusiasm for DBA.

Hittites with Mitanni ally are a bit more interesting than I expected, compared to Hittites in a single army.  If I were playing triple Hittites, I’d definitely prefer the later Hittites with heavy chariots.

The Mitanni are a very useful ally for several reasons.  Their combination of bad going and chariots is a good mix when facing a mounted command near bad going.  I also liked the PIP distribution with this ally.  I never felt like I was PIP screwed even when I was rolling low, and I really enjoyed the fact that my low PIP command typically had more PIPs than a triple army’s low PIP command.

Thanks for the great event, I hope to be back for more DBA in the future!

Greek Shields

I won an auction for a painted 25mm DBA Hoplite Greek army at Fall-In.  Hey, it was for the kids!  I’m not sure if I’ll play 25mm DBA, but I can use it for HOTT as well.

I rebased the army and painted shield designs.  The rest of the paint job is nothing to write home about, but here are the shield patterns I painted.  Two shields have decals, as labelled below; I painted the rest.

The leftmost two are decals, the rest I painted.

More Indians

In order to morph my Hindu Indian III/10c: Other army into Hindu Indian III/10b: Rajput, I needed at least one knight and an extra blade.  We also needed a LH general for the Mountain Indians at Cold Wars.  So, I painted some more Indians.

Essex Rajput Knights

Here is the Rajput knight.  These are Essex figures from their Moghul Indian range.  They match some of the cavalry figures from my existing Hindu Indian army, except they have armored horses.  I used a bit more interesting colors than on the rest of the Hindu Indians, which is probably a bit more accurate.

Indian Blades: Outpost and Museum miniatures

Since I needed one more element of blade, I decided to paint all of them.  This allows me to morph my Hindu Indians into Tamil Indians II/42b, and gives me a head start on a double Hindu/Tamil army.  Most of these figures are from the Outpost Tamil/Hindu Indian line.  The sculpting is detailed, but not very deep.  There are 3-4 different poses, all with a sword and a small buckler.

The club-wielding half giants with bad hair are from Museum Miniatures.  I like most of Museum’s Indian figures, but these guys are just ugly.  The sculpting is adequate with deepset features, but the single pose is pretty bad.  They’re taller than the Outpost figures, as well as some of the other Museum Indians.

Museum Indian Light Horse general

The Light Horse general is also from Museum Miniatures, and was a part of their Mountain Indian army pack.  These light cavalry figures have only a single pose, and like all Museum cavalry I’ve seen, they’re cast in a single piece.  These aren’t my favorite figures from the Indian line; I much prefer their bow and spear infantry.

The army pack didn’t come with any way to distinguish the General stand, so I painted the horses white.  I’ve started painting white horses by starting with grey and bringing the highlights up towards “almost white.”  It gives a bit of a greyish look, but I like it better than the results I get by washing a white horse.

To finish a second Hindu/Tamil Indian army, I now need to paint a bunch of bowmen, some elephants, and some cavalry.  I should probably paint some more knights for the Rajput as well, eventually.  I find that Indian infantry goes really quickly, so I’ve already prepared the bowmen for painting.  I don’t have any deadline or goals in mind for the Indians, so I’ll just fit them in when I have time and motivation.