Hittite Camp

Here is a camp I built for my Hittites.  It is based on images in the Osprey book Hittite Fortifications, c. 1650-700BC.

The wall is built in two sections, each of which is the maximum size allowed for a camp: 40mm x 120mm.  The left section with the gate will be my camp for a single Hittite army, and I’ll add the extra wall section when playing BBDBA with a Mitanni ally.

The walls and towers are constructed of styrofoam cut on the bandsaw.  The crenellations are made of mat board, and the exposed beams are short pieces of balsa.  I brushed on water based primer and varnish, since spray paint and superglue destroy foam.  

At this point I’m officially finished with any modelling required before After Tax Day BBDBA.

Cold Wars 2011: Saturday

Saturday had two big events with a free slot for shopping.

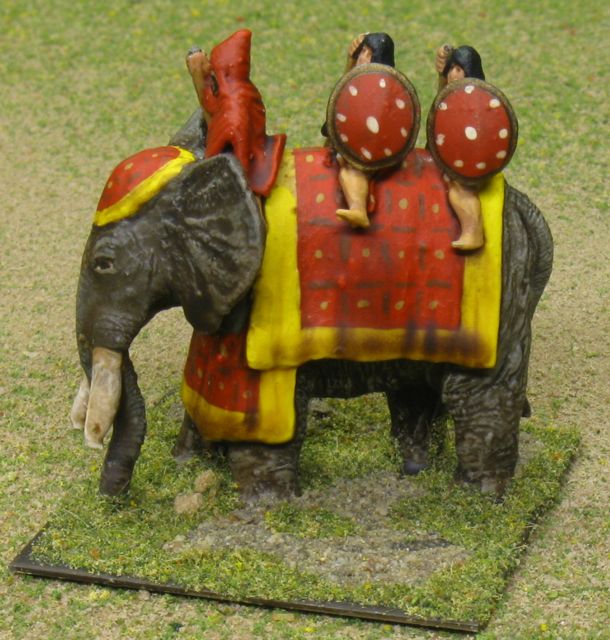
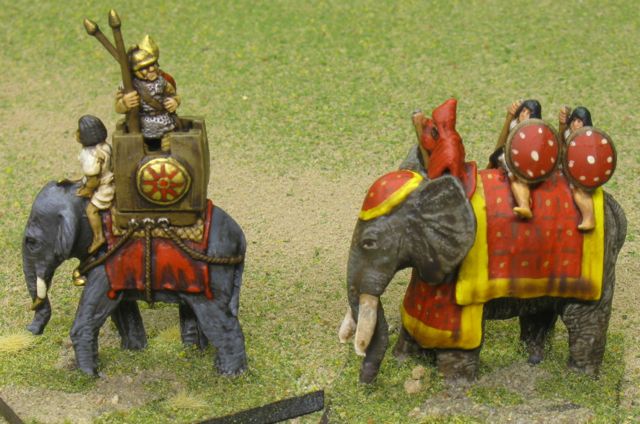
Luckily, the “good old days” of playing 4 new rule sets and coming home with 4 new armies to paint are long gone!  I managed to buy relatively little this time around. Besides picking up some random stuff at the flea market and more bases from Gale Force 9, I also got a 15mm Hordes of the Things army from Splintered Light.  They have really beautiful figures.  I chose a mixed Undead force, with dwarves, humans, centaurs, goat men, and even an undead elephant.

Hordes of the Things: Good vs. Evil

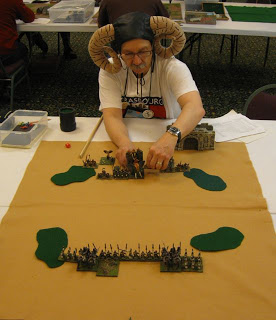
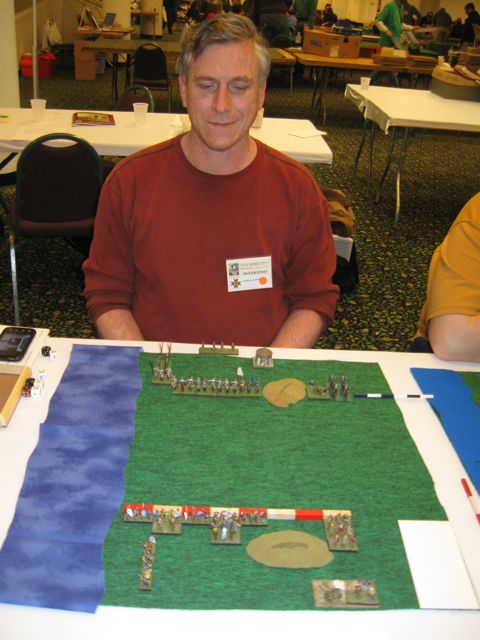
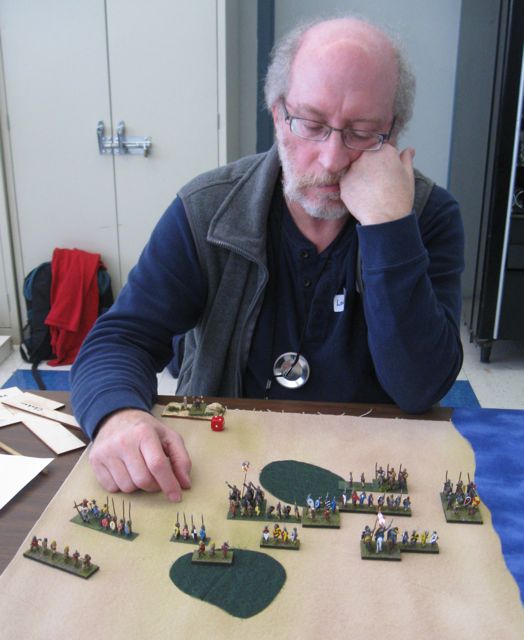
The Diceman. Some people call him… Tim.

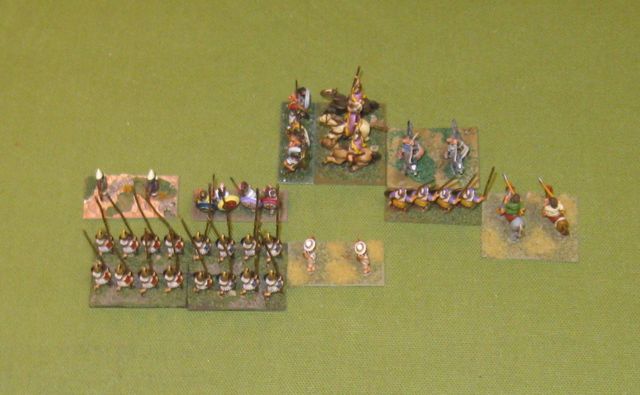
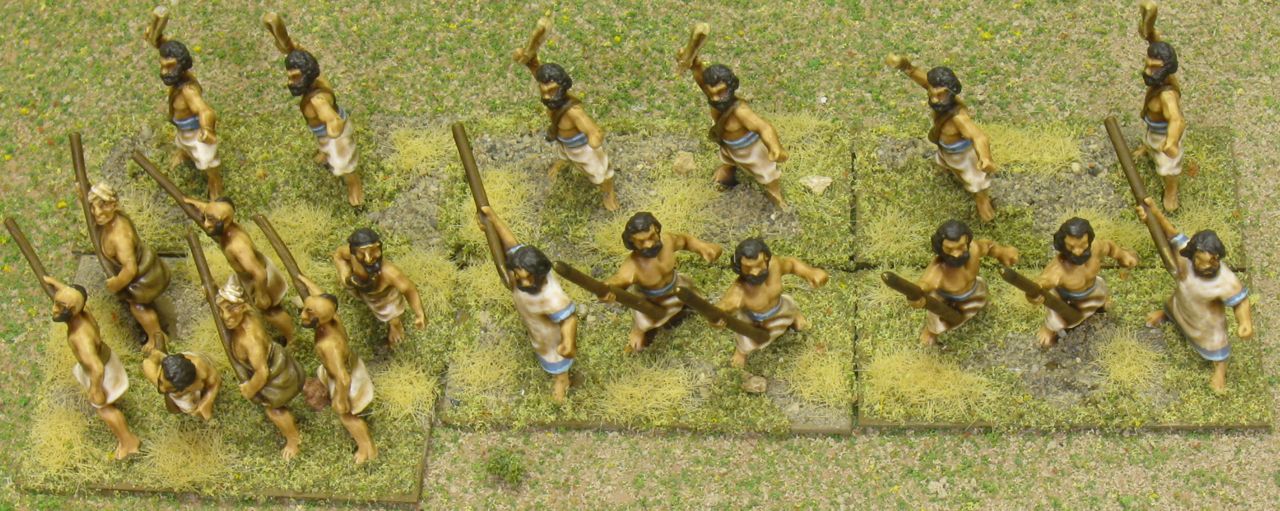
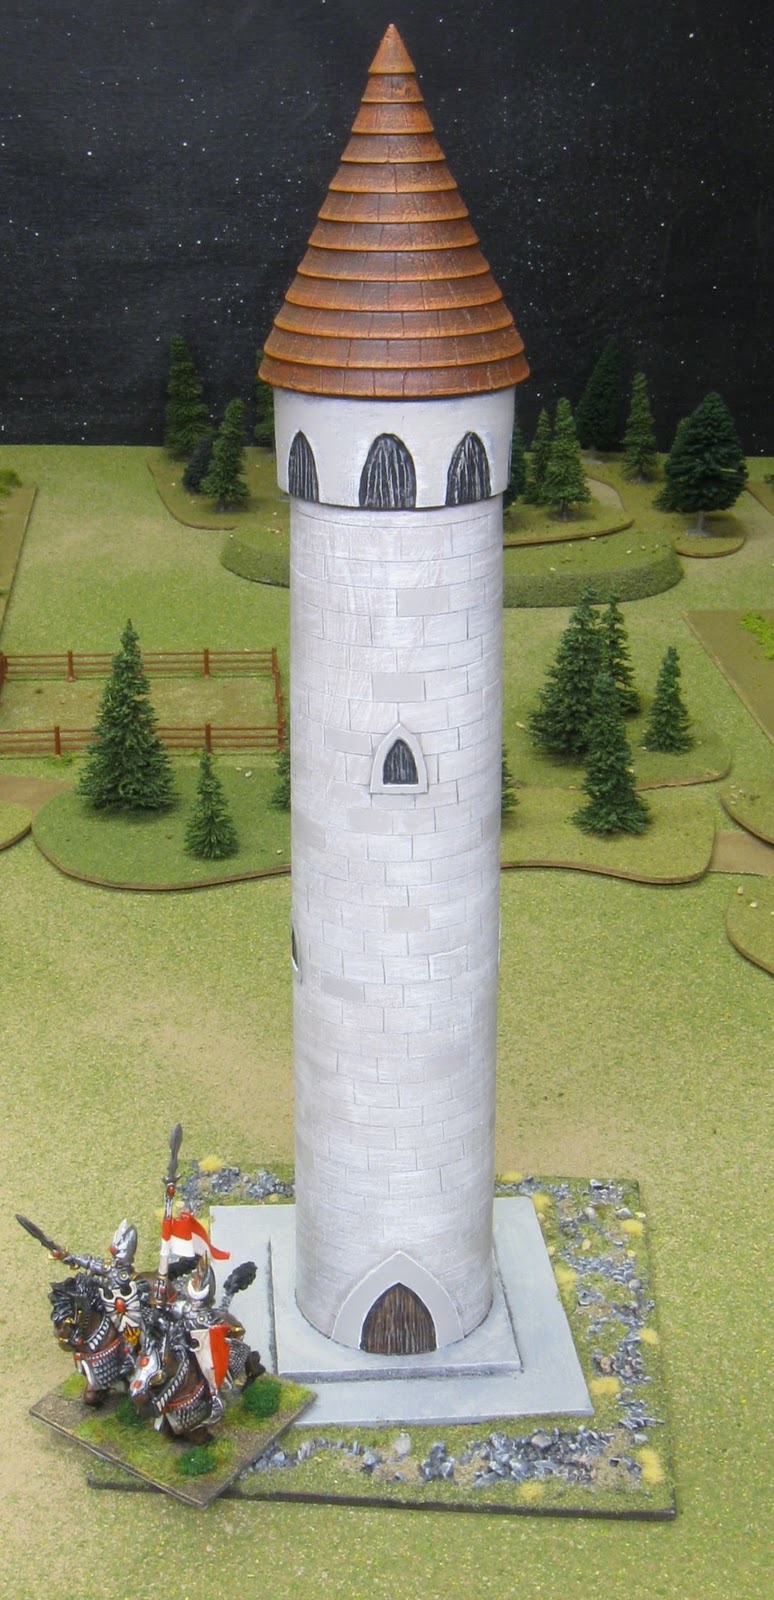
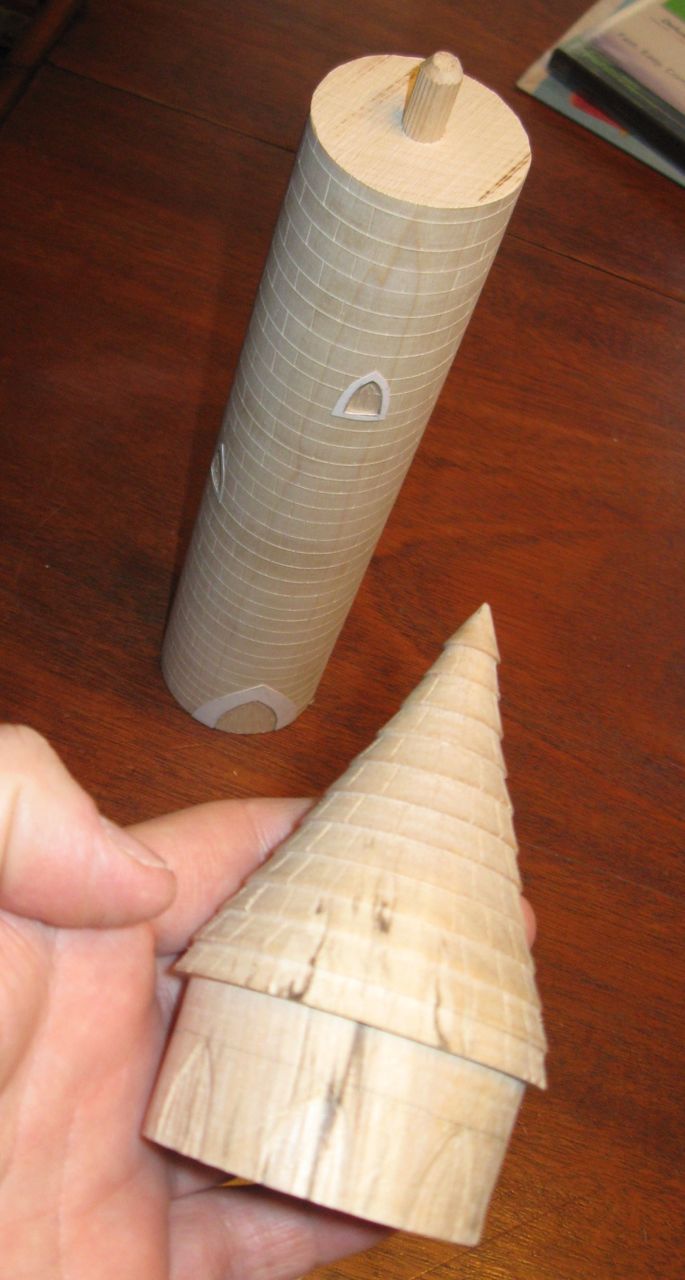
The morning event was Hordes of the Things in 25mm.  I brought my Elves of the Offwhite Tower, but I never defended; so I never got to place my “vaguely flesh colored” tower, as David Kuijt described it.  My army was comprised of 3xSp (gen), 2xBd, 3xSh, 2xKn, 1xMg.

In the first round, I faced Rich Baier’s Lord of the Rings Orc army, and lost.  Next, I faced Frank Popecki’s Dark Elves, and lost.  Finally, I faced David Schlanger’s Haradrim, and lost.

I like Hordes of the Things, but so far in a very different way than DBA.  It’s a very similar game to DBA from a rules perspective, but the different element types require very different strategies than DBA.  HotT seems like a game I want to play mostly for the fun and cinema of it, while DBA feels like a game I want to get better at.

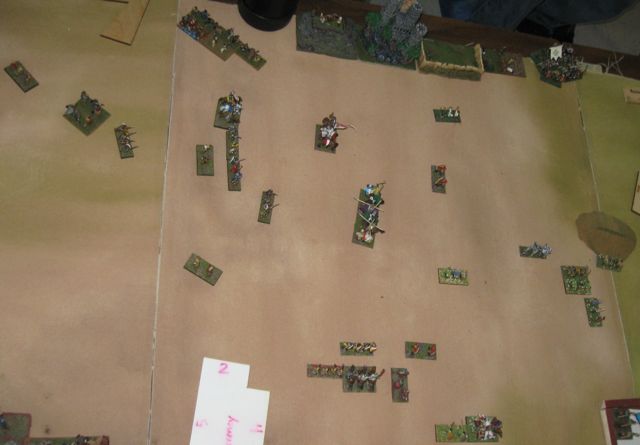
Campaign Theme: 4th War of the Diadachoi

For me, there are two main events that bookend every convention: BBDBA doubles at the beginning, and the Two Davids campaign event at the end. This time around, the campaign included Alexander’s successors and some outlying barbarians, during the 4th war of succession.

This was an interesting mix of armies. The successors all had heavy pike armies, but most of the other armies had light foot or spears. In many theme campaigns, the very different army compositions are typically not close to each other on the map, so you usually face a comparable enemy. On this map, the light armies were all over the place, so any Pike army that wanted an easier target could probably find one.

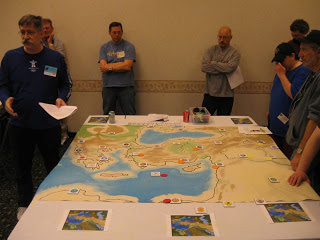
Successor campaign map

I played Lysimachid (II/17): 1x3Kn (Gen), 1x2LH, 4x4Pk, 4x3Ax, 1x2Ps, 1x4Sp. I hadn’t tried a 4 pike army before, and I really enjoyed this one; even against armies with 6 pikes. I initially wanted to play Kassandros, who has an elephant instead of a spear, but I think I’d prefer this army to have more PIPs available to maneuver the light foot, instead of dragging an elephant around with me.

In the first round, I played against Alex Bostwick’s Bithynians: mostly auxilia.  He defended, and I beat him in a fairly straightforward, unmemorable battle.
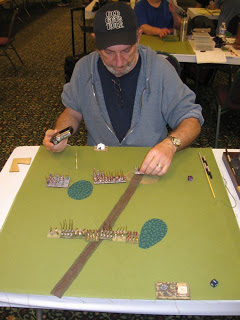
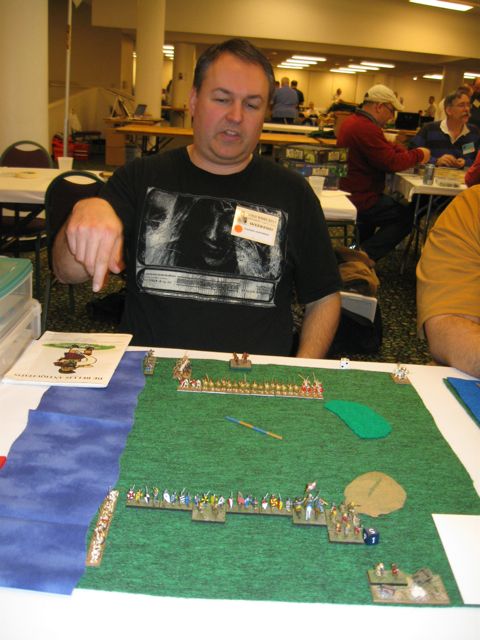
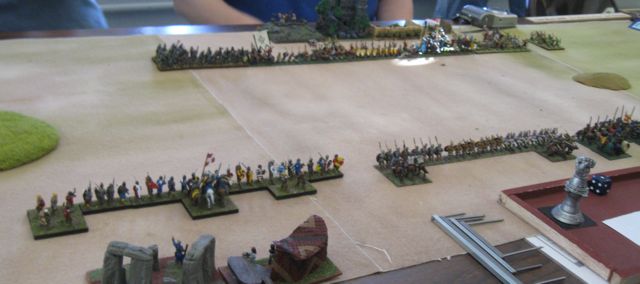
Frank

In the next round, I faced Frank Popecki with Antigonids: an elephant and 6 pikes.  He attacked, and sent his elephant with 3 other elements around the far side of a wood.  I decided to respond by sending a larger portion of my force to that side, to try to isolate them from their general and kill them when they were out of command.

The strategy was working fairly well, until he took a risk and killed off one of my Auxilia in the woods.  After that it was a very intricate, tactical game, but he had the upper hand and eventually won.
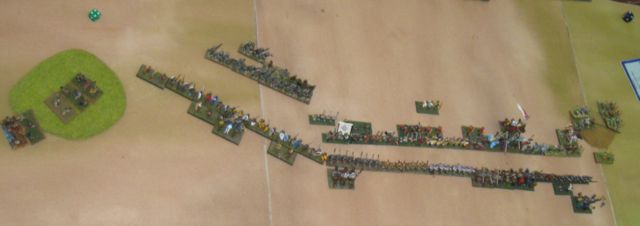
DOOM!  But I won…

In the third round, I faced Alex Halkiadakis and his Aiotolian League: a few spears and a lot of psiloi.  This was going fairly well, as I punched a hole in his spear with my knight general and exploited the gap.  He had heavy losses, and I could win by killing only one more element, so I took a risk.  I sent my spear against his light horse with an overlap on one side, and used my general to flank him on the other side.  This left me without a recoil, so I’d die if I lost the battle… but since it was 4-0, that was only possible if we rolled a 6-1 split in his favor.

We rolled a 6-2, and the combat was tied so neither of us moved.  Alex sent his general against the rear of mine, who turned to face.  It was his 5 to my 4, and if I recoiled I died.  Things weren’t looking good, and then… another tie!

On my bound, I brought up my psiloi to compensate for the missing overlap, and closed the door with my light horse so I would actually kill his element, and got rid of his light horse before my general recoiled (but lived).  That was a close battle that came down to only a few rolls.

Next, I faced Alex Bostwick again, with him attacking this time.  I killed a psiloi early, which was lucky; because in the next combat I sent my Knight general against his light horse with one overlap: 5-1.  Again, I had a huge chance of winning, but I’d die if I lost… but I’d only lose on a 6-1 split in his favor.  In retrospect, since this was not a game winning move, I probably should’ve been more careful; but I wouldn’t be saying that unless we rolled 6-1 and I lost, so obviously that’s exactly what happened.

The game wasn’t over yet, because he hadn’t killed more elements than I had.  I held on for a few turns through even more locked combats that I would’ve preferred to win, but with my moves requiring 2 pips after losing my general, it didn’t take long for him to take out one more element and win.

In the final round, I faced another player whose name I forget, and who wasn’t originally signed up for the event so I can’t look it up, either… sorry about that 🙂

It was another 6 pike army with an elephant, aren’t they all?  I defended and deployed 3 pieces of bad going diagonally across the board and a road down the center.  There was enough space for my 4 pike between the bad going, but not his 6.  My plan was to catch his flank of his pike as he tried to push through the bad going, or crush him in the bad going if he tried to take the central hill.

Early on, things were going well, but eventually he started catching up.  We ended up in another very tricky tactical battle with elements all over the place.  He killed a fourth element before I did, and took victory at 4-3.

The event was a lot of fun, as usual.

The main mistakes I know I made in this event were taking some small risks of losing instantly, and taking advantage of short-term tactical benefits while failing to maintain coherent battle line.  I noticed several times when I was broken into too many groups.  I know the decisions that brought me there made sense at the time: I was intending to win with combat odds that were in my favor, not to lose and end up spread all over the place.

I enjoyed playing the Lysimachid army, but I have mixed feelings about it overall.  I guess I’m not inspired by it, even though it’s quite fun to play.  I think it worked well in this campaign event: if I attacked I could choose an enemy who had more light foot and would likely place terrain; but if I was attacked it was most likely by a 6xPk army so I could deploy bad going and gain an advantage. 

I may not play this army again soon, but I think a triple Lysimachid or triple Kassandros army might be a better alternative than double Alexander with Mountain Indians.

It was another great convention!  Now I’m looking forward to Post Tax Day BBDBA in Columbus, Stoogecon here in town, and Historicon.

Cold Wars 2011: Friday

I didn’t take enough notes to post details of everything I did at Cold Wars, so a summary post will have to do.

We stayed at the Lancaster Host again… that place is getting to be a bit of a dump.  We got a pretty crummy room: it reeked of smoke and had clogged drains.  Fortunately we really only slept there anyway so it wasn’t a big deal.  On the other hand, food options are better than they used to be.  There are burritos available for lunch, and the “family restaurant” next door turned into a Japanese/sushi restaurant.  They also still have the nightly pig roast, if you’re into that sort of thing.

JM and I arrived a bit after 8pm on Thursday, so we probably could’ve played the Dismounting Knight event.  Instead, we decided to get in some more games of Hordes of the Things, since we had hardly ever played and had an event on Saturday that sort of expected us to know most of the rules.

BBDBA Doubles

Friday’s main event was BBDBA Doubles.  JM and I took Alexandrian Imperial (II/15) with a Mountain Indian Ally (II/2).  This was supposed to give us good punch in Alex’s mounted wing, a defensive wall of pike, and lots of bad going troops in the ally.  It’s a high aggression army, so we expected to attack every game, and weren’t disappointed.  Although we considered many of the enemies we might face, some of our opponents gave us a bit of a surprise.

Stephen Aspenberg and Doug Austin

In the first game, we faced Doug Austin and Stephen Aspenberg, playing Bosporans and Sarmatians. They had a lot of knights, with some light troops and artillery in the center.  We deployed the mountain Indians on the far left flank to outflank them, and Alexander on our right.  Unfortunately my Mountain Indians were crushed by playing with knights they should’ve stayed away from, and our pikes were too far off our right flank to be as useful as we would prefer.  In the end, they beat us with two commands demoralized after taking 50% losses to the army; but our C-in-C command had no casualties; mostly because they took so long to get into contact with the enemy.

Alex and Jonathan Bostwick

Next we faced the Bostwicks, who had a ton of cavalry with some light foot in the center.  Since they didn’t have anything affected by double ranked pikes, we thinned out our line and faced them on a wide frontage.  My Mountain Indians had relatively even odds against their Cavalry, but they were more able to take advantage of holes in our line, so my right flank was the first to fall.  On the left, we fared much better: JM demoralized their C-in-C command.  Unfortunately, we had more losses than they did, so we didn’t win outright.  Instead, we lost the battle of attrition as they killed us faster than we could kill them.

I think our setup worked better in this game, and I’m not sure how we could’ve improved things very much from a strategic perspective.  One possibility would’ve been to place our Mountain Indians in the center, and hope they responded by deploying their Cavalry opposite us.  This would’ve been essentially the same matchups we had, except our pike would have been able to gang up on them… eventually, if they ever made it into contact with the enemy.

In the third round, the only teams we were likely to face were both from Pittsburgh and were both playing Ptolemaics.  We ended up facing Larry and Rich instead of Tim and Lisa.

The Stooges: Rich Baier and Larry Chaban

Since Saturday’s campaign theme was a Successor event, we did a bit more thinking than average about how to face another Pike army.  The biggest questions we had were: what do you do with the Mountain Indians, and how can you break their C-in-C command when it’s built entirely out of Pikes?  Our typical strategy was to try to break the C-in-C command, but against pikes we might need to settle for killing everything else; but we needed to keep their pike at bay while we did it.  The answer we came up with was to send the Mountain Indians against their pikes, while facing the rest of their army with our remaining two commands.

The Mountain Indians have 7 elements that can’t be harmed by pikes unless they step out of formation and make themselves vulnerable, so that’s relatively safe. Our light horse general can also quick kill their pikes relatively easily… in theory.   We did relatively well, but our main mistake was to send too much of our pike against their pike instead of facing their lighter troops.  Our other big mistake was thinking the center of their line was made up of auxilia, when it was in fact blades.  They concentrated two commands against our C-in-C command, and crushed us relatively quickly.

Littoral Landing Lovers

After BBDBA Doubles was a themed event that only allowed Littoral armies.  In the first round, I faced Larry and he finally got his payback against my as-yet-unbeaten Leidang (III/40d).  This time, I took 1xKn, 5xBd, 3xAx, 1xPs, 1xSp, 1xBw.  I did a landing and had some initial success, until he killed my bow with his knight and rolled me up.

Doug Mudd

Next, I faced Doug Mudd.  The game went so quickly, I don’t remember his army.  He attacked, and did a landing behind my line.  Using a first turn psiloi double move, he sent a psiloi against my Knight general, which turned to face.  The combat was his 2 to my 4 with me quick killing him, but he rolled high and recoiled my general into my own troops, winning the game 1g-0 before I even had a turn.  Oops!  We had a lot of free time, considering some players weren’t even done deploying yet, so we played an unofficial rematch (shown here), and I beat him in this second game.  I don’t think either of us did a landing.

Stephen Aspenberg

In the final round, I faced Stephen Aspenberg’s Athenians.  I decided that since this was a Littoral Landing event, I’d better do another landing.  I sent 2 elements against his flank, and he sent 3 against mine.  My elements were able to kill 2 of his, while I held off his landing with only 2 of mine.  When we met in the middle, my blades beat his spears and I won.

This leaves my Leidang with a 7-2 record, which I’m only keeping track of because it’s one of the only armies I’ve managed to win consistently with.

Midnight Madness

I don’t remember a lot about Midnight Madness (and don’t have any pictures), but there wasn’t much to remember.  In the first round, I played my Hittite Empire (I/24b) against Jonathan Bostwick’s Minoan & Mycenaean (I/18).  I won, but that’s all I remember… though I have a feeling neither of us remembered to place our camp.  In the second round, I faced Later Mycenaeans and Trojan War (I/26) and lost.

DBA Army I/19: Mitanni

DBA army I/19: Mitanni, from an Essex army pack

This is my recently completed Mitanni (I/19) DBA army.  All figures are Essex, from their prebuilt army pack.

For this army, I painted quickly instead of looking for perfect results.  The people (infantry and chariot riders) are all flat painted and washed with Army Painter Strong Tone.  When I got to the horses and chariots, I decided not to go with “the dip” and instead used Devlan Mud in some areas and painted highlights elsewhere. 

Mitanni chariotry

Mitanni have 6 light chariots, the most available in any DBA army.  These models don’t match the typical shape of Mitanni chariots available from other manufacturers, but they’re close enough for me. Mitanni was a loose coalition of a variety of different peoples, so they probably had a variety of chariots available as well.

As usual, I found building and painting the chariots to be fiddly and annoying, but I like the way they turned out once I finished.  The horses are a bit bright for this time period, and the colors are based on guessing and assumption more than actual evidence. 

I paint the crew, assembled chariot, and horses separately, and then do final assembly.  I stick the chariots to nail heads to hold them during painting.  This time I was careful to angle the chariots when I mounted them, so they can all line up front-to-back without bumping each other.  The general gets blue on his horses, and points at things instead of shooting them. 

Mitanni infantry

As you can see here, the slingers in the back row are my “stumpy brigade.”  Two of them lost a hand, most likely by being run over by a chariot: I don’t think they had threshing machines in the 14th century BCE.  I was surprised to see that Essex made you assemble the slingers: the sling was separate and had to be glued into place.  Annoying!  I’m also not that pleased with the figure selection in the horde.  I know that product code has more poses, because I used them with my Hittites; but I got a lousy mix, with 3 of one particularly distinctive looking figure.

This army will be a matched pair and an ally to my Hittites.  I purposefully put them on different bases (thin metal instead of thicker wood) than the Hittites, so they will be easy to distinguish on the battlefield despite the similar color schemes (offwhite).

Battle at the Crossroads: 2011

Saturday was Battle at the Crossroads in Cambridge, OH.  Rich, Larry, JM, and I drove out to participate in the DBA pyramid format event.

This year’s theme was Vikings and their enemies, so I brought my Leidang army. The composition I used was: 1xKn (gen), 5xBd, 1xSp, 3xAx, 2xPs.

There were several special rules in effect to keep things competitive for the Vikings.  I’ll list them there for future reference, and to provide context for the tactical decisions shown in pictures below:

  • Knights other than generals don’t quick kill blades
  • Blades fight at +4/+3
  • Viking blades receive rear support by psiloi against foot (as well as mounted)
  • Vikings always attack, Leidang always defends
Larry contemplates his fate.

I beat Larry a few weeks ago, so he wanted a grudge match. He wrote “same year as Alan” as his army’s year selection, and we were paired up in the first round.  He brought East Frankish: III/52, with plenty of emasculated knights.

I had a plan for the first round, when I knew I’d be defending against a non-Viking.  I set up two medium-small central woods and the required waterway.  The intent of the terrain was to divide the enemy forces, while maintaining superiority in the bad going.

The biggest flaw in my plan was the possibility of a littoral landing.  I hadn’t considered whether to land, or what to do with my landing force if I did.  Nevertheless, I held back 2xBd and 1xPs and deployed everything else from the woods to the water.

On the first turn, I brought on my landing force somewhat forward, and angled toward the center of the board.  Here, they got in my way and inhibited my movement; but, they also restricted Larry’s ability to advance effectively on that flank.  They required many pips to unscrew completely, but in the mean time they weren’t a big liability: they mainly delayed any action on that side of the board.

Larry sent his horde and a spear around the other flank, and I countered with 2 Auxilia.  In the end, I killed a bunch of knights on my right flank, and he killed my auxilia on my left flank.  Result: 4-2, I beat Larry again.  Overall, the battle was a confused mess; but I find that I often prefer a confused mess instead of two straight lines walking straight forward.

Dan Joyce’s Sub-Roman Brits; Mike Demana’s Vikings

In the second round, we faced Dan Joyce, C-in-C playing Sub-Roman British; and Mike Demana playing Vikings. We placed woods on the sides of the board to narrow it, and a steep hill in the center.  I deployed on the narrower side, and as expected, Mike’s Vikings ended up opposite me.  Larry deployed against Dan’s force on the other side.

Pulling it out of the fire

Larry made me roll his PIP die so he could blame me for the bad rolls.  He got his bad rolls, and his command was the first to break.  Things were looking bad, and we were about to lose.  Eventually I pushed Mike’s Vikings back far enough to take the nearest camp, which happened to be the C-in-C’s camp on the wrong side of the board.  The two element loss was enough to break the command, and we won.

This was an interesting, stressful game. It felt like I was running out of time, but only because I was anxious to see how things turned out in the next few turns.

The Final Round

In the final round we played a 4-on-4 game against Scott Ludwig’s Early Germans (C-in-C), Andy Swingle’s Vikings, Rich Baier’s Leidang/Viking (I forget which), and Dave Welch’s Welsh.

Initial deployment; more Vikings are off our left flank

We deployed on one side instead of in the center, which was a bit of a mistake, in retrospect.  Mike’s Vikings were on our far left flank by the board edge.  I came next, and Dan Joyce’s British were at right flank of our initial deployment.

In response, they deployed more centrally, and narrower.  They ignored the vikings on our far left flank, so in order to include them in the battle we’d have to walk slowly so they could catch up.  Larry, with the most mobile force, deployed on the right flank at the end of our line.

A better initial deployment might have been to deploy centrally, and place Larry’s mobile command last on whichever flank was more vulnerable.  However, the enemy still would’ve been able to  ignore our slower flank, so we probably wouldn’t have gained anything.

Just before we made contact

In the early game, I wheeled to the right and Mike sent his Vikings over the hill, while the rest of our army stood still.  Eventually we clashed.  Dan and Larry faced 3 commands against their 2, and suffered for it.  Also, Larry could have as many 1’s as he wanted on his PIP die, which I was still rolling.

Hilarity ensues; the end is almost nigh

Larry’s command broke first, and then Dan’s. On my side of the board we had superiority, so we broke Andy’s command and then Rich’s.  Neither C-in-C command was close to breaking, but we were both losing a lot of elements. 

The End.  This used to be straight battle lines?

In the last few turns, we were each a few elements away from the 50% losses required to lose.  Larry’s command was completely destroyed or fled off the board, and Dan was hanging on for dear life and winning some tough combats more often than statistics would suggest.  It was a battle of attrition and a race to the bottom.  My general ran rampant in the center of my flank, killing demoralized elements as quickly as possible to increase our death count, but Mike killed the decisive element: Andy’s blade general.

It felt like we lost this game several times, but “it’s not over until the fat Viking sings” and it was a good thing we stayed until the credits rolled.

Our side won, and I ended up taking first place for overall points, probably because of Valdemar the Victorious’ killing spree in the last game. Quick killing demoralized blades with your knight general is the kind of fun you really shouldn’t indulge in very often, or you might get spoiled.

Thanks to all of my allies and opponents for the wonderful games, and special thanks to the organizers for staging this event.  I hope to be back next year!

Viking Forge Elephant: MCC-14

Viking Forge Carthaginian Elephant: MCC-14

I did not paint this Viking Forge Carthaginian elephant, but I did add details to the blanket and apply a dip.  It’s a part of my Later Carthaginian beater army that I bought at Historicon last year.  I’m showing it here as a part of my elephant comparisons.

I have two of these elephants and they have a driver and two crew each.  The spears have broken off, they should be taller.  The crew are separate figures, but I can’t tell how the elephant itself was cast.  The head must be separate, judging by its overhanging ears, but I’m not sure if the body is one or two pieces.

These are by far the largest elephants I have.  They’re taller, fatter, and longer than Essex models, and the ears are impressively large.  The pose is quite static, but it gives the impression that the beast is so large that it can’t make any sudden, drastic motions.

Left: Black Hat CA13; Right: Viking Forge MCC-14

The sculpting of the elephant itself is excellent, but the crew are pudgy and unimpressive, without a lot of detail.  The driver is distinctly KKK-like, and I don’t know what this is intended to represent.

The second picture shows a Black Hat Carthaginian elephant on the left, and Viking Forge on the right.  The Black Hat elephant is shorter, but the crew is much taller and thinner.  The proportions are completely different.

I would not likely buy any more of these Viking Forge elephants, but only because they’re out of scale with everything else I have, and the crew is pretty terrible.

Black Hat Elephant: CA13

Here are two Black Hat Carthaginian elephants, product code CA13: “Carthaginian Elephant.” The elephant comes with one driver and two different crew figures.

These are interesting models.  The sculpting is quite good, and the end result is completely satisfying.  However, I have several complaints about my overall experience when building and painting these.  These concerns are likely my problem more than Black Hat’s.

The most noticeable difference between this elephant and the rest I’ve built is how they are assembled.  The elephant, including its head and the driver, is sculpted in a single piece; the box on the back and crew are separate castings.  Black Hat did a wonderful job maintaining a high level of detail with a single casting.

You’d think that assembly of a two piece model would be easier than elephants with two body halves and a head, with an optional howdah.  Nope!  Unfortunately, the boxes for their backs were filled with flash that is difficult to trim out, and then the box doesn’t fit on the back of the elephant without a lot of trimming.

The shields molded on the side of the elephant are a bit oval, I’m not sure why.

The crew figures are also quite odd, though it doesn’t show at all on the final model.  From the waist down, they look like they’ve been packed in a box on the back of an elephant for a year of campaigning… so I guess that makes them accurate?  The crew are flattened from the waist down.  Detail of cloth and armor is still there, but it’s all squashed.  I’m sure this is to allow the figures to fit in the box, and it’s not visible once they’re in there, but it looks weird before you assemble everything.

Left: Essex Indian elephant; Right: Black Hat African

While I was painting this elephant, it felt miniscule, like a pigmy compared to other elephants I’ve painted.  However, once I actually compared it to other elephants, it doesn’t seem that small.  It’s definitely smaller than an Essex elephant, but it’s not as small as the Museum or Chariot models. It’s tall and skinny, but not as long as the Museum elephant.  The ears are tiny.

I’m not very happy with the proportions of the elephant compared to its crew.  The crew is bulky and the box looks huge on its back.  I think this adds to the feeling that the elephant looks small.

Chariot Successor Phalangites

Here are some Chariot Miniatures Alexandrian Successor phalangites.  I painted them to have better pikes for my Lysimachid army in the Two Davids Successors campaign at Cold Wars.

Overall, I like the figures quite a bit, and they turned out well with minimal effort due to my cheezing out and using Army Painter dip.  Chariot Miniatures are nicely sculpted with nice deep details that take ink well.  The poses tend to be a bit more static than modern sculptors, but I think this works well for regular heavy infantry.  They’re slim and slightly smaller than Essex figures, but close enough to be compatible.

I have only two minor complaints about these figures.  First, their right arms are too short.  You’d have to go out of your way to notice this if you aren’t painting them, however.  My other complaint is more about the Magister Militum web site than the figures themselves.  These pikemen have beards.  I wanted pikemen without beards.  However, these seem to be the only successor phalangites in the catalog that have beards, and also the only ones that were photographed from the rear on the website.  Doh!

I had trouble resisting the temptation to paint a stand or two as garden gnomes; the beards and hats made it almost irresistable.

The Offwhite Tower

Behold The Offwhite Tower,  impenetrable stronghold of the Pretentious Elves.

After showing off the preview of this tower, I’m not sure I have much useful to say about it.  It’s a Hordes of the Things stronghold, suitable for use with 25mm basing.  As buildings should be, it’s slightly smaller than true 25mm/28mm scale; but it’s also about 14″ tall, so it’ll probably be the tallest thing on the table most of the time.

I turned the tower on the lathe, in two pieces.  Then, I carved shallow areas for the windows, and scribed vertical lines to define the brickwork and shingles.  Finally, I added cardstock details around the lower windows and door.  It’s based on masonite with stones, flock, and static grass.

The Elven general stand was painted by Bob Barnetson and is representative of the army that will defend this Stronghold.

Preview: The Offwhite Tower

It’s been so cold out lately that I haven’t been spraying matte varnish outside because it doesn’t turn out matte.  But, I have been modelling and painting.

Here’s a work-in-progress shot of the Offwhite Tower, stronghold of the Pretentious Elves.  Yeah, I really should’ve chosen Horde instead of Alliance…

I turned this on the lathe in 2 pieces, carved windows, and scribed the brick work.  I added a few details around the windows with cardstock. The tower’s overall height is about 14″.  It looks great with paint on it, but I still have to finish off the base.

This will be the stronghold for my 25mm Hordes of the Things elf army.  Now I just need to cut some felt for 25mm terrain.