The Slippery Slope: Later Achaemenid Persians

On the fanaticus forums, someone asked about building a BBDBA army (a triple DBA army from one army list and its allies) starting with the armies he already had. They just happened to have most of the same armies as I do, so I did some calculating.

If you have all of the Later Achaemenid Persian (II/7) options painted, a Skythian (I/43a) army with all the options painted, and one of the later Hoplite armies (II/5), then you have a great start on a double Persian army with Skythian ally for BBDBA. Reading the DBM lists, you can make a theoretically accurate army by using greek hoplites as mercenary spears, Skythian light horse as allied units within the Persian army, and Cretan archers (use Greek) for the Psiloi. Then
all you need to paint is a few elements of Cavalry and maybe more Psiloi to fill up the BBDBA army.

But… I have all those armies. That means I could do it too. And, I just happened to have a spare pack of Persian cavalry… and so my slide down the slippery slope began.

I painted two cavalry stands and the cavalry general I hadn’t painted previously. Around this same time, I started looking into Basic Impetus and Impetus. To field an Impetus army for the Persians, I’d only need a few more cavalry stands and a bit more Psiloi. So I bought a pack of archers, and painted the rest of my cavalry.

The four stands of cavalry in the rear are Chariot Miniatures (Magister Militum/Navigator Miniatures). The Cavalry general in front is from the Essex DBA army pack. The archers are also Essex figures.

Now… the archers give me more Psiloi than I need. If I use mercenary hoplites from my Greek army for the spear elements, then all I need to make a triple Persian army for BBDBA is another cavalry or chariot general and either scythed chariots or psiloi.

But once I have a BBDBA army for the Persians, who are they going to fight against? Clearly I’ll need to paint a second BBDBA army as an enemy. I chose Alexander the Great (II/12), because apparently I have a driving need to paint 48 more pikemen. Actually, if I paint a triple Alexandrian army, I’ll be able to morph it into about 5 other Alexandrian/Successor armies, and I’ll have enough figures to have some of the successors fight against each other in DBA. It’ll also get me enough figures for a substantial Impetus army.

Now I have both Persians and Alexandrians on order from Magister Militum, to round out the Persian army and triple my Alexandrians. I chose the figure packs myself instead of buying premade DBA armies, so I could tweak some of the options so they’re more useful in other armies.

Preview: Jumonville Glen, part 2 (rules)

As I said in my earlier post, I decided to base the rules for the Jumonville scenario on the Blood and Swash ruleset. However, there were some potential problems I wanted to address, and playtesting revealed some real problems to go along with the theoretical ones. The changes are significant enough that I think it’s safer to call the rules “inspired by” Blood and Swash and not based on them.

Blood and Swash uses a card-based activation system. Each turn, the game master draws one card from a standard deck of cards. If a black card is drawn, each player on one team activates a figure; if it’s red, the other team activates. Actions are moving, fighting, shooting, and “anything else you can think of,” in the basic game. Each character has attributes for its ability to shoot, fight, and so on. To see if your action succeeds, roll a 20 sided die: if it’s less than or equal to your applicable skill, you succeed.

The rules were written for pirate battles in a small, confied space. They emphasize doing creative things with the props available in the room, like rolling barrels of beer at the opponent or pulling the rug out from under their feet. The tight space compared to the number of figures makes the game fast paced and chaotic.

In order to emphasize this interesting chaos, guns are powerful but very slow. Reloading your gun might take 5 or more cards, and you can’t do anything else in the mean time. This might be okay in a bar fight, but in a shooting war it’s incredibly boring. The first change I knew I needed to make was to reduce the reload time; in fact, I got rid of reloading completely in the end.

Another aspect of Blood and Swash is that each player rolls dice to determine his figures’ skills at the start of the game. Players might end up crippled by one bad die roll at the start of the game. In a bar fight, this matters less: you can always punch someone if you’re no good at shooting. But the number of useful skills in a shooting skirmish is lower. I also wanted to reduce the game startup time, so I am predetermining each figure’s skills based on how the people acted in this specific skirmish historically.

Blood and Swash figures have a variable number of hit points, weapons have variable damage, and the skill checks use a “roll to succeed, the opponent rolls to prevent it” mechanic. Since the assortment of weapons is very limited compared to a pirate battle, I simplified this: all figures get 3 hit points, and each hit (shooting or hand-to-hand combat) does one point of damage. I adjusted the skill numbers to take into account the chance of an opponent preventing the action, to reduce the amount of die rolling.

In playtesting, I found what I feared: everyone walks within shooting range, starts shooting, and then there’s no incentive to ever move around. Without a rule to allow moving and shooting in the same action, static defenders get a huge bonus: they can often shoot first and can concentrate their fire on fewer figures within range.

To compensate, I added a new skill: Bravery. Whenever someone shoots at you, charges into combat, or charges into combat at you, you need to make a bravery check. If you fail, you run away (a full move away from the enemy, or at least moving out of line of sight). I also added a “move and shoot” action with a penalty to hit.

This made a huge difference: the game was no longer a static shooting match; instead, people were moving around a lot, like in the Pirate games.

To be fair: this rule system is not based on reality whatsoever. It’s intended to provide a fast, easy, fun, and hectic shooting skirmish.

The Rules: Skirmish at Jumonville Glen

By Alan Ferrency, 2009.

Figures and Skills

This is a skirmish scale miniatures wargame intended for 2 or more players controlling no more than 4 individually based figures each. It is not based on reality whatsoever, it’s just a game.

Players are divided into two teams: Red and Black.

Figures have several skills:

  • Shooting determines how likely the figure is to hit another figure when shooting
  • Fighting is how likely the figure is to hit another figure in hand-to-hand combat
  • Bravery determines how likely the figure is to get scared and run away
  • Save is the figure’s ability to take advantage of cover to avoid being shot

Each figure’s skills have a value from 1 to 20. To make a skill test for a specific skill, roll d20; the test succeeds if the result is less than or equal to the skill being tested.

Terrain and figures are deployed appropriately for the scenario being played. Enemies must start the game outside shooting range (12″) from each other. The game ends when one side has obviously lost (or no one is having fun anymore).

Turn Sequence

Each turn, one card is drawn from the top of a standard deck of playing cards. If it is Red, then all players on the Red team activate one of their figures. If it is Black, then all players on the Black team activate one figure. If a face card is drawn, each player on the appropriate team activates two different figures instead of one. (Note that each team might get multiple turns in a row, there is no problem with this.)

When a figure is activated, it can perform one of these actions:

  • Move up to 6″
  • Shoot at a figure within 12″ range
  • Move and then shoot
  • Charge at another figure up to 6″ away
  • Fight a figure currently in base-to-base contact

Actions

Movement can be in any direction or around corners. Figure facing does not matter.

To Shoot at an enemy, the closest parts of each figure’s base must be no more than 12″ apart, and the figures must be able to see each other. The active figure makes a shooting test: roll d20; if it is less than the figure’s Shooting skill, they hit the enemy. If the enemy is hit, and they are in cover (hiding in the edge of trees or behind an obstacle), they make a Save test. A successful save means the shot hit the cover and not the figure.

Keep track of which figures are hit: when a figure is hit three times, it is removed from play.

After a figure is shot at, whether the shot hits or misses, they must make a Bravery test. If the test succeeds, nothing happens. On failure, the figure must immediately move away from the enemy that shot them, either 6″ or until the figure is out of line of site of the shooter.

If a figure Moves and Shoots, they must move first and then shoot. The figure’s shooting skill is -2 for the shooting test when it moves before shooting.

In order to contact an enemy figure to fight them, a figure must Charge. Before charging, the active figure must pass a bravery test. If the test fails, the figure can’t move or shoot but still counts as activated this turn. The figure being charged must also make a bravery test. If this test fails, the charging figure moves 6″ towards the charged figure, and the charged figure runs 6″ away as well.

A figure that successfully charges also Fights on the same turn they charge, and receives a +4 to their fighting skill. To fight, the figure makes a fighting test, and success means the other figure receives one hit. There is no save test when fighting, and fighting figures don’t make bravery tests. Figures that are in base to base contact cannot be shot at by either side.

That’s all there is!

Here is my current version of the figure stats for the Skirmish at Jumonville Glen.

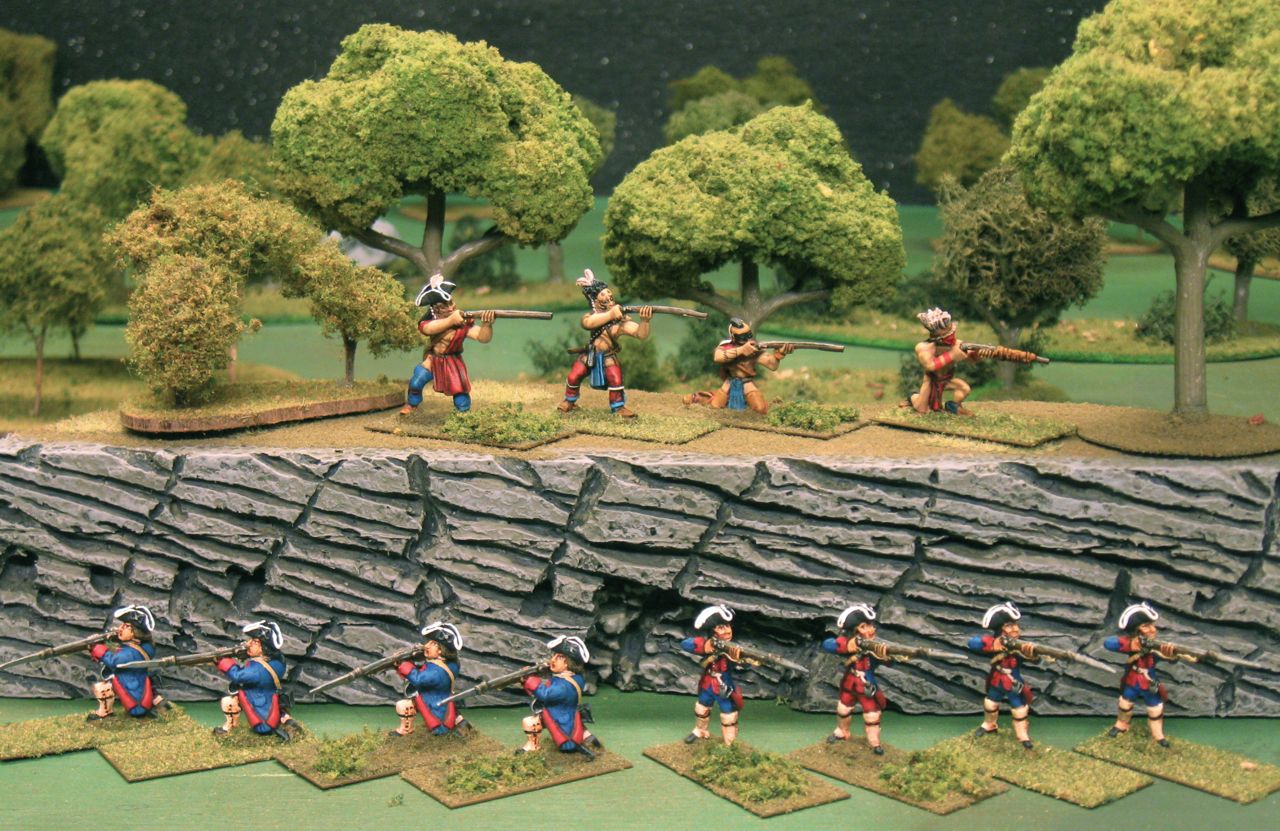
  • Virginians: shooting 8, fighting 8, bravery 12, save 10
  • Indians: shooting 7, fighting 10, bravery 14, save 12
  • French: shooting 8, fighting 8, bravery 10, save 10

I have half-page quick play sheets which we’ll use when actually playing the game. The rules are very simple in actual practice, but like all rules, understanding suffers when you read them without playing.

I’ve playtested this a few times by myself and once with Martine. It will work a lot better with only 2 figures per player, but even with me controlling all of the figures, I reached a decisive outcome within about an hour.
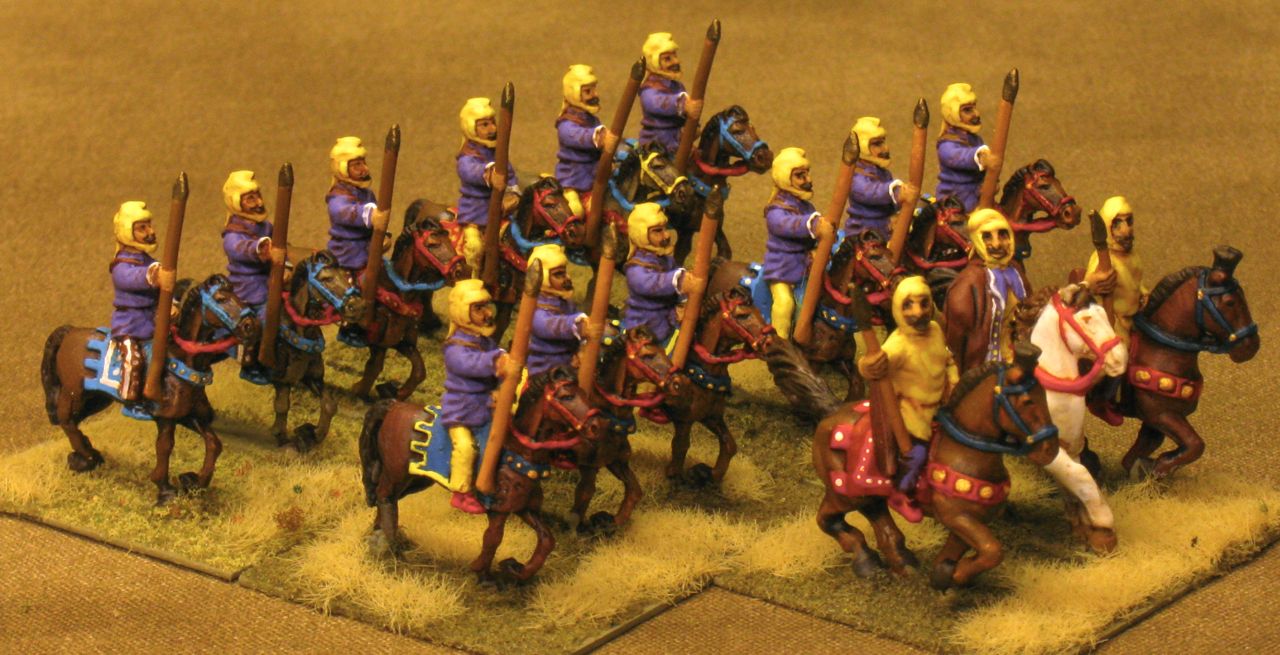
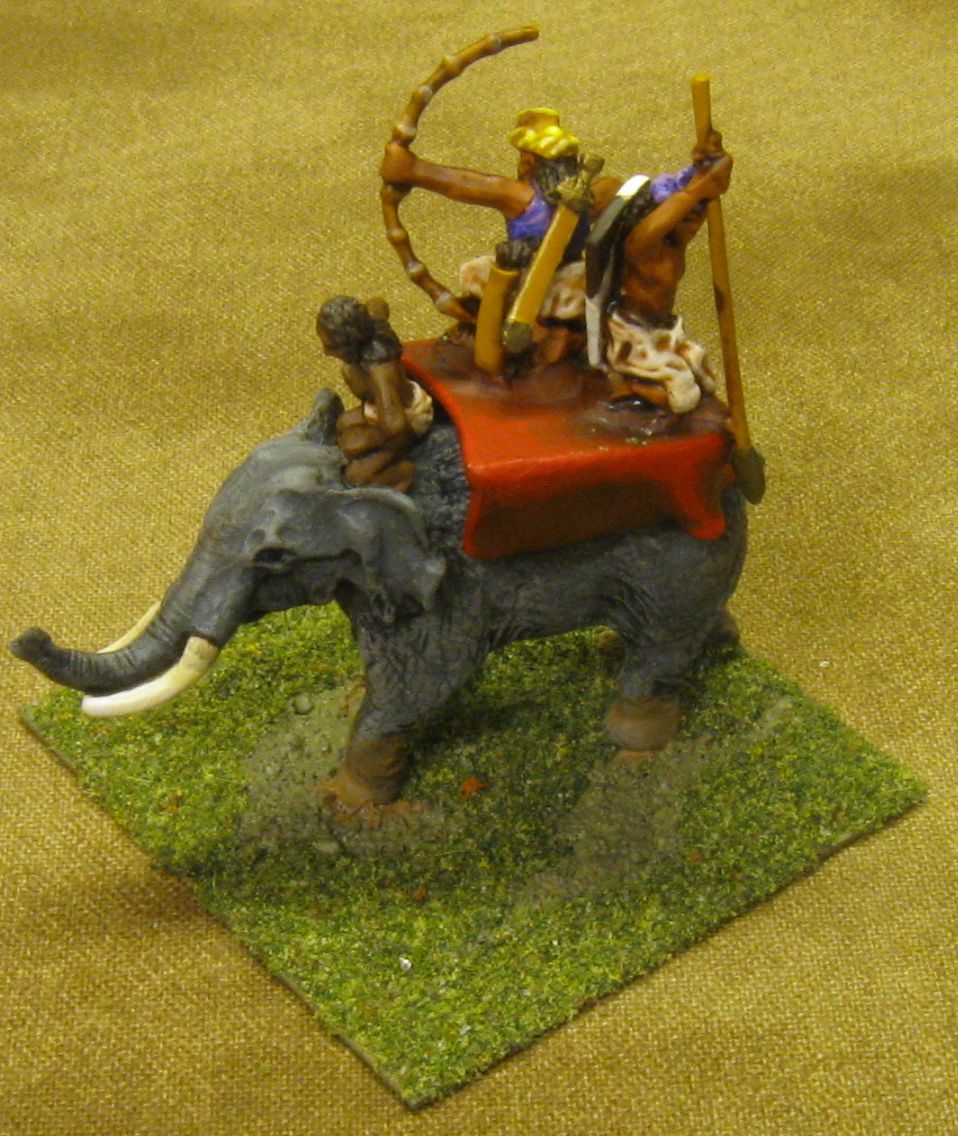
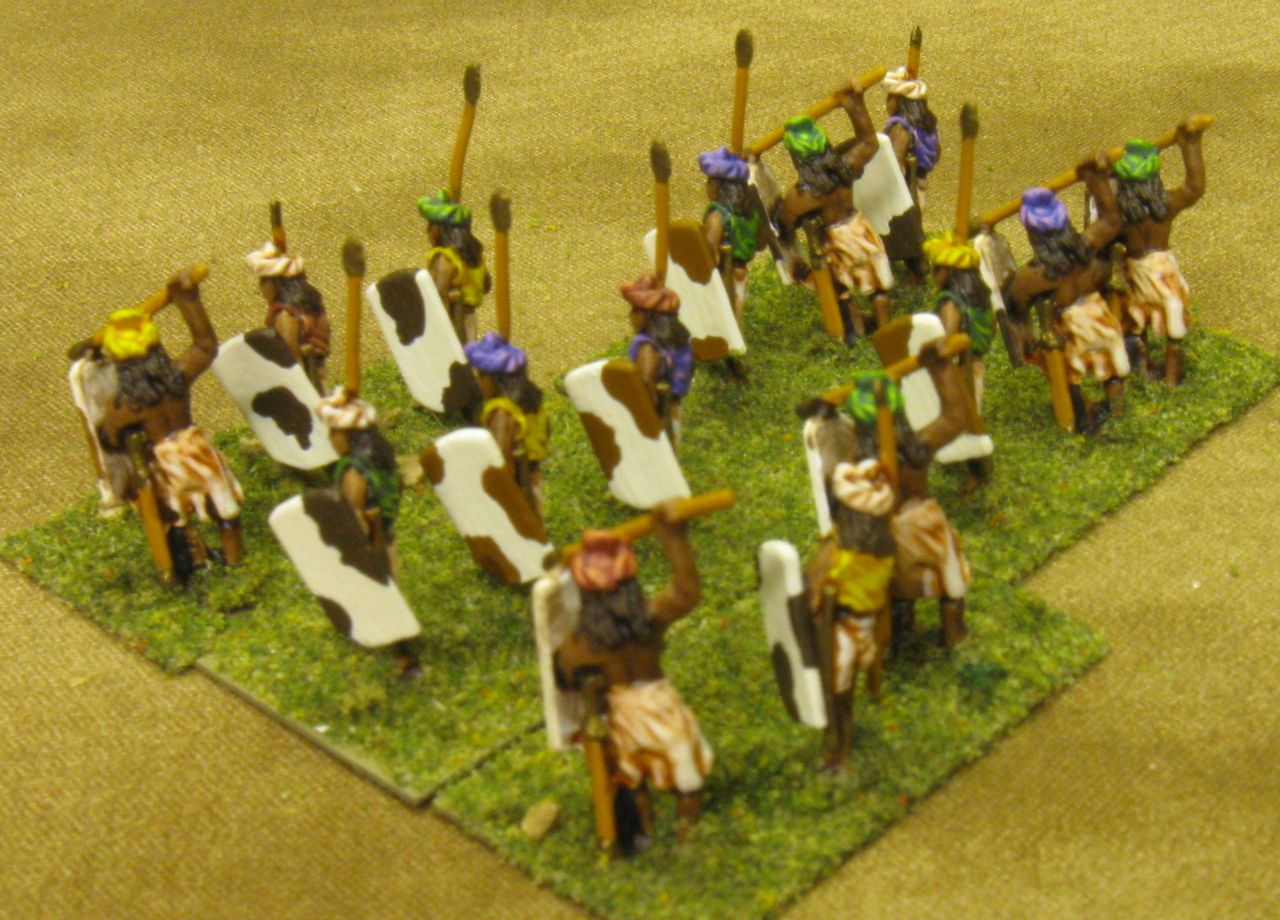
Review: De Bellis Multitudinus (DBM)

Today, I played DBM (De Bellis Multitudinus) for the first time. DBM can be described as a scaled up version of DBA, a game that I am very fond of, but this description would be unfair to both DBA and DBM. I had a good time, and I’d definitely play DBM again, but I wouldn’t consider it an upgrade of or replacement for DBA and/or Big Battle DBA (BBDBA).

The rules

In many ways, comparing DBM to DBA is a bit like comparing long bike rides with shorter trips. You can have just as much fun, but it takes longer and requires a longer term mind frame. If you want to avoid suffering the whole time, it also may require a bit more training. And on a bad day, you’ll wish you opted for the shorter trip.

The beauty of DBA is its small scale and simplicity, matched with deep tactical complexity. Armies always consist of 12 elements, so they’re fast and easy to paint, and the limited army lists provide a good sense of closure when you’re finished. Games require only an hour to play, so even if you lose you won’t suffer for very long.

DBM is larger than DBA in several dimensions, with positive and negative consequences.

DBM adds support for larger armies and uneven forces on each side, using points-based army lists. This allows for playing larger battles and designing historic scenarios within the scope of the rules. However, it also increases the importance of the army selection meta-game, requires a lot more painted miniatures, and loses the “I’m finished!” satisfaction smaller DBA armies provide. Points based systems are always susceptible to minmaxing and twinking, even when the theoretical basis for the system is to match historical reality.

DBM also provides a greater level of detail with additional rules for things like weather, troop quality, and commander quality. The most visible aspect to me was the troop quality modifiers. These provide a finer grained difference between historical troop types that are considered identical in DBA (but weren’t in real life). I’m not experienced enough to decide whether this is a case of confusing “detail” with “realism” or not. However, for the DBA player interested in DBM, the main result is that there are many more close combat modifiers, and generally a lot more things to consider when resolving combat (or deciding whether to enter combat in the first place).

Due to the increased number of elements in each army the ground scale is different, but the movement rates have also changed to compensate. The command and control system is still PIP based, but also more complicated due to the larger armies.

The cumulative effect of all these differences is that you feel like you’re playing DBA on steroids, but some of the differences bite you when you least expect them, or force you to change your tactics to avoid being bitten. I could see myself losing brain cells if I were forced to constantly switch between these “similar but different” rulesets.

The game

This particular engagement was a 500 point game between “our” Pyrrhic army with Seleucid ally, who chased down “their” fleeing Carthaginians. There were about 75-80 elements on each side, split into 4 commands with 3 players on each side. Our individual commands had 4, 19, 19, and 36 elements in them (I think). Each command still only rolls d6 for PIPs, so PIPs for movement are more scarce than in DBA. The movement rules are more flexible for group moves in some ways, since there’s an expectation that you’ll be moving larger blocks of elements around.

This game was part of a large campaign played by a bunch of the guys in this gaming group. Our goal was to kill as many of Larry’s Carthaginians as possible before he got back. The other side’s goal was pretty much the same, since Larry wasn’t around.

I held our extreme left flank with a huge block of pike and spear (twice as large as a DBA army by itself), supported by bad-going support troops (another DBA army worth of Auxilia and Psiloi). (Huh… I just realized I had the Big command… I thought I chose the “easy, uncomplicated” command, not the huge one.) My goal was for the guys with the long pointy sticks to walk forward and crush anything in their path, while the guys with the short pointy sticks stood on the hill and prevented the enemy’s cavalry from turning our flank.

In the end, it worked! Not only did I fail to screw up tactically and lose, I actually rolled well enough in combat to kill superior troops with my light troops, including the enemy’s Commander in Chief, which ended the battle.

Having the Big command helped a lot, because Jim almost always assigned me the high PIP die, so I rarely lacked the PIPs to do what I required.

I think I was also aided by suboptimal enemy deployment, but part of this was likely due to a lack of choice by the time they deployed that flank. They had poor matchups against my pike and spear, but I think a bigger mistake was splitting their command in half. They sent most of their bad going troops halfway downfield to play in the mud (steep hills, really). This provided them with a PIP suck in the middle of the board, far away from their general, and reduced their options on my flank.

The game theoretically started at 1:30pm, but much time was spent finding boxes of figures, talking, and so on. We had everything packed up again by 7pm: not a short game.

Overall Impressions

Playing as a small part of a larger battle, and seeing the battle unfold on the field gave me a much better feel for the “grand tactical” situation than I often get from DBA. Now that I’ve seen this in a larger scale, maybe I’ll be able to translate that vision to smaller DBA battles.

As for my part in the battle itself, it felt fairly similar to playing an isolated and slow game of DBA on my flank. The amount of tactical decision making I had was not equivalent to what I’d see in 5 sequential games of DBA, by any means.

I’d definitely play DBM again… but at someone else’s house. I don’t even have a room large enough for the 8’x5′ table required, and don’t have nearly enough miniatures to field even one side of a 500 point battle. As with many of the larger games I play at conventions, I don’t like it enough to want to do it myself, but I do like it enough to “push lead” once in a while in someone else’s game.

Instead, to satisfy my personal “bigger game” fix, I’ll attempt to scale up some of my DBA armies into Impetus armies and/or BBDBA armies.

Preview: Jumonville Glen, part 1 (modelling)

In January, Martine’s school is having a Family Game Night. Being the miniatures gaming nerd that I am, as soon as I heard this was going on I decided to prepare a kid-friendly miniature wargame for that night.

I decided the rules in Big Battles, Little Hands would be a good place to start. This is a great sourcebook for introducing kids and their parents to the concept of miniature wargaming, and provides two simple sets of rules appropriate for ages 6 and up: Milk and Cookies, and Blood and Swash.

Milk and Cookies is named as a parody of “beer and pretzels,” a term used to describe light and easy games as opposed to picky detail-oriented ones. These rules are designed for fighting battles between fairly large armies. They’re primarily aimed at the Horse and Musket period (in the 1700’s-1800’s), but with some modifications they’ll handle anything from Ancient times up to modern times.

Blood and Swash was developed for pirates fighting swashbuckling barfights, so it’s best for a lot of players, a small number of figures per player, and a tight space. I thought a pirate fight might go over well, so I’d probably go with Blood and Swash and maybe build a few pirate ship decks to play on.

But then, I visited Fort Ligonier and learned a bit about the area’s local history. I had no idea I was living a mile or two from a French-Indian War battlefield. After a bit of reading, I decided it would be nice to work towards fighting the first few battles in the French-Indian War: Jumonville Glen, the Battle of Fort Necessity, and Battle of the Monongahela.

Jumonville Glen was the skirmish that pushed the French and British to war in America, and eventually across Europe as well, where the larger conflict is called the Seven Years war. A very young George Washington led a group of around 75 Virginians and Indians in an ambush against a party of 30-40 French at Jumonville Glen, and crushed them before they even had a chance to deliver France’s ulitmatum.

The scale of this fight lends itself to Blood and Swash. It’s a simpler ruleset than Milk and Cookies, and requires fewer figures: a bonus, since this is the first I’ve done with the French-Indian War.

I picked up a few packs of Old Glory 25mm French & Indian War figures: British (also suitable for colonial regiments), French, and Indians. I started with 8 Virginians, 4 Indians, and 12 French: enough for up to 12 players with 2 figures each… what a mess that would be if they’re all 6 years old! It also works out to 3 units for each side, in Milk and Cookies… not a lot, but a start.

The Indians were quite fun to paint! I’m happy with how well they turned out. The rest of the guys weren’t as much fun and didn’t turn out as well. The French white coats were the worst, but at least it’s giving me practice shading white.

Jumonville Glen has a cliff, where the French sought shelter during several days of rain before Washington ambushed them. I obviously needed to construct this distinctive terrain feature since it’s the centerpiece of the skirmish. I built it as a step hill with a cliff face, out of white styrofoam. This leans towards the “useful” side of the scale, in the “useful” vs. “pretty” compromise that all terrain features have; but it still looks good.

I already had all the trees necessary to make it look like Pennsylvania woods. The only construction left is painting and cutting a piece of canvas to use as a play mat under the terrain.

Obligatory complaints and self-deprecation:

I’ve been using a few Osprey books as references for painting these guys. I’m not sure the pictures in Monongahela are very accurate however, since they don’t match the text.

The Old Glory British Firing Line figures are not perfect for either the British or the Virginians, according to Osprey’s images; but they’re close enough to pass for either of them. The French are missing their characteristic cartridge case, and instead have the same bag the British are carrying. I have no clue if the Indians are right or not, but they look cool, and that’s important.

The worst flaw here is my selection for the colonial troops. The Virginians didn’t get uniforms at least until several months after Jumonville Glen, so they were dressed in their own civilian militia clothing. However, since I want to use these figures later in the war as well, I’m willing to compromise. I’d be surprised if anyone (other than Daniel) points this out at game night anyway.

To help increase the number of troops for later battles, I got some Dixon French-Indian war figures on clearance. They’re labelled as “coureurs de bois,” illegal trappers, but they’ll pass as Canadian-born French for use at Fort Necessity and later. I have 8 of those and 4 more Inidians ready to paint now.

In my next update I’ll go over the rules changes I’ve made to Blood and Swash in order to make this a playable and interesting game.

Hot Dogs vs. Monsters

Last Sunday, Martine and I playtested the French and Indian War scenario I intend to play with kids at Martine’s school’s game night. She got bored in about an hour, which is probably good: I expect the game to take about that long, but her behaviour would be a lot better if she were around someone other than her parents. I hope it will play a bit faster with 4-8 players controlling 2 figures each, instead of 2 controlling 8 each.

After that, she wanted to do a craft, and wanted me to give her ideas. So, I drew a goblin and made a little stand-up guy. She took that idea and ran with it: she made a hot dog, whose combat prowess allowed it to deflect any weapon my Goblin was holding, and also to penetrate my shield.

Pretty soon she had an army of 7 hot dogs (with buns, of course) and one boss: a floating green tentacle beast. I had 2 goblins, a troll, 3 skeletons, a wolf, and my boss was a beholder (a giant floating eye with tentacles, I think it inspired her boss).

Then Martine asked me to make 2 trees and some rocks. She made a map to set up the board, a movement ruler and a rock-throwing ruler, and found a cardboard box to use as a playing field.

Then, she taught me how to play:

Hot Dogs vs. Monsters, version 1.0

  1. Players alternate turns.
  2. On your turn, do 2 actions.
  3. One of the two actions must be a move.
  4. You must move the full distance unless blocked by a rock or an enemy warrior.
  5. If you’re blocked by a rock, you can use an action to throw it out of the way to the side.
  6. Use an action to fight an enemy warrior touching you by rolling d10 and allocating that many damage points to the enemy.
  7. An enemy warrior with 8 or more damage dies and is removed from play.
  8. You can’t fight warriors who are even partially in the trees.
  9. You can only fight with the front of your warrior, but enemies can attack your side and rear.
  10. Bosses can’t fight each other.
  11. The game ends when one army is completely destroyed.

It’s a remarkably playable game, considering she’s 6 years old and made it up as she went along. There are even discernable tactics possible: hide in the trees one turn, and next turn jump out and attack before they can attack back. The rocks didn’t seem to affect play much, I’ll lobby to remove them next time.

As far as the rules: I think they were inspired by Hibernia as well as the French and Indian War game. In Hibernia, you take 2 actions per turn, and they’re both movement (and possibly fighting) actions. The miniatures game gave her the movement ruler, die rolling, and damage mechanics.

We haven’t finished a game, and might never finish it with these rules, though she did teach her friend how to play today. She had a wonderful time creating it, and I think that’s the most important part.

Ringmaster

Ringmaster is an Italian circus game. Actually, it isn’t: it’s a freely available, print-and-play, vaguely Lord of the Rings themed strategic wargame. It is Italian, though; or more accurately, originally written in Italian and then translated into English.

I was in the mood for a multiplayer wargame this past weekend, but don’t have any suitable titles on hand, so I looked for a Print and Play option. I found Ringmaster on the Print and Play blog, and printed it up.

I printed the board on photo paper (4 sheets; Marla bought a ream at Costco so I don’t mind using a few sheets) and mounted it on foam core. It isn’t perfect, but it came out really nice. The art and finish quality are a lot better than many low-budget store bought games. The cards are worse: they’re printed on plain cardstock and stuck into card sleeves so they can be shuffled more easily. Coincidentally (probably not) the 6 army colors used in the game match the 6 armiy colors in my old thrift store era Risk game, so that worked out well for the army pieces.

The game is completely card based, and uses no dice. During play, it looks a lot like Risk, but it’s more fun and not nearly as painful.

On each turn, first you can cast magical spells or use artifacts (cards). Then move armies from one or two adjacent territories to as many other territories you want. Any territory with more than one player’s armies has a fight. Finally, you get troop reinforcements and new cards based on the number of territories you hold, and it’s someone else’s turn. The first player to get 10 victory points (gained by taking other players’ territories, but not from holding your own) wins.

Combat is card based. The non-magic cards all either add combat value to the number of troops you brought to the fight, or modify combat values in some less direct way (removing defensive bonuses or nullifying the enemy’s cards). Whoever has the biggest number wins, and the loser loses troops equal to the difference.

The rules are easy and straightforward, but they do have a few questionable points. Unfortunately the author only speaks/writes in Italian, there are a few problems in the translation, and no FAQ is available. (We were entertained by “Take a card from an opponent casually,” where “casually” was clearly meant to be “randomly.”)

Theoretically the game should take about 2 hours to play, but it was our first time so it took us 3 hours. Somehow we often take a long time with wargames. We must think too hard or talk too much.

Ringmaster is quite a good light strategic level wargame. It has only a low to moderate feeling of randomness, due to the card-based combat. You have your cards before you decide to attack, which helps immensely, as I predicted in a previous blog post about randomness. There felt like a bit of a “runaway leader” effect, but it was mostly manageable by ganging up on the leader (although Frank won in the end anyway: no dice!) The end game is very much unlike Risk, luckily. Since you only need 10VP to win and not “everything on the board,” the game ends before it gets boring.

We played the “basic” version of the rules instead of the “advanced” version, and the Middle Earth theme is very light. You’re playing on a strategic map of Middle Earth, but there is almost no other thematic flavor to the cards or rules. Apparently the Advanced rules help that somewhat, by at least allying the forces of Good and Evil on separate teams, among other things.

This game totally hit the spot on Saturday, and I look forward to playing it again. It was a great deal more fun than dying at the hands of the orcs and dragon on the first turn of Wizard’s Quest.

Basic Impetus

At Legions today, we played Basic Impetus. This is a freely downloadable introductory version of the Impetus ancients miniatures wargaming rules. Rick and Jim played Polybian Romans, and Larry and I played Carthaginians. No one had really played the rules before, but at least Larry read them before we started.

The model basing uses the equivalent of 4 DBx sized bases for each unit. This is similar to Ancient and Medieval Warfare (AMW, which I also haven’t played), except you never need to remove bases so they could be permanently based on larger bases.

I couldn’t really field any proper armies without painting a bunch more stands, but I could fake it so we can play enough to decide whether to paint enough bases for two full armies. The common basing with AMW, also based on multiple DBx bases, would make this a useful way to encourage painting more elements. Incidentally, Command and Colors: Ancients also uses 4 blocks per unit, so with enough elements painted up I could play C&C:A with miniatures as well.

The Impetus rules are partway between highly detailed reductionist rules like Warhammer Ancients, and the extremely abstract DBA. Activation is IGO-UGO and every unit can be activated on every turn. Units have a few stats: Type, Move, VBU (both hit points and combat effectiveness), Impetus (combat bonus in the first round of combat), and VD (victory points for killing the unit, basically).

If the unit has a ranged weapon, it’s listed; otherwise all other weapons and armor are abstracted into the VBU number. Unlike DBA, javelins and slings are considered ranged weapons and not “close combat.” Some unit types such as skirmishers and light cavalry have special rules to fit their historical use, but for the most part everything acts fairly uniformly based on its stat line.

Movement is “normal” with one exception: when you meet enemies you must not line up exactly with the enemy units. Instead, you always overlap the lines partially on each side. This seems odd, but it ends up working well in practice: most combats end up with single overlaps, but no fights give you double overlaps.

When shooting or fighting, you roll a number of d6 equal to your VBU plus appropriate modifiers; each 6 or two 5’s are a hit. Those hits aren’t immediately applied to the enemy unit, but if a unit receives any hits, it must make a cohesion roll modified by the hits received. Failing the cohesion roll causes “real” damage by reducing your VBU for the rest of the game (or until you run out and rout).

The two-step combat system is probably the most fiddly part of the rules, but in practice it works well enough and isn’t too complicated. I think the whole “effectiveness equals hit points left” thing is based on the fact that historically, casualty rates in melee combat were very low, and almost all casualties were caused when one side was running away. The most important thing is to not run away in the first place.

In the game itself, I controlled the right flank with 2 units of Light Cavalry, 1 unit of Cavalry, 1 unit of Warband (strong light foot) and 1 unit of skirmishers. At first I did well: I was rolling lots of 5’s and 6’s, and pushed back the Roman flank. But later, the Romans started hitting me back. I kept on rolling 5’s and 6’s for cohesion tests, but I’m supposed to roll low on those, so I took heavy casualties. Eventually all five of my units were killed, and when one of Larry’s spearmen joined me, the game was over.

Overall, I enjoyed the rules and I expect Frank and Andy might like them a better than DBA. They aren’t as “weird” as DBA: you get to move all your units, you throw big fists full of dice, and you don’t need to remember a pantsload of seemingly random combat result tables. I’m hoping Daniel would still enjoy the more chess-like DBA, but I’m also hoping he ever has a chance to play it again…

The general character of the game itself was what I’d expect while learning a new rule set. There was a lot of “lively discussion,” rulebook consultation, and getting things wrong. The battlefield looks more impressive than a DBA game because the units are larger, even though there are fewer of them.

I’d like to give these rules a try, but first I’ll need to work up some armies and build some sabots (large bases to hold the individual stands) to make things easier to move around.

Attack on Ste. Marie

Date: 6 June 1944, 1300 hours
Location: Ste. Marie du Mont, Normandy, FR
US Orders: Capture the church in Ste. Marie.
German Orders: Prevent US victory conditions

Since Mike was in town for the weekend, I planned a “big” miniatures wargame scenario. World War II is still Mike’s favorite period as far as I know, and I have plenty of troops and terrain in 15mm to put on a good show. However, we haven’t played any WWII rules in several years, and I was planning on 5 players: 2 more than we ever had when playing WWII games previously.

I decided to use the Disposable Heroes rule set. Although we had never played these rules outside a convention, I remembered them being easy to learn and not too fiddly. We preferred Arc of Fire when we most recently played WWII skirmish games, but those rules take a bit more learning than I wanted to put in for one night of gaming.

Since I haven’t studied any World War II history in a long time, I decided to use one of the canned scenarios from the SkirmishCampaigns books I had on hand. I needed a big enough order of battle for 5 players without many vehicles. I chose Attack on Ste. Marie because it used a fairly large board and had enough squads to split 5 ways. It’s one of the scenarios from the “Normandy ’44- First Hours” scenario book. We played it once before, years ago, so I knew I had the terrain. I also wanted to build a game around my fancy French church, so I could use it for more than one game over its entire lifetime. After I set up the board, it really didn’t look very familiar, so I wonder what we did the first time?

In this operation, US paratroopers who were airdropped into the area only 12 hours earlier were tasked with capturing the church in the center of town. The German defenders were also heavily armed, highly trained paratroopers. To answer Mike’s question from turn 1 in the game: the Germans didn’t get artillery support because their observer in the church steeple was destroyed by US paratroopers using a captured German gun. I was worried about Disposable Heroes’ lack of hidden unit rules, so I didn’t give the Americans any artillery support either.

The Germans were defending with two Fallschirmjaeger squads, one platoon HQ, one artillery radio team, and one Panzerschreck team. The Americans attacked with two Paratrooper Infantry squads, two Infantry Squads, 4 Sherman tanks, and a jeep with MMG.

I broke all squads into two teams each, for unit activation purposes. The vehicles were one unit of tanks and one jeep unit, until we enough vehicles blew up, at which point we switched to one vehicle per unit/activation.

Mike played the German defenders, and Andy joined him when he arrived. Frank and I attacked with the Americans. When Dan arrived, he took over the vehicles, and finally I switched sides when Mike got bored (sick: he failed his guts check) enough that he had to leave (and there weren’t many tanks left). I’m sorry you weren’t feeling better, Mike! So I thought I’d write this up so you can see what you missed…

The Americans had 10 turns to capture the church, and the Germans only had to mount a static defense and prevent the capture. The dilemma for the Americans was: if you run into the open, you get shot (a lot); but if you don’t, you can’t capture the church.

In the first few turns, the American infantry found heavy cover within firing range of the enemy, and holed up. With both sides under heavy cover, no one was hitting the enemy very much; and paratrooper Guts scores prevented everyone from failing any morale checks. It turned into a trench-like war of attrition. Unfortunately Frank was playing the Americans, so my Germans (after Mike left) were pretty much impervious to his attacks.

The tanks were a different story: the first several turns each saw one or more vehicles destroyed. Finally Dan drove a tank out of range of the rockets, while keeping the enemy within MG range. At that point the rules demonstrated the pointlessness of bringing a gun to a knife fight: Dan spent so many turns trying to acquire his target that his infantry had killed it before he could shoot anything other than his pintle HMG at it. One more infantry squad would’ve helped a lot more in this rule set, than the 4 tanks.

In the end, the infantry ruled, which is to be expected in an infantry game. Dan’s Americans advanced from the West and were decimated in the open (as they should be). Frank tried to advance through the orchard in the north, but met with strong resistance from the occupied townhouses.

Finally, it was turn 8, but the Americans hadn’t made a lot of progress. They calculated that the only way to even reach the church was to send one or more units sprinting towards it while the rest provided cover. On the last turn, I pinned the sprinters just before they ran out of cover towards the church. The Americans cleared the final German out of the church tower that turn, but it was too late.

In the end, the Germans had 6 infantry left (out of 33). The Americans had 11 infantry (out of 48), 1 functional tank, and one rolling coffin (out of 5 vehicles). The losses were huge. By percentage they were slightly worse for the Germans, but unfortunately the Americans weren’t able to capitalize on their advantage.

Catalog of (scenario/rule) Errors:

  • The German paratroopers had an accuracy of 6 (not 5), but we never took advantage of this.
  • The Germans had two areas of Anti-Personnel mines. I have no clue where they were, since Mike left before anyone walked near them. Would they have made any difference?
  • If we had not made the two errors above, I expect the Americans would’ve needed more help: leaving off the Artillery support was probably also an error, under the circumstances.

Catalog of Complaints:

  • I don’t think the SkirmishCampaigns/Disposable Heroes rules translation worked well for this scenario. The Guts scores were 10 or 11 for most troops on the board, and the cover was heavy for almost all troops most of the time. This translated to “roll 1 to hit” (see also: we missed the German paratrooper ACC6) and “roll 10 to fail a guts check” almost always. There weren’t nearly enough morale effects in the game, but truthfully I would’ve expected fewer casualties than we saw, given the low hit rate we should’ve seen.
  • Less of a complaint than an observation: we use a few metrics to judge WWII skirmish rules. Grenades either suck or they don’t (we think they sucked in this game, but never actually used them to find out). Close combat is usually extremely painful, but sometimes it’s a huge waste of time (you’re better off shooting instead): in this case, we never found out. Vehicles are usually nearly pointless against infantry, but also hard to kill; in this game, they proved relatively easy to kill, but not very powerful against infantry. Lastly: M1 Garand rifles are usually not represented well. Either they’re too powerful compared to a manual rifle, or they’re equivalent to the weaker weapon. DH models them as equivalent during a “stand and shoot” standoff, but better when used to actively assault the enemy, and this felt pretty good in the few games I’ve seen.
  • We played in 15mm scale, with a very terrain-heavy board. I think the rules would’ve worked a lot better in 25mm scale with fewer layers of terrain than we played with.
  • I think we were playing with an old version of the rulebook, but a new version of the quick reference sheet for the rules. The old rulebook caused confusion in some areas, especially the pin/fall back/rout section. I’m really not happy with the writing used in this version of the rulebook, it needs much clarification.

Highlights:

  • I have plemty of ammo, so what if I need to roll a 1 to snap-shoot that tank with my panzerschreck. Hit! Penetration! Damage? no result… it bounced off a tread.
  • We learned a lot about the “Man Alone” rule: if only one guy in a unit is left, he can’t move towards the enemy, but he can join another squad. Frank had a donut convention with all of his squad leaders; they had as many SMGs as a Russian rifle squad.
  • Dan played the lawyer: since “half your figures shoot” rounds up, he left his individuals to fire separately instead of combining them, and got more dice. Besides, how dangerous can one guy be, really?
  • Oops, tanks don’t block line of sight, when you can shoot from the second floor of the building.

If I were planning on playing any more WWII skirmish games, I’d do one of two things: either look into a more recent version of DH available for sale, or just give up and spend my effort on Arc of Fire instead (more likely).

Overall the game was fun, and it allowed people who don’t know or care much about WWII or miniatures games to roll dice and kill the bad guys. But it did feel a bit like a luck-filled dice fest, and lacked some of the subtleties I remember from Arc of Fire.

I really enjoyed being able to set aside the time for a “big” miniatures game outside a convention, which is rare these days since I have kids who aren’t opponent aged yet. I wish Mike was able to enjoy it a bit more, though. I’d love to get another game set up for Christmas, but I’ll concentrate on something a bit less serious. Maybe we can play my French and Indian War scenario in Blood and Swash?

Thanks for a great game, guys! Until next time…

Update: Additional rules complaints:

  • It was not obvious when pin/fall back/rout units were supposed to make their mandatory move. We played that they wait until their next activation, but this ended up sticking them out in the open for too long. As Dan said, “Oh noes, I’m being shot at! I think I’ll stop here in the open!” I think we did it wrong.
  • Target acquisition for the tanks was confusing. We failed so hard for so long that I think we must’ve been doing it wrong.

DBA Army II/2: Mountain Indians

Here’s my latest DBA Army: Mountain Indians, II/2. According to the DBA army book, these guys were an enemy and an ally of the Alexandrian Imperial army (II/15), and an enemy of the Skythians (I/43a). They’re also an enemy of the early Seleucids (II/19a), which I can morph my Alexandrian army into.

The figures are 15mm Museum Miniatures, and are available in a DBA army pack. I painted everything except for the 2LH General element. The figures are slimmer and shorter than my Essex guys. The horses are downright pinheaded. I haven’t stood them up next to each other yet but I think these guys will look tiny. The quality of the sculpting is good overall, but their faces look somewhat uninspired, with mere suggestions of eyes. I quite like the bows.

My only complaint with the army pack itself is that there was no clear way to distinguish either the Elephant or the Light Horse as a general element. The Elephant came with a parasol, but nothing obvious to mount it on and no general-like riders. The light horse figures were all identical.

According to the DBM army list book, the Mountain Indians armies represented by this army list are various tribes living in the mountains in the corner of what is now Pakistan, Afghanistan and India. I’ve been unable to find much information about these people, so I’m not sure whether the sculpts are accurate.

This was a fun army to paint, for several reasons. As I’ve said before, I’m getting a bit sick of painting clown suits, so this was a welcome change of pace. These simple solid color outfits are a lot easier to shade with dry brushing and layering instead of ink.

This is the first time I’ve painted dark-skinned humans, and I think it turned out pretty well. I’ve seen Mountain Indians painted anything from “got a bit of a tan last weekend” to “how much more black can it get?” and even a few “wow, that’s way too pink to be human.”

I’ve also been unable to find much information on what color their clothes should be painted. General recommendations seem to be to use readily available dye colors of the time, with their trousers in “your favorite color of off-white.” The freedom of not worrying so much about whether I’m getting it right makes it a bit more fun.

Their shields were apparently faced with cow hide, and so most painters use a holstein-like spotted color scheme. I’m not sure that makes any sense: were holsteins available in ancient India? I’d expect something boring and brownish, but the spots look a lot better.

This army was also very fast to paint, but it exercised some techniques I hadn’t used much lately. Unfortunately the photographs didn’t turn out well, they aren’t focused properly.

With 4 Auxilia and 4 Psiloi, I’m not entirely sure how this army is supposed to stay alive. I guess we’ll just have to try it out and see. I expect I’ll take a little break from painting DBA armies, but hopefully I’ll get some time to play them instead.

Even More Mordheim

Apparently, at some point I became a much faster painter than I used to be, without getting any worse at it (in fact I might even be better). I’m not sure when that happened, but the “how” probably has something to do with doing a lot of painting, instead of finishing fewer figures more meticulously. Practicing the same techniques many more times makes me both faster, and I’d say slightly better, than I was before.

In any case, here are some more figures I’ve painted since I finished the Later Achaemenid Persian army.

First is a group of Middenheimer bowmen, for Mordheim. I already have crossbowmen, but crossbows are really expensive in Mordheim, and of course the only figures I’ve ever had die after a match are the crossbowmen. Now that I have bowmen instead, the crossbowmen are guaranteed not to die for fear of being replaced with cheaper minions!

These figures are Games Workshop Empire Bowmen. I would have gotten a box of the men-at-arms, but they didn’t have any, and these are close enough. They’ll add a bit of variety to the warband. I painted the blue and green a bit lighter, with lighter highlights instead of darker shadows.

Next up is a Sister of Sigmar. This is another Mordheim figure, a metal casting. I got about 5 of these in a big box of bits from a Games Worksop bits sale. Andy is painting a Sisters of Sigmar warband, so I decided to paint a duplicate of one of the figures to demonstrate the techniques on the same figure he’d be working on.

Andy chose the color scheme. I wouldn’t have used this blue, but it turned out a lot better than I expected. In these pictures it seems to almost glow, it’s a lot brighter than in real life. I need to work on my inking technique on these larger figures, I often end up with a mucky, messy look instead of good shading (see around her leg). After really messing up the blue with ink, I redid it. Now it’s shaded by hand with multiple layers of similar colors to build up the gradient.

I have no idea what I’m going to do with this figure. Truthfully, there are some much nicer Sisters of Sigmar figures, I wish I had five copies of those instead of this one.

At this point, Andy has tracked down at least one of every Sister of Sigmar ever made, as far as we can tell. He’ll have plenty of options for building a warband; not that Sisters give you many options anyway: “Would you like one hammer, or two hammers?” Painting up the warband should give him plenty of time to decide whether he actually wants to continue painting or not.