 My first stool is complete, and ready for finish. I didn’t even have to add any more mistakes to my list.
Windsor chairs are traditionally painted furniture: most often, green paint. When they were first built in the 1700’s and 1800’s, they were never stained or simply varnished over wood. The chairs were designed around the fact that they would be painted, and they were always painted. At that time, they used lead paint. These days, chairmakers generally use milk paint, which ends up looking similar to lead paint.
I found an interesting article about the traditional green color used on these chairs. For a long time, it was thought the chairs were painted dark green originally, and then repainted in the 1800’s or so, using black or dark grey. Recent paint analysis has found that actually the chairs were bright green, but the pigments used in the paint darken over time. When they were repainted, the color was chosen to match what the original bright green had become: dark, dank, nearly black/grey green.
My stool will be red, to match the other chairs in our house, primarily because I already have red milk paint and I don’t want to buy any more quite yet. Applying a milk paint finish requires a bit of a leap of faith: it looks horrible, before it starts looking good.
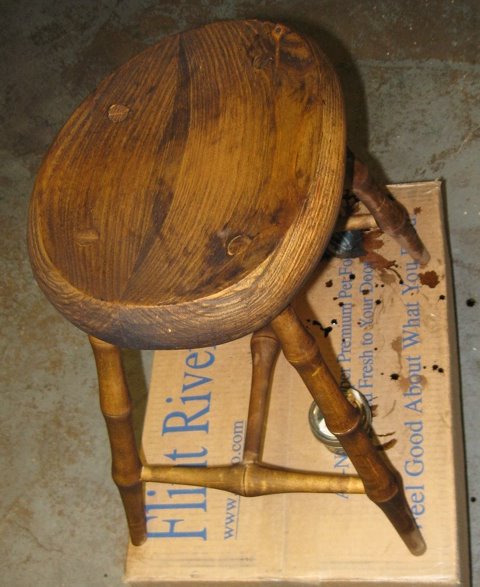 Brian Cunfer starts by dying his chairs brown, to provide a dark base under the paint. Then when the paint chips or wears through, which it does, it will have a uniform color under the paint everywhere on the chair, and won’t provide as much contrast with the darker paint on top. So, the first step in finishing is to dye the chair Horrifyingly Bad Brown. Other manufacturers call this color Middle School Woodshop Brown or Antique Mall Refinishing Brown. It’s especially hideous on woods such as pine.
Next, I’ll be applying probably 2 coats of red milk paint. The first coat will look splotchy, completely flat, and basically horrible. The second coat will look dead flat and mostly bad. After rubbing it down with a scotchbrite pad, I’ll apply some wipe-on poly finish, and it will begin to stop sucking. I’m not sure why I describe this now: probably to reassure myself that I didn’t just ruin the stool. But most likely, I’ll post more pictures of the process as I go.
Well built Windsors use different woods for different parts of the chair, depending on their function, and paint covers the differences in the wood. Hard, strong wood such as Maple is used for the legs and stretchers. Soft wood like Pine or Poplar is used for the seat, so it’s easy to carve and holds onto the legs well. The top parts of chairs are made of wood that is easy to shave and bend, such as Oak.
My next stool, made entirely from walnut, will technically speaking not be a well-built Windsor. I also won’t be painting it. I really don’t care, despite what some people might say about it: they aren’t allowed to sit in it anyway. I think it’ll look quite good as long as I don’t need to patch any mistakes.
Mike Kaizar says:
Alan, I am having a lot of fun watching your project progress. Keep up with the blog, you do have readers!
It is interesting to see how much work goes into a “simple” stool. A good investment of time though as it is something you will be able to enjoy and be proud of for a lifetime.
Alan says:
This takes a lot longer than it should, 2 hours at a time and with many mistakes!
In the chair classes I took, with a fully equipped shop, instructor, and 8 hour days, the equivalent portion of a full chair would take a beginning student maybe 2 days or so; I forget the exact schedule. Instructors keep spare parts around so you don’t waste as much time recovering from mistakes.
I expect the second stool to go together more quickly as I learn from my mistakes. Knock on wood…