In late 2020, Elia Bizzarri and Curtis Buchanan produced an online class teaching Curtis’s Democratic side chair. This chair was designed to be built using a relatively small selection of simple tools, and doesn’t use some of the more complicated tools chairmakers typically use. I didn’t always stick to this intent, but used tools I had on hand.
Democratic Side Chair
I ordered wood from Elia, and kept up with the online classes until all the green wood was processed, bent, and allowed to dry. Preparing the leg stock using a hand axe was a new experience for me, and I enjoyed it immensely. When I was finished, I had 2 thoughts: I wanted to remake all the parts now that I had a bit of practice; and I wanted to do more work with the axe. That led to setting aside the project for almost a year and a half while I carved spoons and bowls.
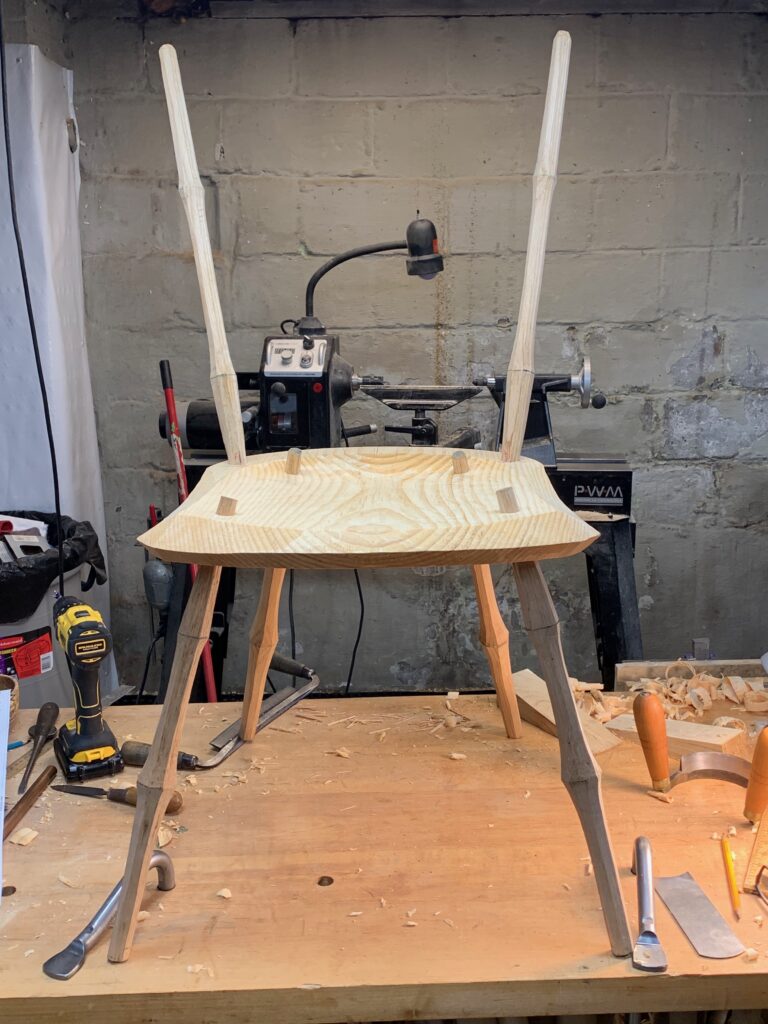
This spring, I finally carved the seat and finished the chair using the original sticks I carved. Curtis typically doesn’t use glue when assembling this chair, except for gluing the wedges into wedged joints. I intended to glue all the joints “just in case”, but in several places I forgot to apply the glue, so most of the back only has glue in the wedges. I didn’t take any pictures until I started assembly.
Chair assembly
Unlike a typical Windsor chair, all of the sticks on this chair are shaved instead of turned. They are left octagonal rather than circular. The angular shape of the seat complements the facets on the legs, stretchers, and spindles.
The chair is painted with General Finishes acrylic (“milk”) paint and finished with wipe on poly varnish.
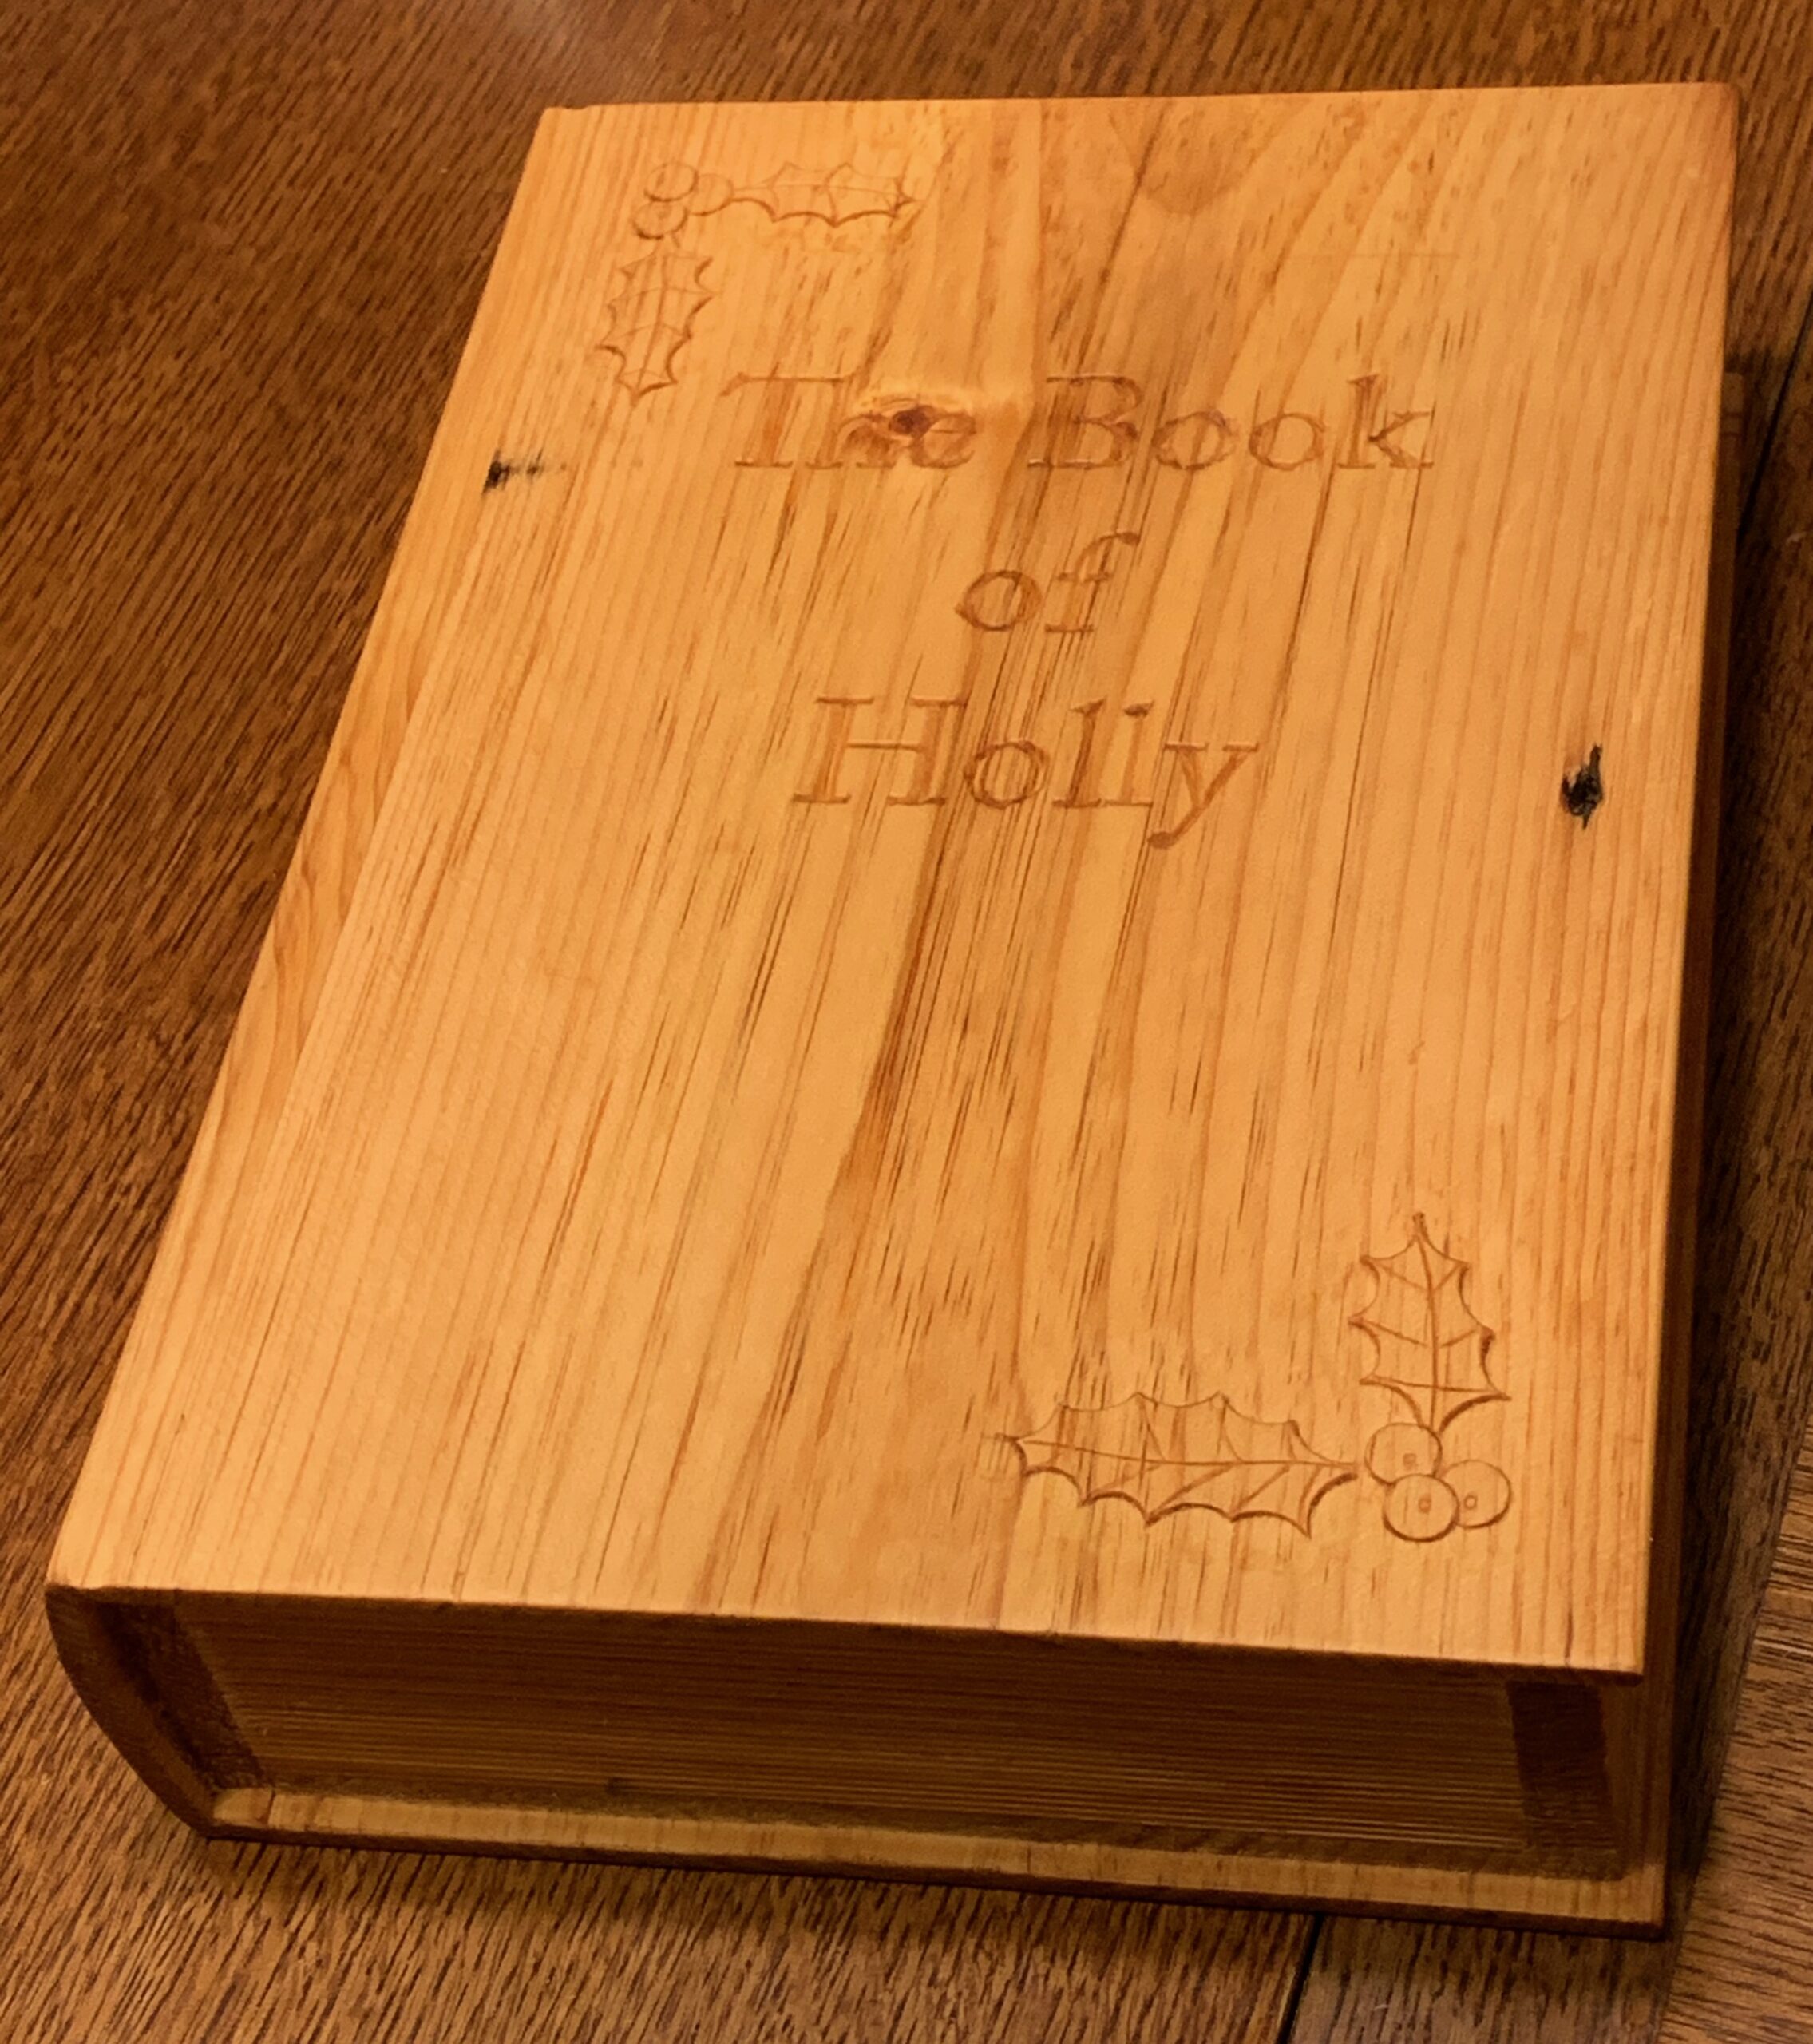
Marla’s mother died recently, and Marla and her siblings asked me to construct a burial urn in the shape of a book. Here’s how I did it.
They requested I use wood salvaged from Leatherwood, Marla’s great-great-great-grandfather’s house. The pine boards I used were originally stair treads, so they were thick, painted, and encrusted with 150 years of dust and grime. After finalizing the design, the first step was to find the good wood inside the ugly.
After removing the rusty cut nails and cutting the stair treads roughly to length, I used a scrub plane to remove the outer layer of grunge with a blade that’s easy to resharpen, followed by a planer to flatten the boards and remove the bulk of the unneeded thickness. This resulted in the boards I needed and a birdseed bag full of shavings that still smelled like pine.
A piece of the original stair tread with finished boards beneath
My design required the front and back cover boards to overhang the sides, the way the covers of a hardcover book extend past the pages. The cover boards were 1/2″ thick to provide enough thickness to carve. To make the edges a more appropriate thickness I planed a rabbet along the edges of the covers, and a groove to hold the sliding lid. The page edge boards fit between the cover boards, and the spine board caps the covers on the other side.
Cover and spine boards showing rabbets and groovesStarting to look like a book
Since this is a book, it needed a title. The family settled on “The Book of Holly”, with carvings of holly leaves and berries in the corners. My supply of Leatherwood wood is limited, so I practiced on scraps. I tried paint to see how that looked, but the final decision was raw wood with an oil finish.
Lettering test: too small; don’t paint it; GIT GUD NUBCarving test: leaves on the left seem pretty good.
To avoid having to rebuild the entire box if I made a mistake, I did the carving before assembly. This was the most lettering I had ever done, so I was glad to have the practice. The curves aren’t easy with the grain pulling your blade in various directions. Since this is a book and an urn, I opted for a formal typesetting design rather than trying to draw the letters in a more creative way. I designed it on the computer, printed it out, and temporarily glued it in place while carving. This worked quite well, and my unsteady hand removed any sign that this had originally been digital art.
I carved the letters with a knife, the technique used by David Fisher. I was imagining the hand drawn lettering used on Eric Sloane book covers, although I didn’t actually look at reference images before choosing Adobe Caslon as the font to use here.
The leaf carving uses techniques from Peter Follansbee’s toolset, although the pattern was original. I defined the outlines with vertical cuts with gouges, and then I carved away the surrounding surface so the leaves would be raised. Since this is pine, it required very sharp tools to cut instead of mashing the wood, and I didn’t need to use a mallet for any of it. I stropped my knife every few letters to keep everything cutting well.
The cover after carving. Nail holes add character; I blocked the hole with paper on the inside.
Next was carving the spine board, which I didn’t take any pictures of. I marked the shape of the cover on the ends of the spine, and planed away material to curve the back of the spine. On the edges of the spine board I carved a groove where the cover of a hardcover book bends open. I then used a chisel to carve the ends of the spine board to line up with the cover properly. (You can see this in the picture of the lid, below.)
To assemble the urn, I glued each page board onto the back cover separately, and when it was dry, glued on the front cover using a temporary spacer inside the unsupported corner to keep everything aligned. Once that was dry I added the spine onto the end of the box. Doing it in steps like this was slower, but ensured I got everything lined up without having to juggle 6 pieces at once with clamps going every which way.
Gluing on the front cover
The last piece to construct was the lid. I left this until after the book was assembled so I could get a tight fit (but not too tight). For this, I just planed rabbets on the two corners of the lid board, carefully approaching the proper thickness so it wouldn’t be too loose. Marla requested I carve paper page edges on the page boards, so I used a very coarse rasp to carefully scribe a series of (almost) parallel lines. I also added a notch to make it easier to open (and to tell which side is the lid). The lip of wood retaining the lid is very thin, and all weak short grain, so I wicked thin CA glue into the end grain from the inside to provide substantially more strength.
The top of the book with sliding lid
At this point construction was complete. I rounded off the corners slightly with a block plane, and gave everything a very light sanding with 220 grit paper: enough to remove rough spots and signs of the electric planer without removing hand tool marks. After that, I applied raw linseed oil, and that’s that. This doesn’t need to be a durable finish, but the oil emphasizes color variation in the wood and increases the contrast of the carvings where end grain is exposed.
The finished urnDimensions are 13.5″ x 9.5″ x 3″
I’m very happy with how this turned out. It’s not often that I make a plan, and then implementation goes entirely according to plan without needing to make adjustments on the fly, but this one worked.
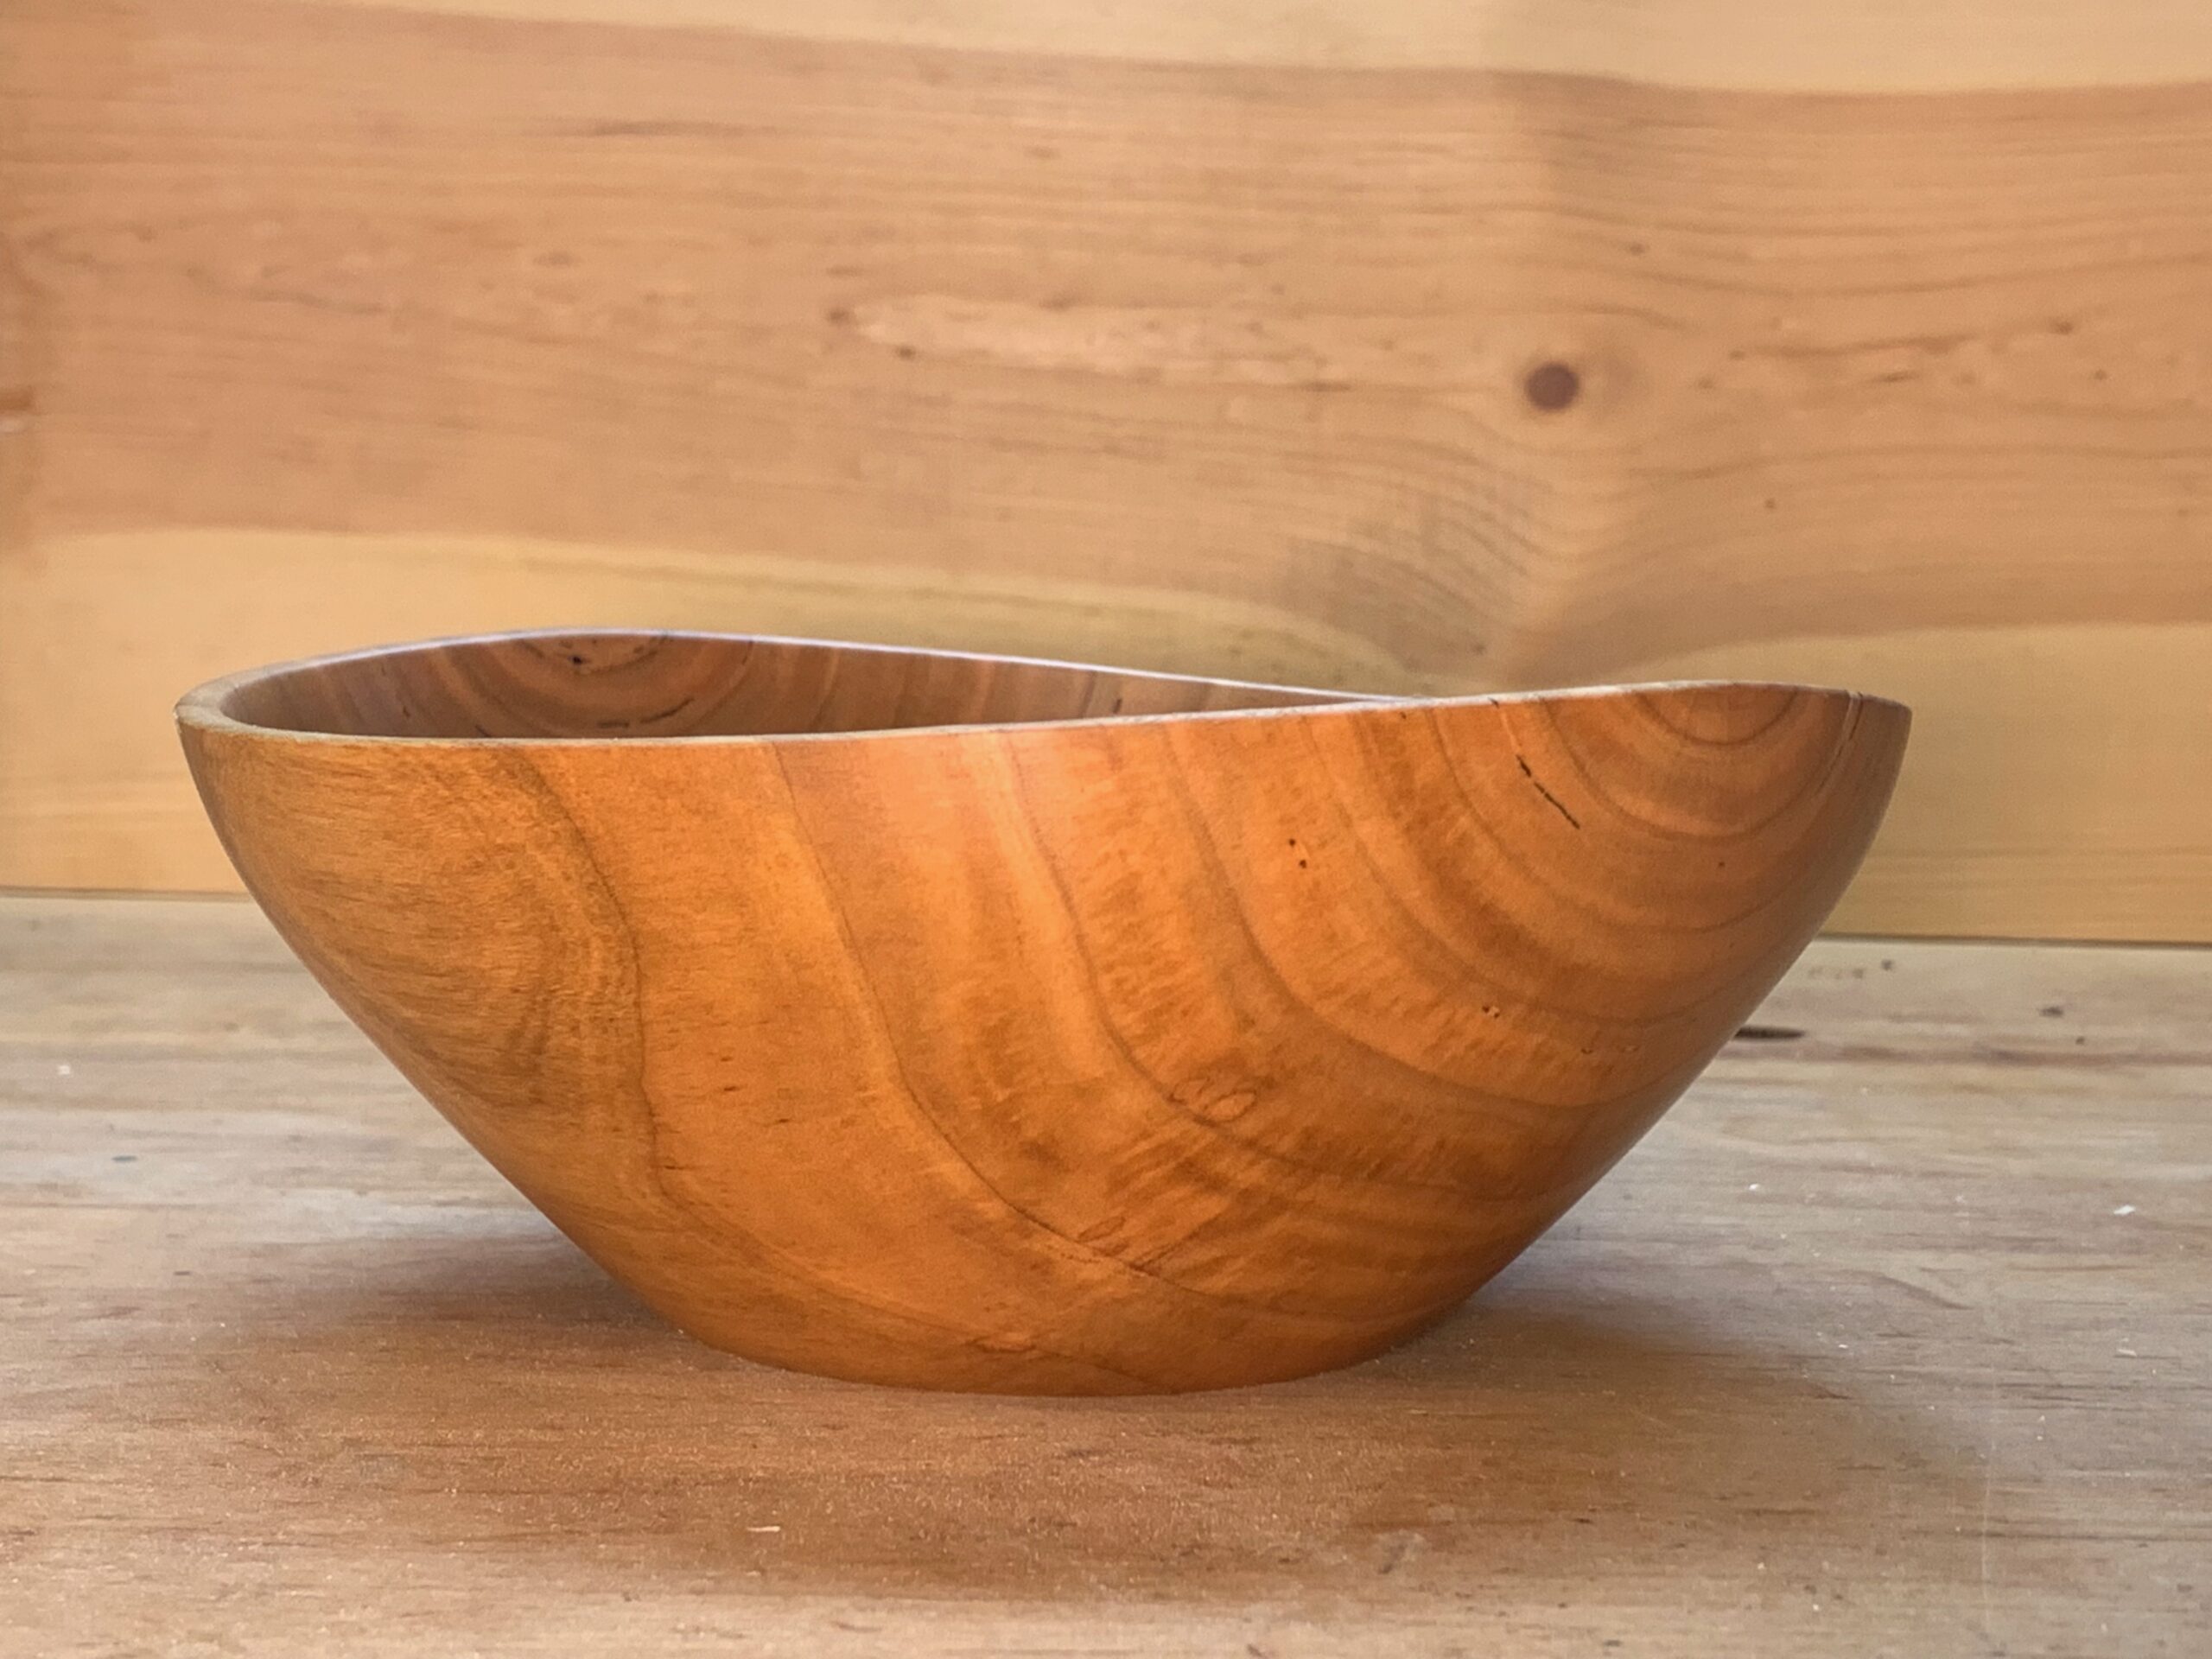
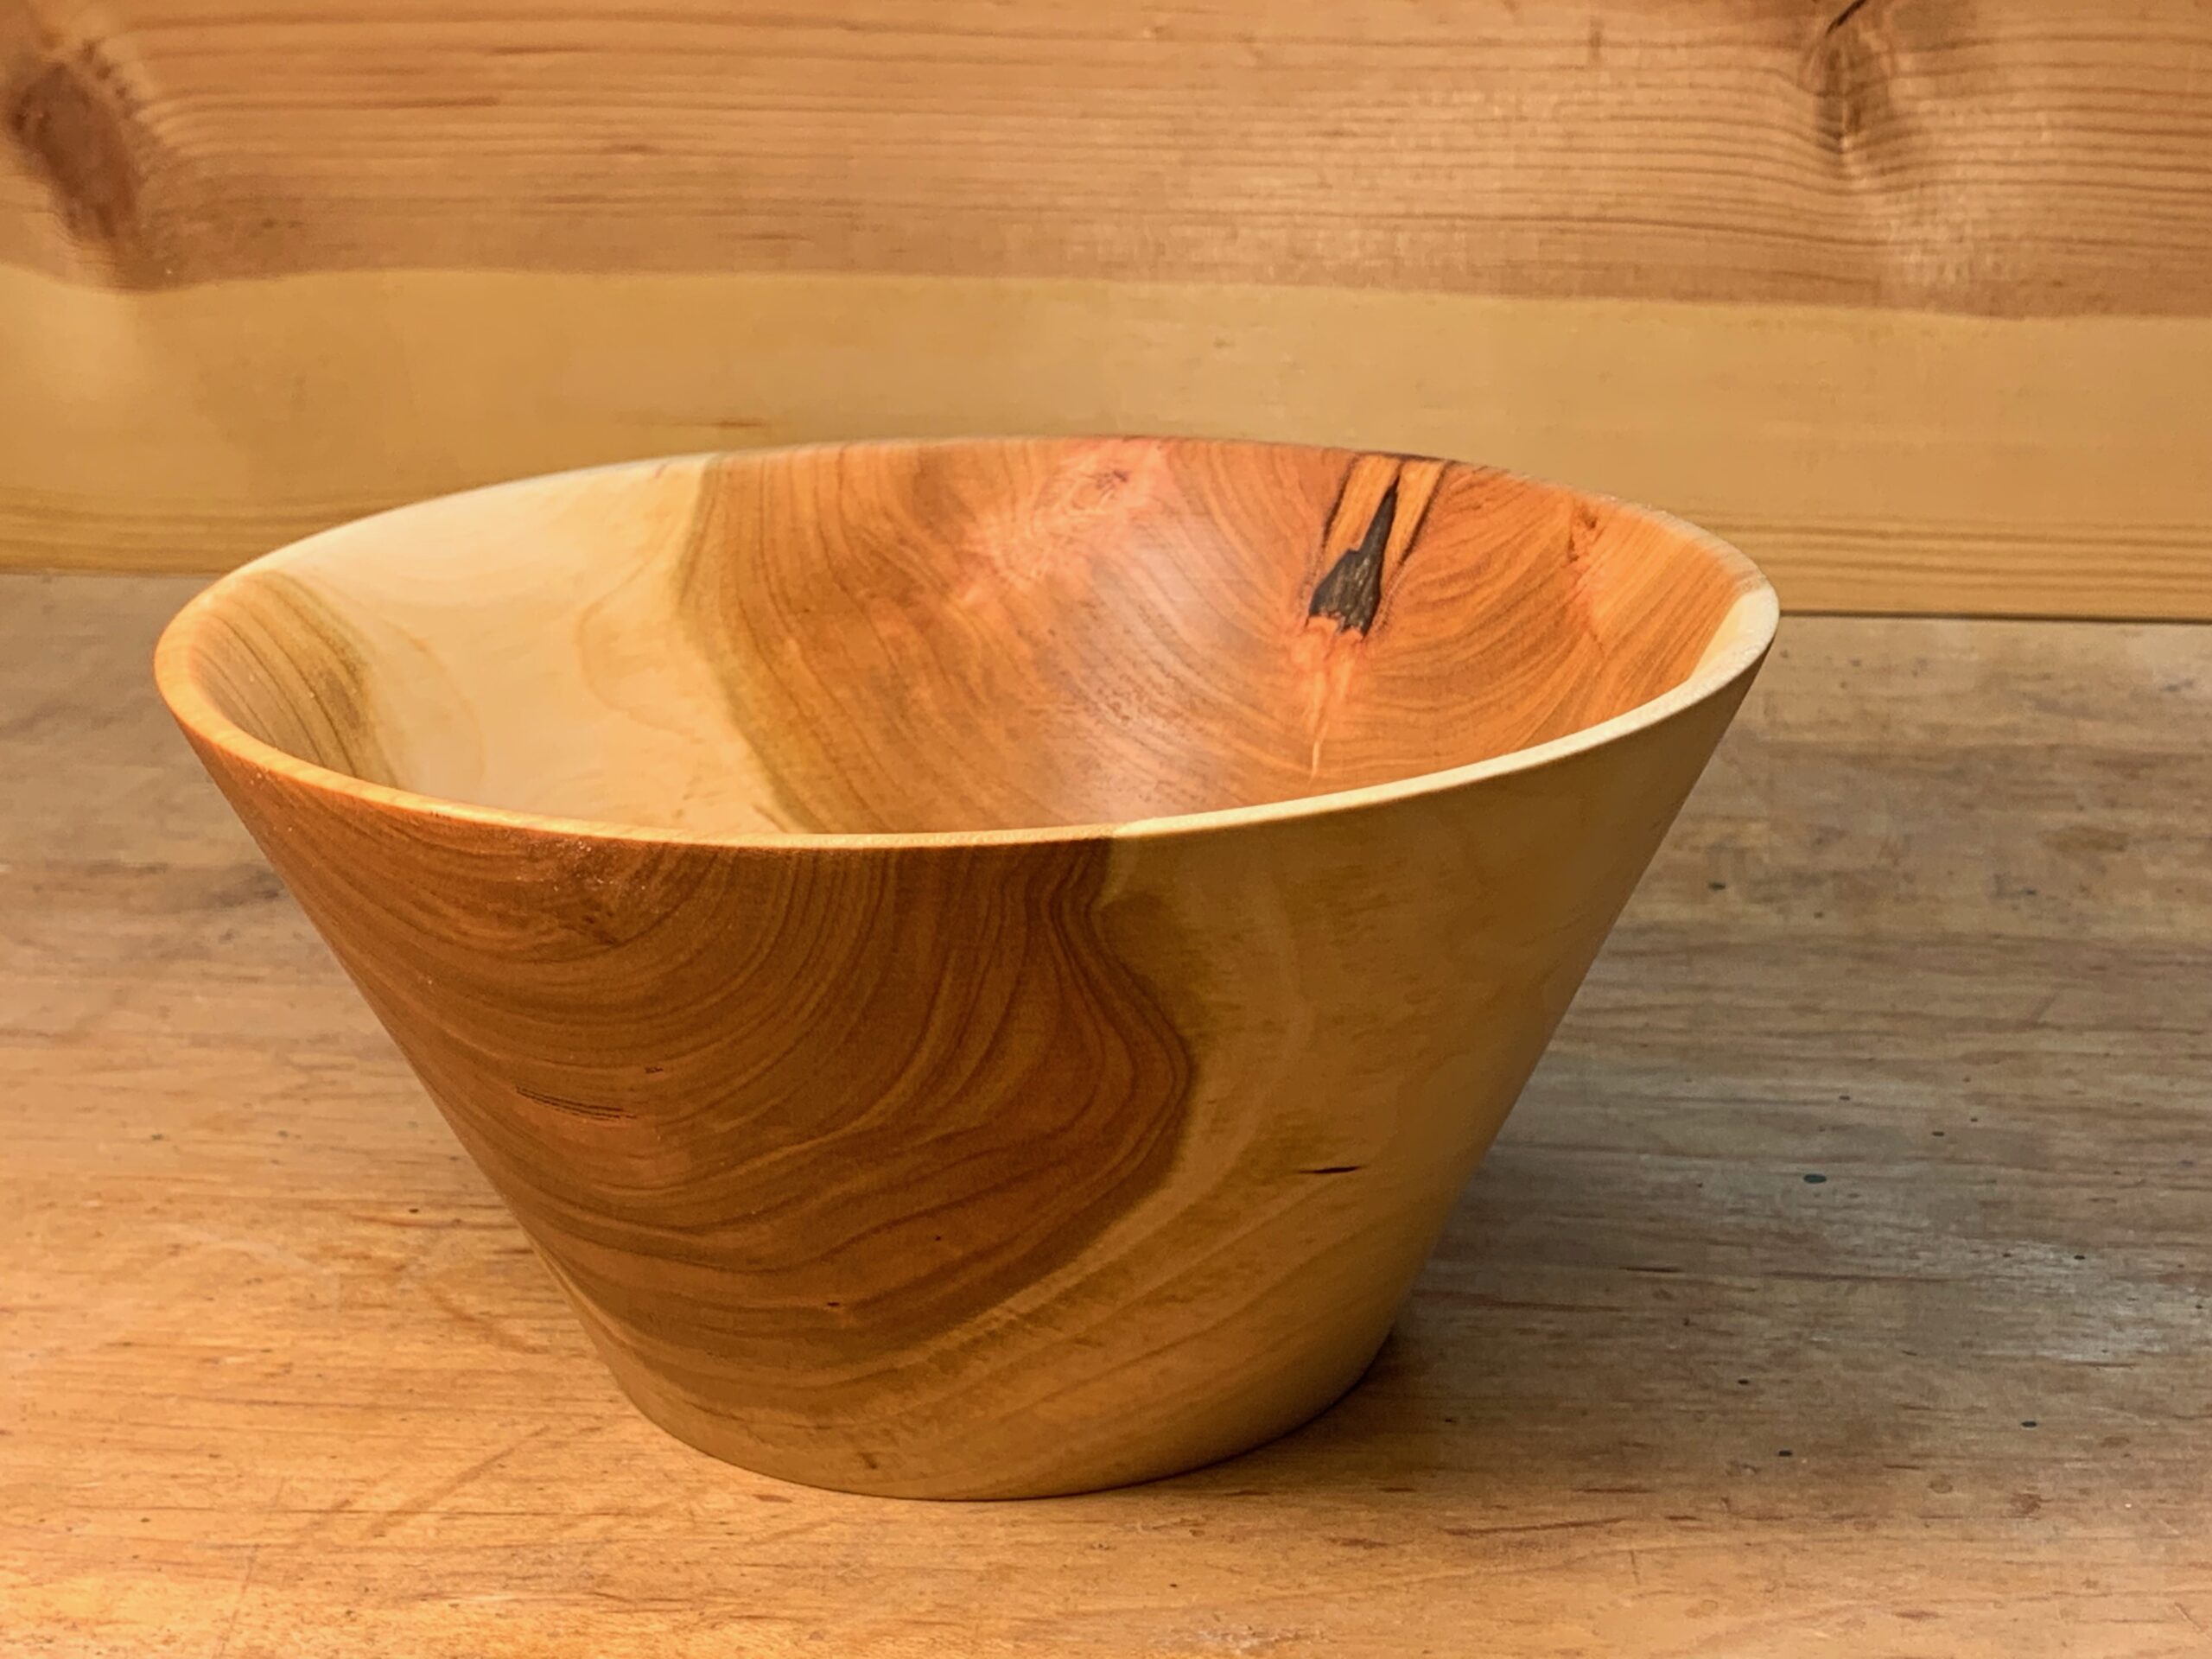
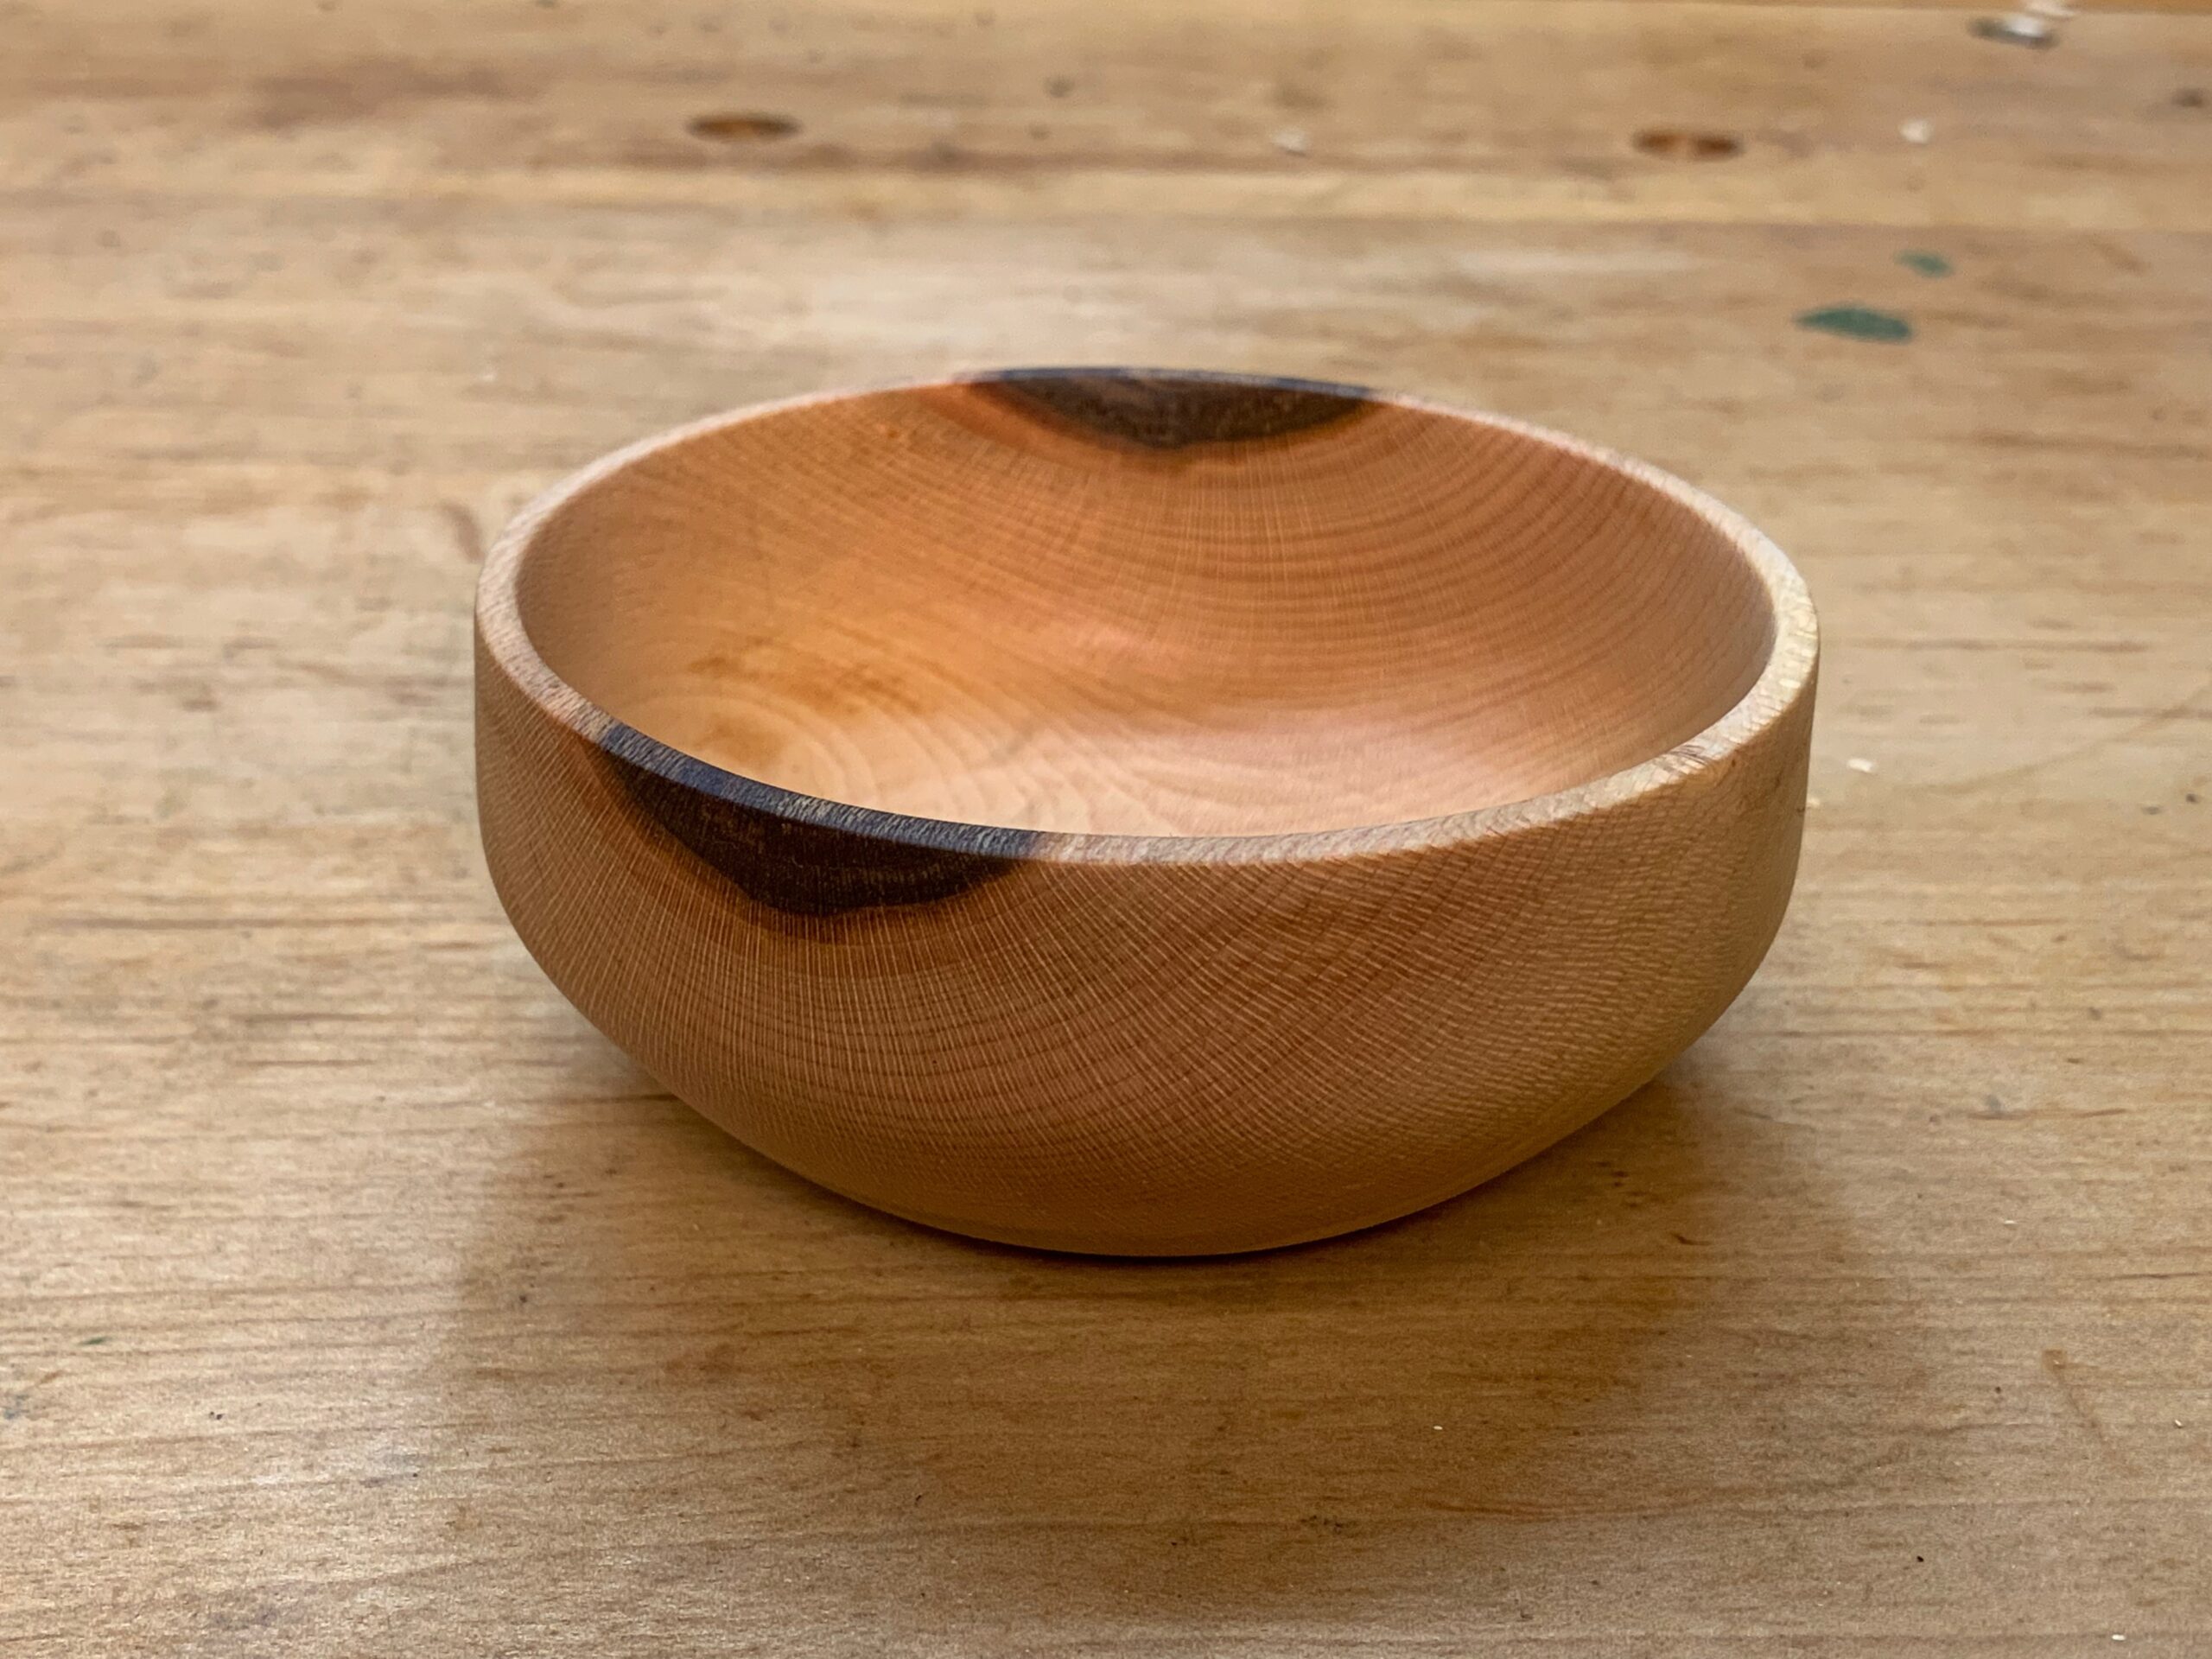
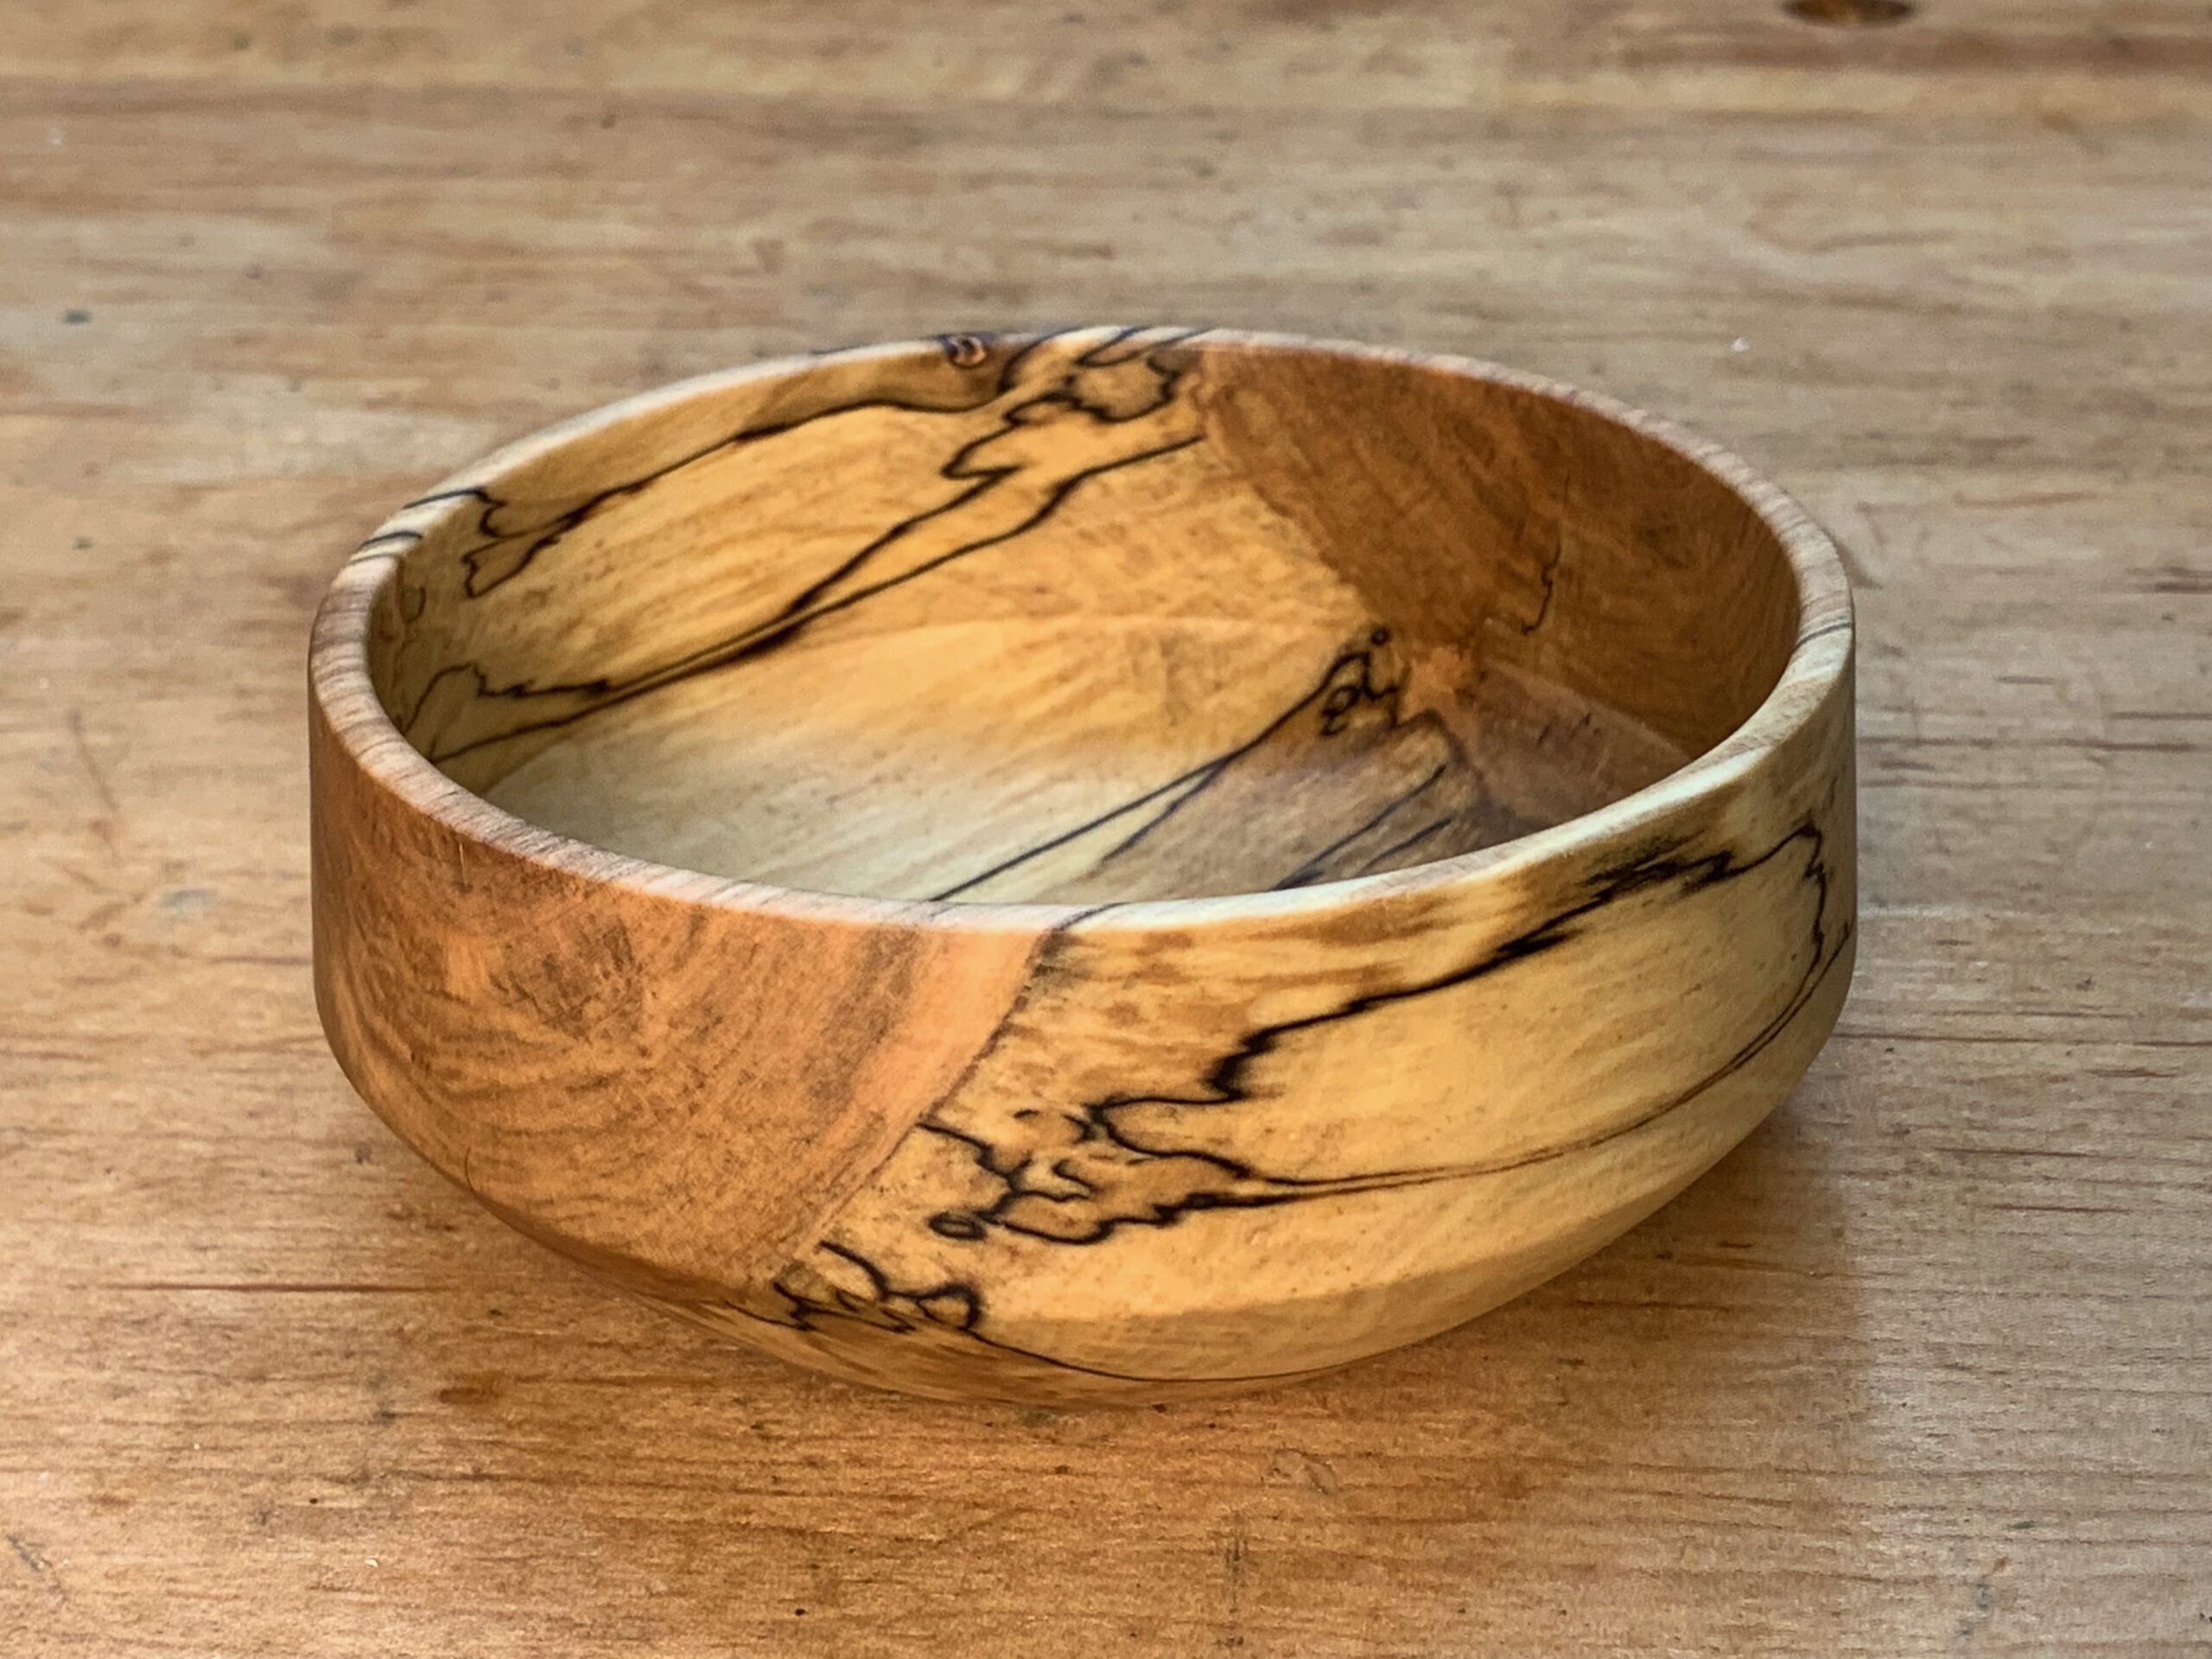
Although I’ve been wood turning for many years, I never really ventured into turning plain old bowls until recently. Here are several bowls I turned last year. All are finished with linseed or walnut oil; some also have beeswax. Most were rough turned green and returned after they dried; some were completed green and allowed to warp as they dried.
Black cherry; 7.5″ x 2.25″Black cherry, finished green; 6.75″ x 2.5″Black cherry, finished greenBlack cherryBlack cherryBlack cherry, textured surfaceBlack cherryCurly maple with ambrosia Maple cups; ~12 ozLondon plane; 4.25″ x 1.5″London plane; 4.25″ x 1.5″Spalted maple?; 4.75″ x 1.5″Spalted maple?; 4.5″ x 1.75″Spalted maple?; 4.25″ x 1.75″
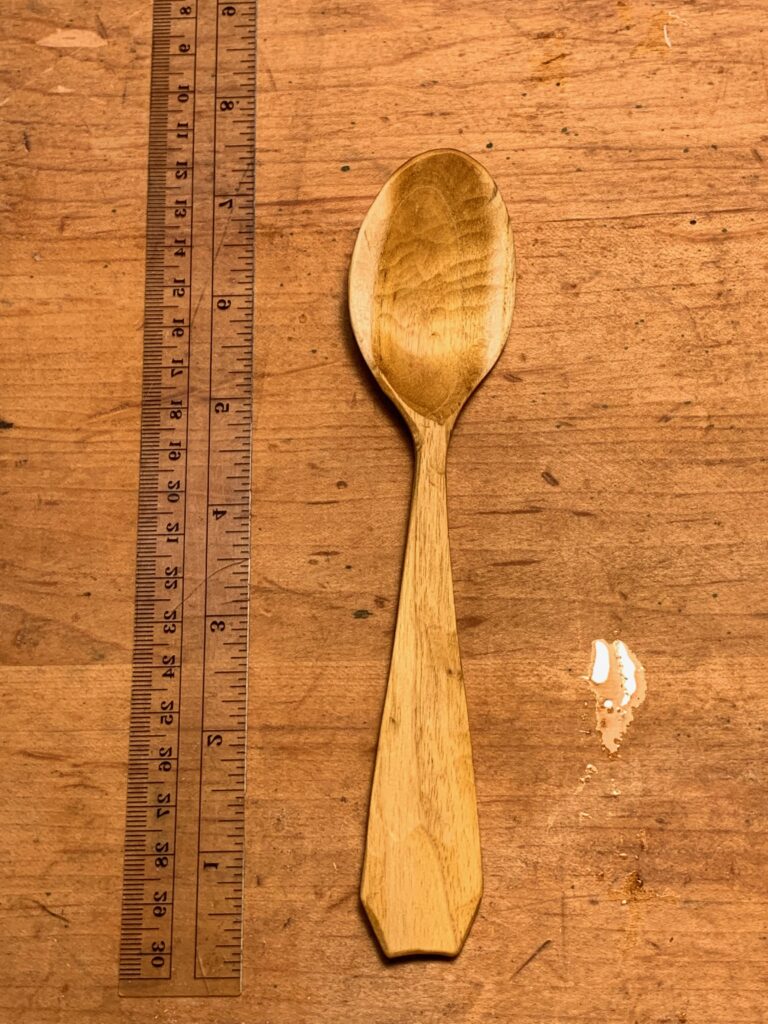
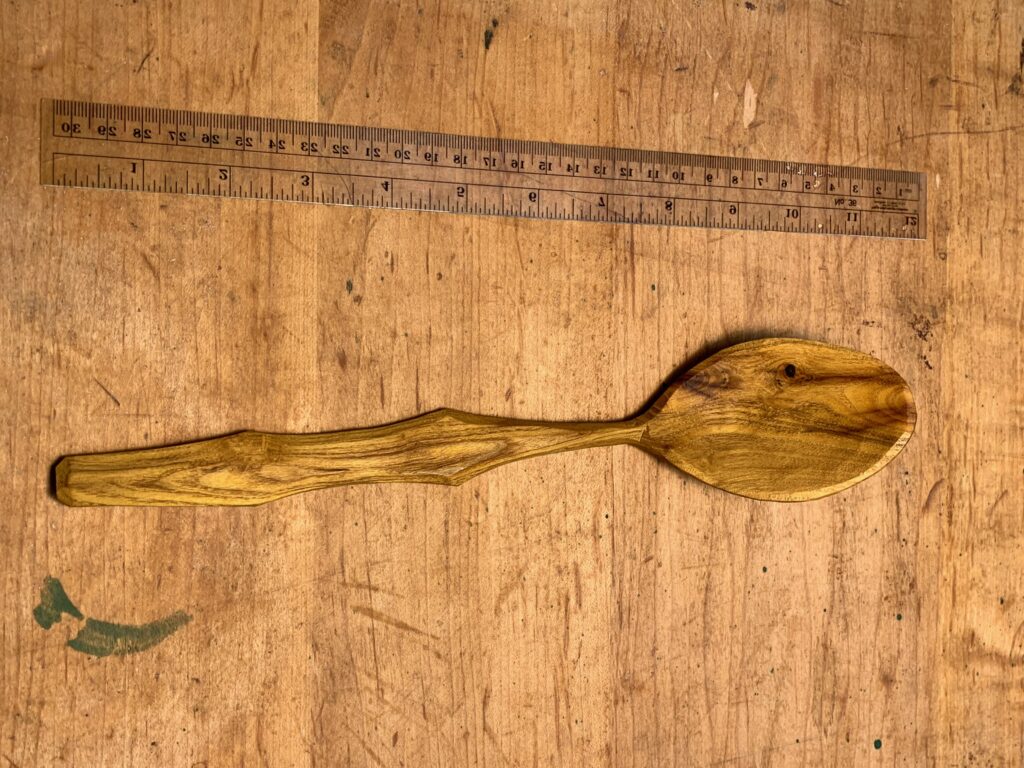
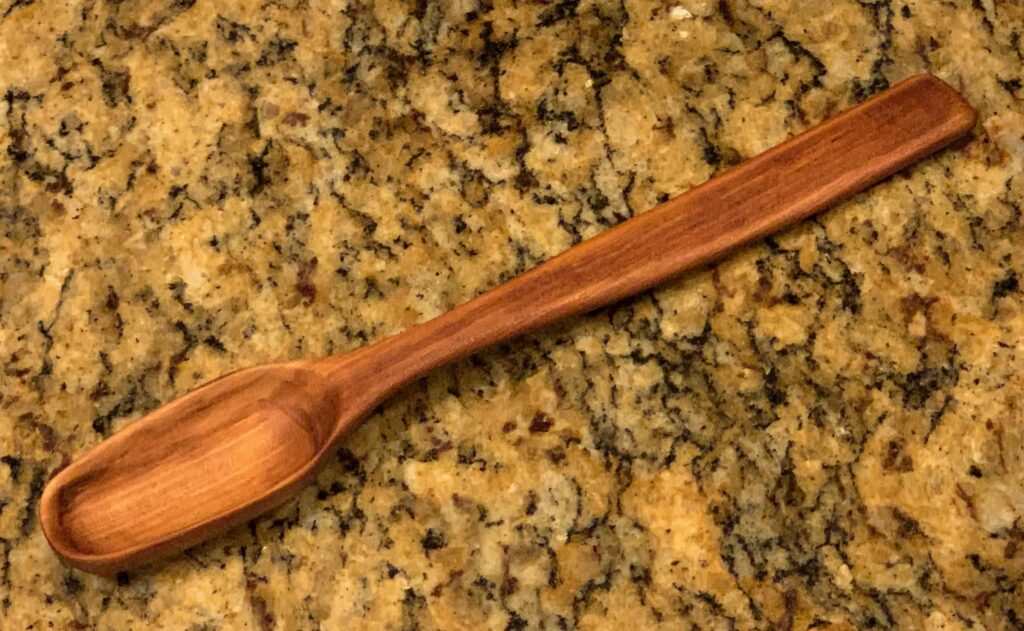
In 2020, I started learning to carve spoons. I planned to carve enough to give as Christmas gifts for all the relatives, but I cut myself pretty badly and had to put that off until 2021. Most of these spoons were gifted away in 2020 or 2021.
Wood species is noted when I know it, but basically all of my spoons are carved from scavenged wood and I’m not always sure what kind it is. Most of the Cherry spoons have darkened significantly since pictures were taken.
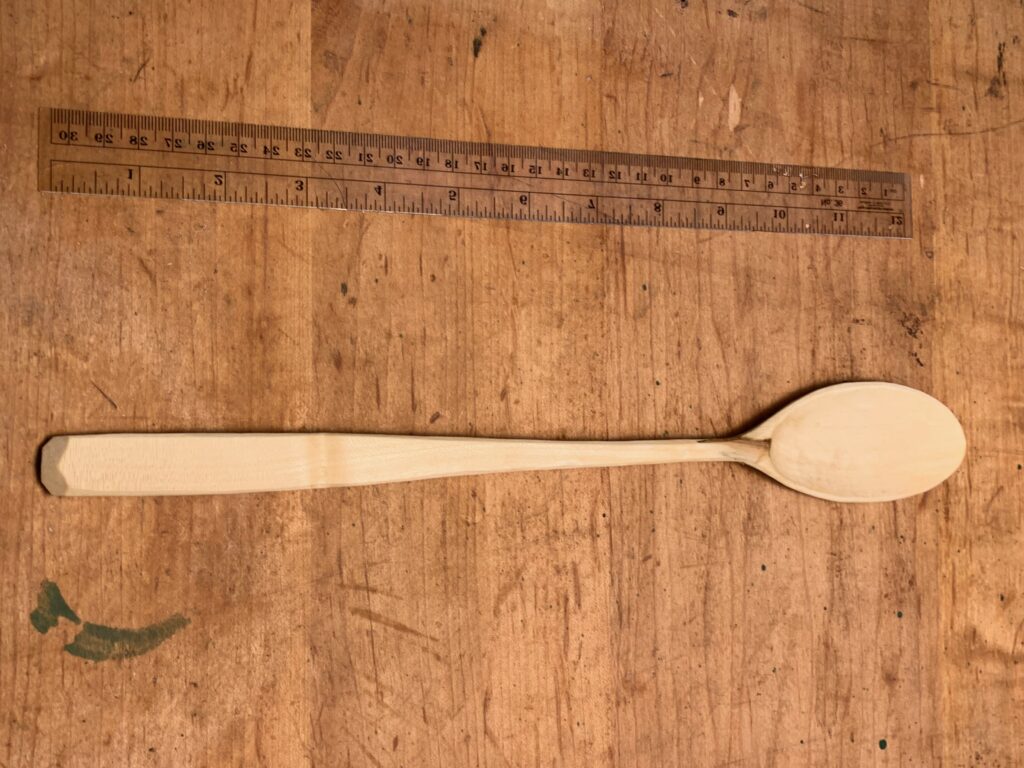
Eating spoon; wood unknown
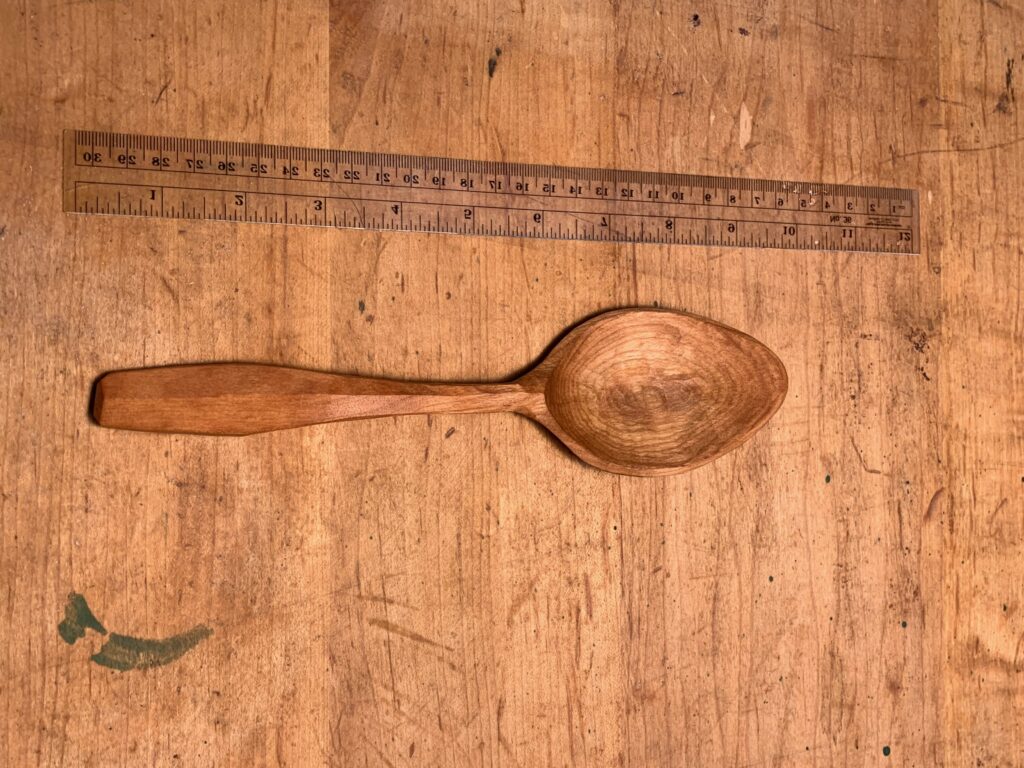
Cooking spoon; black cherry
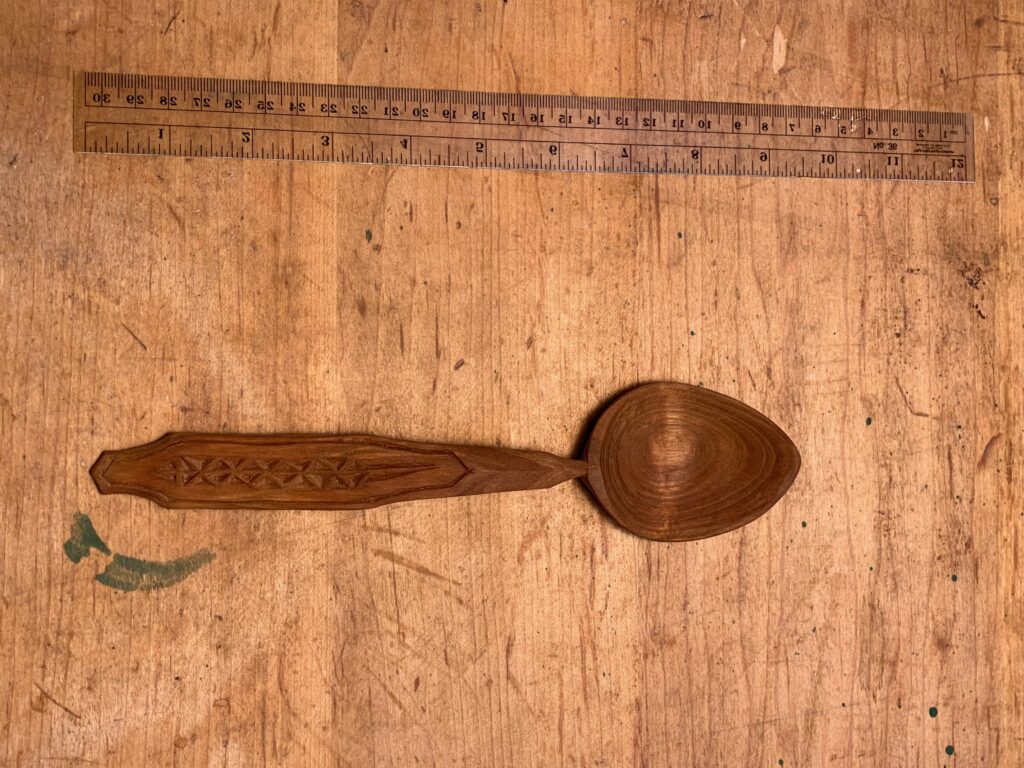
My personal eating spoon; wood unknown
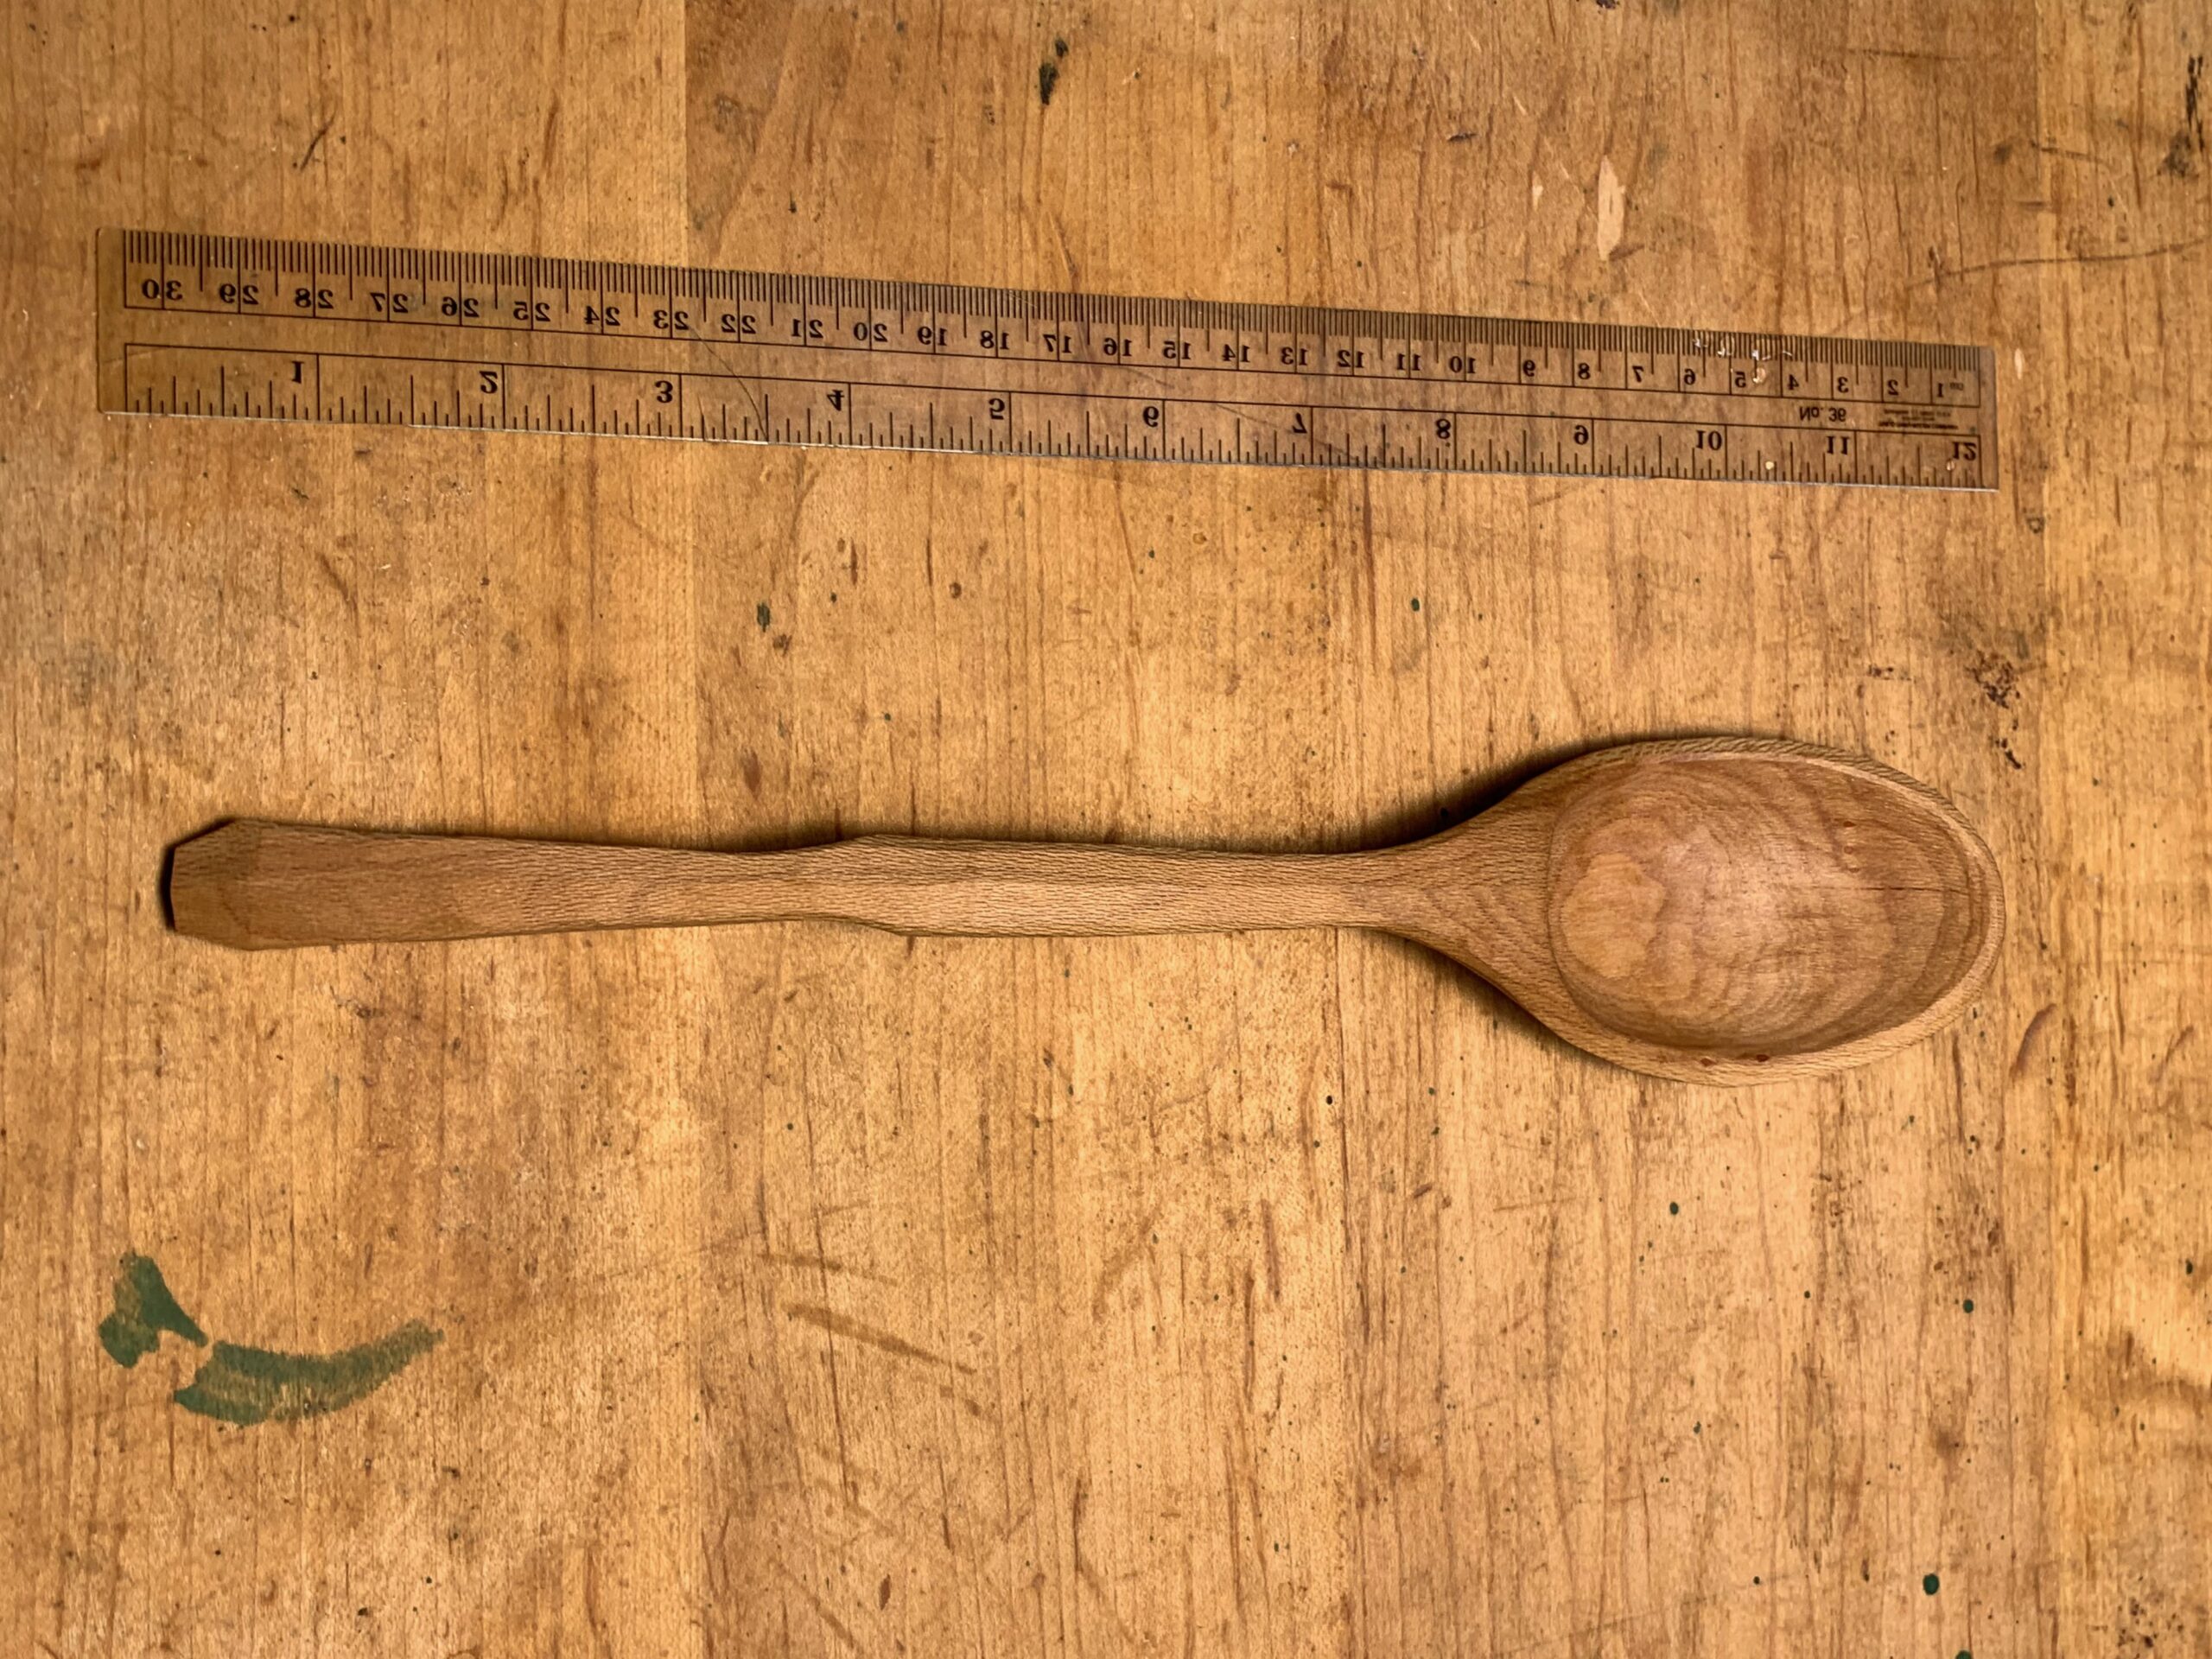
Serving/cooking spoon; London Plane
Eating spoon; Walnut
Cooking spoon; Black Locust?
Cooking spoon; maple
Serving spoon; black cherry
Cooking spoon; maple?
Serving spoon; box elder
Eating spoon; black cherry
Eating spoon; black cherry
Serving spoon; black cherry
My personal eating spoon; wood unknown
Eating/serving spoon; black cherry
Serving spoon; black cherry
Turner; black cherry
Ladle: curly maple root? Serving/scooping spoons: black cherry
Eating spoon; wood unknown
Deep serving spoon; London plane
Serving/cooking spoon; maple with bark retained on handle
When I came back to woodworking in 2020, I once again discovered that learning new skills and techniques provides me with motivation even when I don’t need the end product. I only get motivation to use the skills I already have when I want or need the product I’m creating.
With new skills come new tools. Here are some of the tools, benches, and fixtures I’ve built to support my exploration of new techniques.
My first experience using an axe (hatchet or 1-handed axe, really) for any real work was when I started working on one of Curtis Buchanan’s Democratic Chairs, using the online classes put together by Curtis and Elia Bizzarri. I still haven’t finished that chair yet, but my use of the axe pushed me towards spoon and bowl carving as well as more woodturning.
Here is my chopping block, before it had seen any significant use. The legs are splayed like a baby deer, and it has 4 legs because I didn’t position the first 3 correctly. The block is a chunk of oak previously destined to be firewood, and the legs are (also scavenged) maple.
Chopping block for axe work; 2020
I had a broad hatchet for hewing, and purchased a Robin Wood carving axe. Eventually I wanted to try a carving axe with the asymmetrical bevel preferred by Wille and Jögge Sundqvist, so I rehabilitated an old roofing hatchet for the purpose. I cut off the hammer head from the rear, reground the bevels with a curve to the blade, and carved a new handle from some scavenged Tree of Heaven firewood. I really like this axe, but ironically I’ve shifted back to using the entirely inappropriate single bevel hewing hatchet for most of my carving work.
The blade guard is carved from tulip poplar scraps. I have since added a second screw and slots to allow it to close securely.
Modified roofing hatchet, now an excellent carving axe; 2020
I was on the fence for a while regarding shaving horses. I got by just fine with a bench and vise for shaving sticks, and didn’t really think I wanted to spend the space required for a dedicated shaving horse. I think what changed my mind was wanting to build the shaving horse more than wanting to have and use it; but it has seen plenty of use since I built it.
This was built using Tom Donahey’s Shaving Mule plans, freely available online. The seat is from my perch, which had a great seat but was never very comfortable as a stool. Rather than carve a new seat, I repurposed the old one. Most of the lumber for the horse was sourced from a single 2×12″. Pro tip: if you want cheap, straight wood, look in the 2×12’s rather than the 2×4’s. You can make 2×4’s out of small, crooked trees, but 2×12’s are big enough that they need to come from good, straight trees. They’re always flatsawn, but if you find a cut that was close to the pith, you can end up with some nice quartersawn pieces once you rip it to width.
Shaving Mule; 2020
I realized the shaving horse is useful for doing work outside, when the weather is nice. For the same reason, I decided to build a low bench with holes for pegs and holdfasts. Again, I was imprecise when drilling tenons for the legs, so this looks like a baby deer. This bench sees regular use in the shop as a saw bench, and when the weather is good I can bring it outside and attach a chopping block for carving.
The top is glued up from two pine boards, and the legs are from my old stash of scavenged maple. On the bench is a turned wooden mallet I made to whack the holdfasts and wedges. The head is black cherry, and the handle is probably Tree of Heaven. Overall, the bench and mallet remind me of the Playskool Cobbler’s Bench I remember from when I was a kid.
Low bench with holdfast, pegs, and mallet; 2021
Although I certainly don’t have anything against beautiful tools, I am also very utilitarian. When I need a thing to get the job done, I concentrate on function instead of form, especially when I’m not sure if I’m going to use the thing long-term, or when it’s likely to be consumable or worn out with use. Some of these items are more beautiful than others, but they all perform their intended function quite well.
I built this Moravian style stool for Marla’s mom for Christmas in 2020. I used plans that I believe originally appeared in Popular Woodworking magazine. I found the plans online at the time, but can’t find a link for them anymore.
This simple stool uses a board top with sliding dovetail battens running across the grain on the bottom to provide extra support for the leg tenons. This results in a very light but strong piece of furniture. Yes, it’s a cardinal sin to use cross-grain construction like this, but it works. Worst case scenario, the top will crack but the stool will stay in one piece.
Moravian Stool
The seat board is salvaged pine from the stairs at Leatherwood, the now demolished home of Marla’s great-great-great-grandfather. Despite the tree being cut down over 150 years ago, when I cut through the grunge and dust it still smelled strongly of pine. Three of the tapered octagonal legs are hard maple; the fourth I replaced with hackberry because the maple was flawed and cracked. Finished with acrylic craft paint and wipe-on polyurethane.
When my mom was moving into her new house in 2016, I gathered several half-finished projects my dad started, and brought them home with the intent of finishing them. They sat in a box in the basement for several years. In 2020, after we had a French drain put in, I rebuilt my shop in the basement and finally found time to finish these projects.
First is another Windsor style stool based on plans from Fine Woodworking. Dad turned the seat and a multitude of legs and stretchers, but never assembled the stool. I was able to use the seat and some stretchers, but the legs were all too slim, so I turned replacements. The seat is pine and the rest of the parts are most likely maple.
Workshop stool
I painted with black acrylic craft paint and applied a wipe-on varnish finish. The stool is in regular use in my shop now.
The other project I found was an unfinished turned spoon, or scoop really. Dad turned the shape on the lathe, cut it in half, and hollowed it. I cleaned up the surface and applied an oil finish, before realizing this is not a very useful shape for a spoon: it has no crook, and the bowl’s sides are too steep to make it easy to cook or eat with. So it continues to sit around and not be used, but at least it’s complete. I had no idea dad had tried to make any spoons, but I expect this object contributed to me becoming interested in spoon carving later in 2020. It’s made of Black Cherry wood.
Maybe it’s time for me to restart blogging about the projects I’m working on. I guess we’ll see if this sticks.
Walnut Dice Bowl, turned and carved.
This is a dice bowl with locking lid I turned and carved. The first to pictures show it in unfinished state. I installed a felt bottom for rolling dice in the large compartment, and the lid holds the dice you aren’t using, as seen in the other pictures. It’s turned from American Black Walnut, a part of the collection of 6×4″ walnut pith sections I bought 20 years ago or so.
The lid is a bit looser than I’d prefer. I’ll need to work on that if I make another one.
I’m not very happy with the overall profile of the bowl. The opening is too small for the interior space, and the lid looks small in proportion to the bowl.
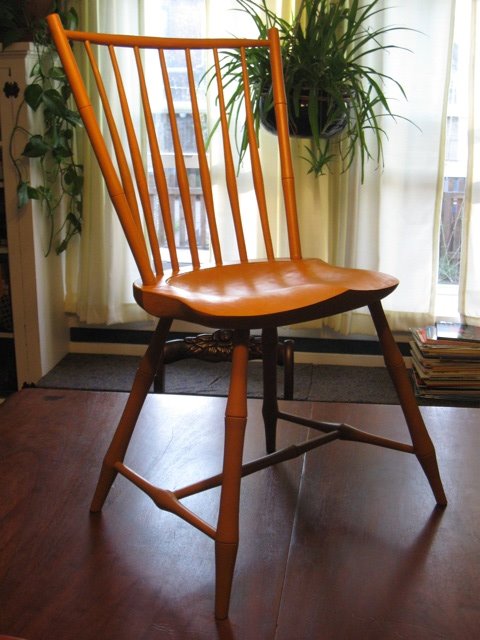
I finished the rodback chair. I used mustard Real Milk Paint with the anti-foaming agent, and I’m still very happy with the results. I didn’t use an under coat of the Butternut Squash, as I did on the perch, but this chair surprisingly turned out a bit more orange than the perch.
This is a really comfortable chair. I really like the feel of the deeply carved seat. Overall I’m very happy with the way it turned out, despite the mishaps.
I used epoxy to fill the crack in the seat as well as I could. Unfortunately it didn’t fill completely, but I’m confident it’ll be strong enough. The sawdust-filled epoxy seems to hold paint well enough, but it expands and contracts differently than the surrounding wood, so it does stand out a bit.
There was another unforseeable circumstance that set things back slightly. I used two different woods when making spindles, and one of the spindles I chose for this seat was made from the yellow/green wood I haven’t identified. When the first coat of paint dried, that spindle stuck out like a sore thumb: it turned dark brown, almost black!
So that spindle has several more coats of paint than the others, just to turn it yellow. It’s not a perfect match for the rest, but it’s close enough. I have a bunch more of this wood, and it seems to be turning brown on the outer surface as it ages. Probably something in the milk paint just accelerated that process. Now I’m not sure what I want to do: I’d like to use the spindles, but I’d rather not have to add 5 coats of paint to all of them. Maybe I should use a darker color, but then I wouldn’t have matching chairs.
On all of the pine seats I’ve painted recently, there are tiny surface cracks in the paint. I think this may be related to tiny pockets of pine pitch in the wood. I think it looks basically fine, the paint hasn’t chipped on any of them. Peter Galbert heats his seats and washes them with naptha to avoid problems with pitch.
This one is marked “Alan Ferrency 2009 4” on the bottom of the seat. I must say, I didn’t expect to make 4 chairs, even stools, in the same year! And there may be more to come.
Assembling the bottom half of a Windsor chair is generally called “legging up.” So, I figure, assembling the back must be “backing up,” right? I hadn’t assembled a square backed chair before, so I had to figure out how to do it, with this one. Prepare to be bored (no pun intended): this is what I did.
Unlike most other windsor chairs, even other square backs (including many rodbacks), this chair’s two joints at the sides are at a significantly different angle (but not quite “perpendicular”) compared to the joints at the tops of the spindles. I decided this required assembling the rod and posts first, and treating it as a single unit when assembling the rest of the back. This turned out to work quite well.
I first tapered the post holes, and set the posts in place. Then I clamped the rod to the posts, in the correct orientation and at the right height. In this chair, the rod should be parallel to the floor. I set a bevel to the angle between the post and rod, and confirmed it was the same angle on the other side. I used that bevel to drill the angled holes in the posts.
After removing the clamped rod, I measured the distance between the top of the posts, so I could trim the rod tenons just far enough for the posts to be lined up properly. The posts can rotate on the rod to any angle, but I wasn’t sure how this would work in practice. It turns out that the distance between the bottom ends of the posts changes significantly with very small rotations at the post-rod joint. I measured the distance between the posts at the seat of the chair to make sure the post-rod angles were also correct.
It’s possible for the top and bottom post distances to be correct while the posts aren’t in the same plane (the whole back is twisted), so I eyeballed it while dry fitting it into the seat. Once I aligned the posts and rod correctly and dry fit them into the seat, I marked the orientation of rods and posts so I could reproduce it quickly in the presence of glue. I then sawed kerfs in the rod for the wedges, applied glue to the rod and posts, assembled everything, and wedged the tenons.
While the rod and post joints dried, I installed the spindles in the seat (“crack!”). In cases where my spindles hole angles weren’t quite right, I oriented spindles that weren’t quite straight, to compensate. I marked the spindle hole locations in the rod, and bored the holes by eye, sighting down the spindles. This was the weak spot: I’m not enitirely happy with the results of these holes, but I don’t have a better solution at the moment.
From here on out, it was pretty much the same as the other chair backs I’ve done. I dry fit the back, and marked the spindles at the bottom of the bow, to saw wedge kerfs to the proper depth. Then, I hurriedly applied plain old Elmer’s white glue to all 9 holes and 9 tenons, and fiddled with things until it I got it all in one piece.
Finally, I applied glue to the wedges and hammered them into place. I’m unhappy with my wedges: they’ve been cracking fairly regularly. I think I should probably use something other than maple. I think we used oak on my previous chairs.
Anyway, I warned you it’d be boring; there weren’t even any pictures. But I would’ve appreciated finding this blog post via google, a few weeks ago.