Last weekend I drove out to Columbus, and Mike and I played BBDBA at the Post Tax Day event. It was a fun time, definitely worth going to Ohio. I hope to go back for future DBA events out there.
Unlike my other BBDBA tournament experience, this was a singles event instead of doubles. I borrowed JM’s Hittite army so I could field double Hittites (I/24a) with a Mitanni (I/19) ally. My planning ahead of time was limited to figuring out how to break the army into commands, and considering general defensive deployment (but not terrain placement). In all three games, my commands were split as follows:
- High PIP: 4xLCh(CinC), 9xSp, 3xPs.
- Low PIP: 4xLCh(Gen), 3xSp, 1xPs.
- Ally: 6xLCh, 2xAx, 3xPs, 1xHd.
I’m a bit of a wuss, so the Mitanni horde never left the camp.
Game 1: Hittites
 |
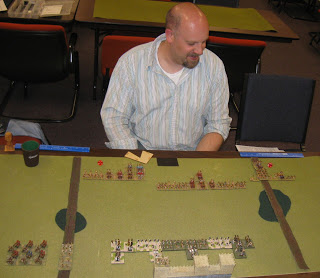
| Brian Peruski with Hittites |
The first game was a Hittite civil war: I faced Brian Peruski’s triple Hittites (I/24b). Our army compositions were similar, but he had knights instead of cavalry, and I had the Mitanni ally.
I defended, and placed fairly open terrain with two roads and woods. My army wanted some bad going to play with, but not a lot. I placed my Hittites first, with the spears supported and in two ranks as shown here. This provided good defense against knights, and the symmetrical deployment allowed me to deploy my Mitanni on whichever flank I though I could gain an advantage on, while leaving chariots to protect the other flank.
Although I hoped to face knights with my spears, I didn’t expect it. Although knights quick kill spears, the combat factors are horrible if the spears have support.
Brian deployed with one command poised to go into the woods on my right flank, and a mounted command on my left. My choice at this point was to try to figure out which command was his low PIP command, so I could ignore it and concentrate on the other side instead. I deployed against his mounted-heavy command, and left my right flank relatively open.
It turned out I was wrong about his commands: his mid PIP was on my right and his low PIP was on my left. In the first turn, Brian ran down the road, and everywhere else we advanced in an orderly fashion. This left his column of spear ahead of the rest of his force, and within striking range of my chariots.
 For the remainder of the game, three chariots from my high PIP command delayed and distracted his mid PIP command on my right flank. He was never able to bring the rest of his troops up to support his spear. In the center, we pushed back and forth until I killed off some knights and held my advantage. On my left flank, I outflanked and destroyed him.
Eventually I broke his C-in-C command in the center, after suffering a loss of 6 elements. The final score was 88-12 in my favor. My first win in tournament BBDBA!
 |
| Mike’s Early Crusaders are run down by Brian’s Hittites. |
This game reaffirmed my faith in well-supported spears against knights. Brian learned from his mistake of deploying his knights against my spears, and in the second game he crushed Mike by deploying his spears against Mike’s knights.
This also provided a great example of Economy of Force. Holding off 10 of Brian’s elements with only 3 of mine made a huge difference. Early on, I was afraid I made a mistake by placing both roads, because they ended up providing Brian with as much mobility as they provided me. Luckily, facing my chariots left him without enough PIPs for the rest of his force to advance.
Game 2: Medieval Swedish
 |
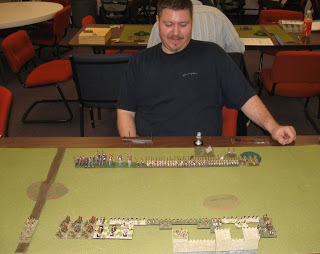
| John Lawitzke with Medieval Scandinavians (Sweden). |
Ugh, what a nightmare. I totally screwed this one up.
John Lawitzke defended with his Medieval Scandinavians (IV/54c): blades and bows galore. As in his first game against Mike, he placed a fortress of maximum sized forest and marsh in front of a waterway.
Clearly he wanted to sit inside the fortress and not outside it, so I made the only good decision all game by choosing to place the waterway at my rear. He placed his camp centrally, and I deployed mine on my far right flank so I could deploy at least part of my force in front of the bad going.
After he deployed centrally, I started screwing up. First of all, I didn’t deploy a strong force against his C-in-C command, but instead virtually ignored it. Second of all, I spent way too much effort attempting to prevent a littoral landing. I could’ve lost both camps on the first few turns, but since his army was so slow I should’ve had plenty of time to recapture them before he hit me. Instead, I bottled up my troops and made it impossible to maneuver.
When we first met in combat, it didn’t look like a completely lost cause until after I rolled the dice. I had some advantageous combats, but they all failed; this turned my disadvantageous combats into epic fails, and I lost several elements. After that, I never had a combat that was in my favor for the rest of the game.
He quickly crushed the Mitanni on my right flank, and then demoralized my C-in-C command. By the end of the game I was cheering when I simply caused a recoil. He beat me 100-0. Doh!
Game 3: Antigonids
 |
| Scott Ludwig with Asiatic Early Successors (II/16a). |
In the third game, I defended against Scott Ludwig’s Early Asiatic Successors: Antigonos (II/16a). My terrain placement was intended to encourage him to choose his side of the table, and to anchor his pikes on the woods on his baseline. It worked. The hill on my left was steep and on the right it was gentle.
I used the same symmetric deployment as in the first game, but with a single rank of spears where I assumed his pikes would be. After he deployed where I hoped he would, I placed my Mitanni where they could play on the steep hill and restrict his options on that flank.
Scott’s command split was pretty severe. He had 18xPk (C-in-C) and 1xLH in his low PIP command. This is just enough PIPs to walk forward in a straight line, but it provided no room for maneuver. The key to my survival was clearly based in not letting him poke me with his long pointy sticks. On my right flank, his mid PIP command had 6xPs, 1xLH(Gen) in the woods. On my left was all of his mounted in a high PIP attack wing.
He advanced his pike line with his psiloi in support on my right flank. There was a mistake in there somewhere, but I’m not sure what the better answer would have been. The three chariots on my right flank killed off the entire psiloi command before starting to outflank his pikes.
 In the center, I really didn’t want to face his pikes. I advanced as far as necessary to gain a hill advantage, and then sent my psiloi into “pain in the ass” mode. They played between the lines, forcing him to shift sideways to align with my group of psiloi, and then preventing him from advancing more than 5-10mm at a time before contacting another psiloi unless he broke formation. His troops were well trained and stayed in line, but it was virtually impossible for him to gain ground. His 1-2 PIPs per turn were dedicated to fending off my chariot attack on his pike’s flank.
My left flank was most interesting, tactically. I had superior numbers and terrain advantage; he had superior combat factors. It wasn’t clear whether I’d be able to turn his flank on my right before he gained an advantage on my left.
 |
| After the death of Scott’s high PIP general. |
He broke through my line with his elephants, demoralized my low PIP command, and started killing spears in my high PIP command. In the end, I won with a bit of a Deus Ex Dice: I set up an advantageous combat against his high PIP command’s general and killed him. With his low PIP command completely destroyed and his high PIP command demoralized, and almost no PIPs available to advance his pike line, he conceded. He’d have been hard pressed to keep his three elephants on the board, since they were in 2 groups and cost 3 PIPs per group to avoid retreat. In the end, I won 78-22.
This game was another great example of economy of force, but I was able to make a strong offensive strike against his psiloi since my light chariots quick kill them. He might have been better off rotating his pike line on the bad going, letting him keep some of his psiloi in the woods.
I was really happy with my terrain placement. It was minimal enough to look harmless, but provided exactly the function I wanted it to. In some games my plan would be too obvious and therefore easy to ignore. However, it’s still sometimes a good tradeoff to give the enemy the terrain they’re looking for in exchange for terrain you’re looking for. The alternative is no one getting the terrain they want, which may be just as good.
Summary
In the end, I came in 5th place out of 10 with 166 points. Mike won a game as well, in the third round and his third game of BBDBA ever. I didn’t even have to exercise my “bring a new player so you’ll have someone to beat” option.
This whole “BBDBA singles” thing has a lot more of the feel of a DBA event than a BBDBA doubles event. In the end, it’s still DBA and I enjoy DBA. Mike wasn’t sure whether he’d like the longer game length of BBDBA, especially when you’re losing, but he had a good time and continues to have enthusiasm for DBA.
Hittites with Mitanni ally are a bit more interesting than I expected, compared to Hittites in a single army. If I were playing triple Hittites, I’d definitely prefer the later Hittites with heavy chariots.
The Mitanni are a very useful ally for several reasons. Their combination of bad going and chariots is a good mix when facing a mounted command near bad going. I also liked the PIP distribution with this ally. I never felt like I was PIP screwed even when I was rolling low, and I really enjoyed the fact that my low PIP command typically had more PIPs than a triple army’s low PIP command.
Thanks for the great event, I hope to be back for more DBA in the future!


