Blood & Plunder: How I Sew Sails

I started painting and modeling for Blood & Plunder in mid-2022. I recently finished rigging a Brigantine as well as a few boats, and took pictures to share my process for sewing sails. This method requires a simple sewing machine and minimal sewing experience.

The Brigantine was able to land, but all men who went ashore died or routed. Firelock Games miniatures and Brigantine ship model. Everything created and/or painted by Alan Ferrency.

Tools and Materials

I use thin cotton fabric for my sails. I look for a thin, natural colored cotton muslin at the fabric store. When sewing the sails, I use ordinary white or natural colored sewing thread. When rigging I use a thicker upholstery thread and tan colored elastic cord.

Tools:

  • A sewing machine. It only needs to perform a straight stitch, but you’ll have a much easier time if the machine can sew slowly and/or has a hand wheel to advance the needle manually as needed.
  • Scissors. Don’t underestimate the importance of sharp scissors for use when sewing. Cutting fabric should feel like cutting paper, not like chewing jerky. Most folks who sew regularly dedicate a pair of scissors for use only to cut fabric, to reduce the need for sharpening.
  • An iron. Although it is possible to do without an iron and to use sewing pins instead, you will have a much better time using a clothes iron to prepare your hems. In some locations, both irons and sewing machines are commonly available inexpensively at thrift stores and/or estate sales.
  • Water spray bottle. In a pinch you can use a bowl and your hands; you just need to be able to get the fabric damp in a predictable way.
  • Pencil and paper.

Making Sails

In order to make sails, you first need a paper pattern for each sail shape you will be making. You can download sail templates from the Firelock Games DLC site, but beware that these templates often do not perfectly match the assembled rigging. I recommend using paper to fiddle with the exact shape of the sail required, based on your (partially) assembled rigging. Once you have the sail shape correct, you can trace the paper’s shape onto cloth to make a cloth sail.

Trace each pattern onto the cotton cloth, leaving at least 3/8″ (1cm) extra cloth on each side.

I iron the fabric before tracing patterns, to make sure it’s flat and wrinkle-free. When tracing the paper patterns onto the cloth, the direction of the pattern in relation to the cloth is important. Cloth has long straight fibers going the length of the cloth (the warp) and looser, slightly more stretchy fibers going across the warp (the weft); but it’s stretchiest along the diagonal. In order to make your sails look “billowed” correctly, especially if you’ll be using sizing (glue) to curve them, you will want to make sure that the seam lines shown on the sail pattern are parallel to the warp (length) of the fabric. When designing your own sails, typically the seam lines go vertically on square sails, or parallel to the longest side on non-square sails.

Trace around each pattern using a pencil, leaving at least 3/8″ extra cloth on each side, or more between two pieces. This is a folding line, not a cutting line! You need extra cloth outside the line to hem each edge, so cut at least 3/8″ from the line.

When you cut the sails, don’t cut on the line! Leave at least 3/8″ (10mm) of extra cloth on each side.

The next step is to prepare the edges of the sails for sewing. For this, we first fold over the corners and iron them, and then fold over each side and iron it. The objective is to get the pencil line on the outside of the fold once you’re finished ironing. It may not be perfect the first time, but the closer you are, the closer you’ll be to the right size.

Spray the sail to make it damp. Fold a corner over, leaving the pencil line on the outside, so the fold stops just at the corner where pencil lines meet. Use the iron to press the corner until it is dry and stays in place.
Next, do the same on each side: spray, fold, iron to press into place. When you’re finished, iron the entire sail flat. Everything should stay in place without unfolding or causing trouble.

When working with sails with sharp corners such as Lateen or Gaff sails, you may end up with the side fabric overlapping where the next side needs to fold on the corner. I recommend trimming away any overlapping cloth, as long as you don’t cut into the bottom layer or the corner itself. You may also need to trim the second fold before cutting to avoid sewing down too many layers. I usually start on the pointy corner so I pay attention to it.

Trim sharp corners as needed to allow the next corner to fold correctly.

Next is the fun part: sewing!

Here, the overall objective is to sew a line around the edge of each sail to secure the edge, and then to sew decorative “seam” lines along the length of the sail. These lines represent the seams between pieces of sailcloth on an actual sail. Sails are wider than a single bold of cloth, so many pieces of cloth must be sewn together to form a sail. Those seams are typically less stretchy than the rest of the sail, which affects the way the sail looks when it is billowed. Luckily for us, a decorative straight stitch at the proper tension is also less stretchy than the cloth, which helps the sail billow more realistically.

Start sewing exactly at the corner of the sail, only 1/16″ (1-2mm) from the edge.

Start sewing on one corner, using a straight stitch, very close to the edge. I use a tight stitch, maybe 2-3 mm long. I usually lock the threads on the end by making 2 stitches, reversing for 2 stitches, and then stitching forward until the next corner. To sew a perfect tight corner: go slowly or manually until you reach the corner with the needle in the fabric exactly where you want the corner. Then stop sewing, lift the presser foot, turn the fabric to align it with the new sewing direction, and start sewing the new edge.

When you get to the end, lock the thread with 2 more stitches and trim the excess thread.

When complete, you should have a clean line of stitching close to each edge, with a lot of extra fabric on the inside.

After sewing the edges of each sail, we need to trim the excess fabric before sewing the decorative seam lines. For this, I carefully align the part I’m cutting off on my lower scissor blade as I carefully cut as close as possible to the stitching without cutting the stitching or the lower fabric layer. The corners require extra work because they have several layers of excess fabric that must all be trimmed.

Trimmed sails, ready to sew seam lines as needed.

After the edges are trimmed, the sails may need a bit of ironing to make them flat again. Sewing the decorative seam lines is straightforward. I lock the threads on each end here as well. I mark the location of each line, to make sure they’re spaced correctly, and I use the decorative trim on the front of my sewing machine to keep the fabric aligned. A sticky ruler or marker lines on your machine would work at least as well.

Everything Else

This article is about the sewing… sorry no pics of anything else.

I don’t typically dye or stain my sail cloth, but I do often end up with mineral stains due to ironing that help give it a weathered look… I tell myself, looking on the bright side.

For fore-aft sails, I typically leave the cloth loose, without any glue or starch to keep it in a specific shape. I tend to use tension-based rigging instead of gluing all my yards in place, so the cloth ends up as a bit of a structural component of the rigging when I’m finished.

For square sails, my current technique is to curve the sail on a rubber playground ball, using a mixture of extremely watered down white glue. I use a brush to saturate the sail with watered down glue, and to press it into a curved shape on the ball. Since cloth is stretchier in the diagonal, you’ll naturally end up with the corners ending up a it pointier and the edges curved inward. To keep the top edge of large square sails straight for mounting on the beam, I use a skewer to keep the top edge of the sail straight while the rest is curved onto the ball.

Completed Brigantine using the sails sewn in this article.

OpenForge: 3d Printed Dungeon Terrain

The availability of a large selection of models for wargaming and RPG terrain was a huge factor in deciding to purchase a 3d printer. Here are some examples of OpenForge dungeon tiles I’ve printed and painted.

OpenForge dungeon tiles and Carrion Crawler models printed in PLA.

Because OpenForge 2.0 “low wall” pieces weren’t available when I settled on what I was going to print, I decided to drop the wall height by 15mm everywhere. This makes things more visible in tight spaces while keeping it visually interesting, but unfortunately the doorways don’t line up perfectly.

I settled on using magnetized bases: each base has a spherical magnet at the edge of each 1″ square, which allows the pieces to align and stay aligned during use. It’s not a strong connection, but it works fine for single floor dungeons.

The first image is an encounter I set up for a D&D game I’m running with Ezra and some of his friends. This is the tower in Thundertree (from the Mines of Phandelver introductory adventure) some time after another group of adventurers came through and killed the dragon.  Carrion crawlers and insects now inhabit the area, preventing local loggers from using and restoring the tower.

A selection of painted and unpainted OpenForge dungeon tiles

Malifaux: Terrain

We finally made time to play another game of Malifaux.  Frank, Andy, JM, and I played two games side-by-side on a 4×6′ board set up with terrain set up for two adjacent 3×3′ boards.  This was a good showcase for my Malifaux terrain, so I took some pictures.

A Ronin attacked by mechanical spiders in the woods

Frank played his Viktoria crew against my arachnid-heavy Ramos crew.  Andy’s Colette box set tried to fend off JM’s Freikorps.  Frank crushed me utterly in 4 turns, while JM destroyed Andy’s dancers in 6 turns.

After trying and failing to enjoy the Terraclips terrain, we’ve fallen back to using area terrain pieces on a Terrainguy map.

The terrain here is an amalgam of pieces from a variety of sources that I’ve collected over the last decade or so.

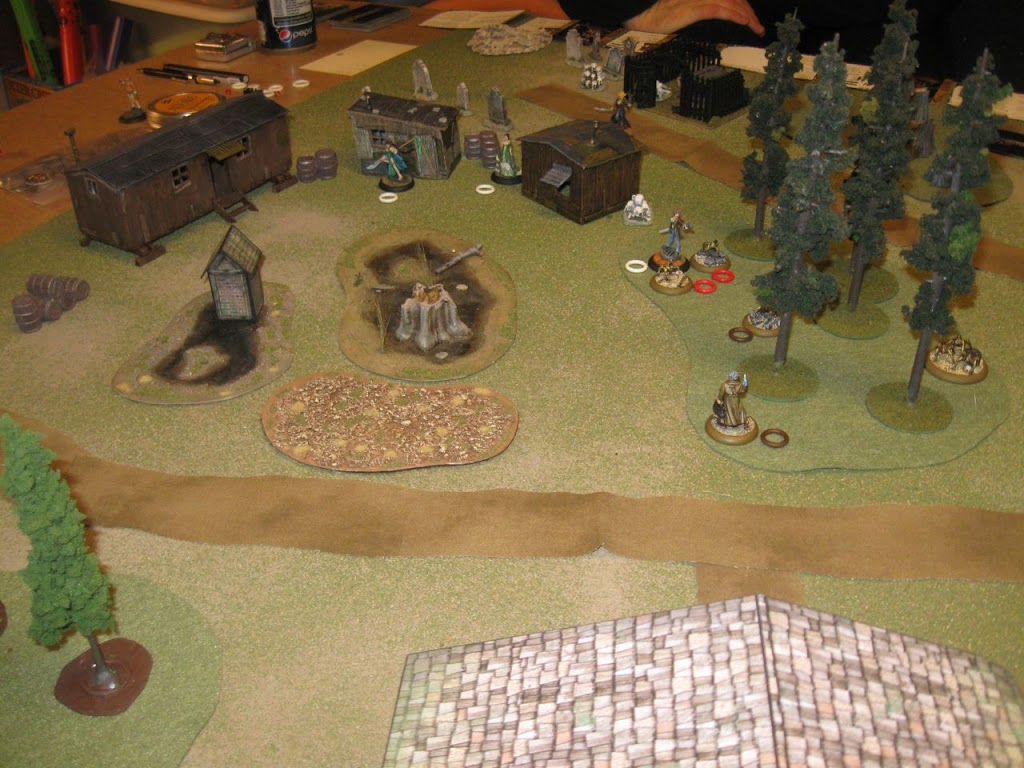
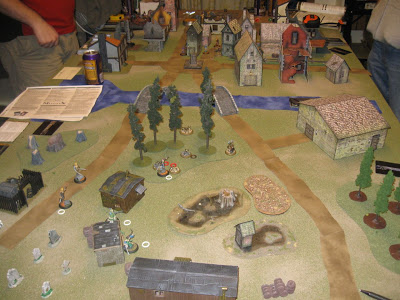
Malifaux terrain: city and outskirts

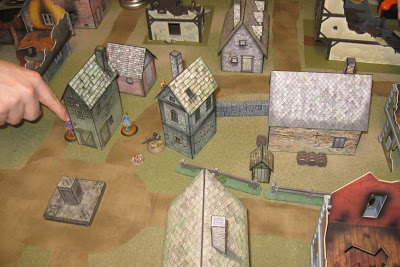
Some of the buildings are Mordheim terrain from the box set. Others are completely scratch built and hand painted by Frank.  Some are made from inkjet printed walls glued to foam core. The hobo village around the swamp is plastic O scale railroad terrain.

The grave stones and piles of skulls are from Michael’s craft store during Halloween season.  The graveyard was scratch built by Frank.  There are railroad trees, cast resin stumps, and strips of cloth for roads.  The barrels were store bought pre-painted terrain.

Colette versus the Freikorps in the streets of Malifaux

I scratch built the swamps and rough ground area for dual use with DBA and Malifaux.  They’re made of thin plastic with rocky sand glued on, followed by paint and flock.  The water areas are done with glossy varnish slopped on over the paint.

Frank scratch built the board fences for Warhammer Fantasy, and I built the stone walls using Hirst Arts plaster molds.

Overall, I like the way this terrain looks, works, and stores better than Terraclips.  I could see adding a few standalone Terraclip buildings to this kind of game board, but I don’t think I’ll be trying to lay out an entire board of Terraclips terrain again any time soon.

Playing Malifaux reminded us all how much we enjoy the game, and we plan to play again soon.  Unfortunately the game seems to be changing faster than we can keep up with, since we don’t play regularly.  Luckily it’s still enjoyable with older models.

Hittite Camp

Here is a camp I built for my Hittites.  It is based on images in the Osprey book Hittite Fortifications, c. 1650-700BC.

The wall is built in two sections, each of which is the maximum size allowed for a camp: 40mm x 120mm.  The left section with the gate will be my camp for a single Hittite army, and I’ll add the extra wall section when playing BBDBA with a Mitanni ally.

The walls and towers are constructed of styrofoam cut on the bandsaw.  The crenellations are made of mat board, and the exposed beams are short pieces of balsa.  I brushed on water based primer and varnish, since spray paint and superglue destroy foam.  

At this point I’m officially finished with any modelling required before After Tax Day BBDBA.

Terrainguy Brown-Green Mats

In response to a recent question from a Fanaticus forum reader, here’s my take on the Terrainguy brown-green gaming mats.  I’ve included photographs from a few recent blog posts that show m brown-green mats in action. 

Close-up of Terrainguy brown-green mat.
For comparison, the bases are flocked with
Woodland Scenics Fine Turf and sand.

A view of a 4’x6′ green-brown mat.

These mats are available in a variety of colors and sizes.  I have a 4’x6′ mat and a 30″ DBA mat in brown-green, and I’m very happy with both of them.

This is the best looking flocked gaming mat I’ve seen so far, but I know of a few I haven’t seen in person.  The flocking material is not static grass, it’s more like the Woodland Scenics “fine turf,” made of very fine ground foam. The mat itself is made of canvas with a rubberized material on the surface that holds the flock in place.  Mine aren’t old enough or well-travelled enough to know how well the flock holds up to heavy use, but I haven’t had any problems so far.

For storage and travel, I roll the mat.  I would not recommend folding it, I would expect it to get permanent creases.  They’re flexible and roll easily.  They hold a slight curl when you unroll them, but they’re easy to flatten out.

Overall I’m happy with these for the price I paid, and I’d definitely buy another one if I need any more mats.  The larger mats often go on sale, but the DBA mats seem to always be full price.  The DBA mats are in a different section of the web site, making them harder to find in the color you want, but all of the colors are available for DBA sized mats as well as the larger mats.

Tlingit Camp

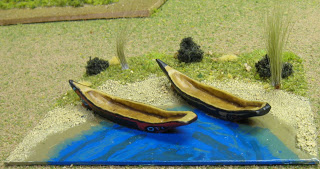
Here’s a picture of the camp I built for my Tlingit army.  Since the Northwest Americans are a Littoral army, they will always have a waterway when they place terrain, so I decided their canoes would make a good camp.  I left room to add a totem pole, but I haven’t been inspired to build it yet.

The canoes are longboats from Museum Miniatures, modified to look a bit more like Tlingit canoes on the front end.  The rear end isn’t right, but it’s the way the canoes  looked when I got them.  The paddlers with the canoes were totally inappropriate for precolumbian North America, so I didn’t use them.

The patterns on the sides of the canoes, barely visible here, are based on images of Tlingit canoes I found via Google image search and in Flickr. 

Malifaux Terrain

Here are a few shacks I painted up for Malifaux.

These are from an O-scale model railroad plastic kit.  It’s the Hobo Jungle from Bachmann’s Plasticville USA series.   Despite its horrifyingly bad name, there are a few good models in the Plasticville range.

According to the TMP All About Scales page, O-scale is supposed to be 1/43.5 scale or equivalent to 37mm miniatures.  In practice, these are great with the 32mm Malifaux figures and fit well alongside Mordheim terrain (intended for 28mm).  They’re quite small overall, and most of our 32mm figures won’t fit through the doorways.

I’m not sure how brown can be described as “bright,” but I think some of these turned out brighter than I intended. The rusted metal turned out well enough, though the rust may be a bit too “fresh” looking… or just too bright.

I also have a Plasticville sniper water tower to put together, and I haven’t finished the outhouse from the Hobo Village.  I think I’ll put the outhouse on the edge of a swamp terrain piece.