Blackbeard Update

Here are some second impressions after playing Blackbeard again last Friday, this time with 4 players.

I still think the game feels quite random, but once you get used to the rules it’s a bit easier to gain a bit of control over that randomness.

The KC rules both helped and hurt.  They did provide a greater chance of failure for the pirates, but they also provided an opportunity for greater wealth if they were killed.  Almost half of Frank’s VP came from killing one KC: 11 combat x 2 notoriety, and he retired to turn that into x2 VP for 44 VP total.  That seems excessive to me.  On the other hand, I think we played even fewer Warships this game, since they’re so weak. 

There was a lot more port attacking going on. No one grabbed anyone else’s booty.  There was very little motivation to go take the Buried Treasure instead of just attacking another port.  The game still felt too short in turns, even though it was about the same length in time as our 3 player game.

Overall, I’d still play it again, to see whether I’d want to play it again or not.

Battle at the Crossroads: 2010

Today, I went to Cambridge OH to play in a pyramid format DBA tournament at Battle at the Crossroads.  It was a great day, and I did at least as well as I anticipated.

Battle at the Crossroads is a small annual miniature gaming convention.  There were about 5-6 scheduled games in addition to the DBA tournament, as well as a flea market.  I’m glad I really enjoyed playing DBA, because the rest of the games weren’t very interesting to me.  I managed to escape the flea market without taking anything home either.

I really enjoyed the Pyramid Format. We had 12 players, so in the first round we played 6 1-on-1 games.  For the second round, the winner and loser of each game join their remaining forces, with the winner playing commander-in-chief to the army as a whole; we had 3 2-on-2 games.  For the third game, they split one player off of each group of four to form a fourth group of three, and we played 2 3-on-3 games.  Placement was measured by your win-loss record, with your individual elements killed and losses counted to break ties.

The tournament’s theme was “A Day Under Scythian Skies,” and the eligible armies were Skythians (I/43ab) and all of her historical enemies.  Special rules for the tournament allowed Skythian players to start with an additional element, and to reduce their aggression from 4 to 0 or 1, which allows them a better chance to choose the game’s terrain.  I chose Skythians, since this would be my best chance to field this army competitively. My army was: 3Cv (gen), 8x2LH, 2x3Ax, 2x2Ps.

I didn’t get a picture of my first game.  In this match, I faced Jim K and his Later Achaemenid Persians (II/7: LCh(gen), 2x3Cv, 2x2LH, 1xSCh, 3x4Sp, 1x3Ax, 2x2Ps).  I rolled low for terrain and set up a hill and two small areas of rough.  I set up first with my infantry split onto both flanks, with the intention of swapping two infantry to the other side in reaction to his deployment.  My biggest mistake was failing to do this, but instead swapping my Cv general out from in front of his SCh.  As a result, my infantry reduced the maneuverability of my light horse, and basically pinned them in place.  My other big mistake was rolling lousy for pips every turn… but what can you do?

In the end I killed one of his elements, and he killed 2 of my light horse as well as my general.  This 4 element overall loss ended up being a good outcome as we entered round 2: some groups lost as many as 9 elements in the first round.

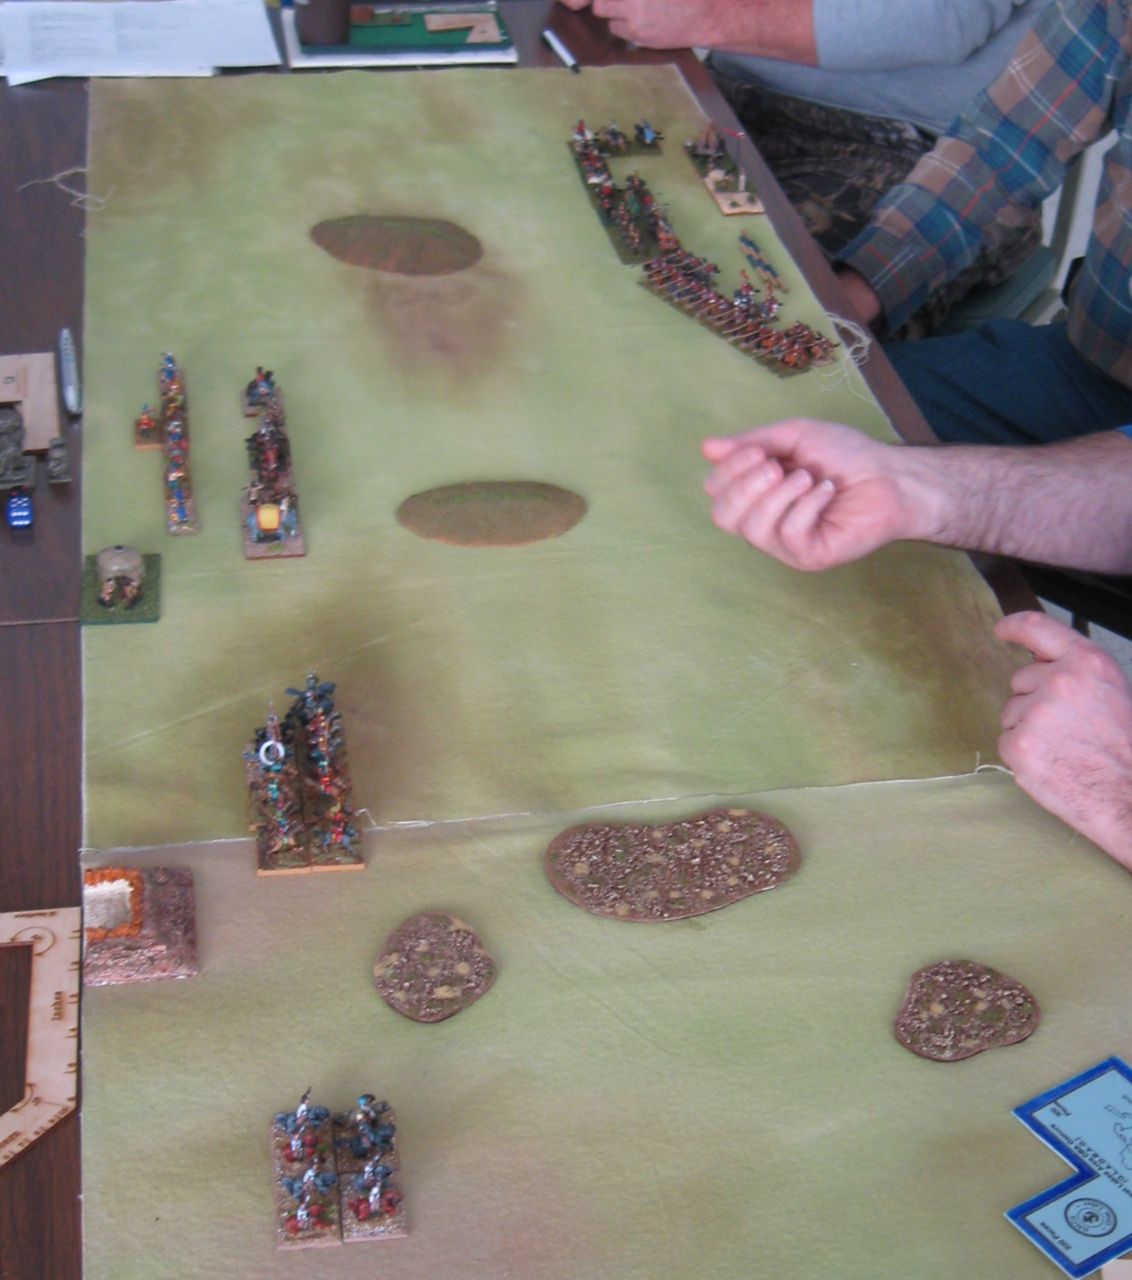
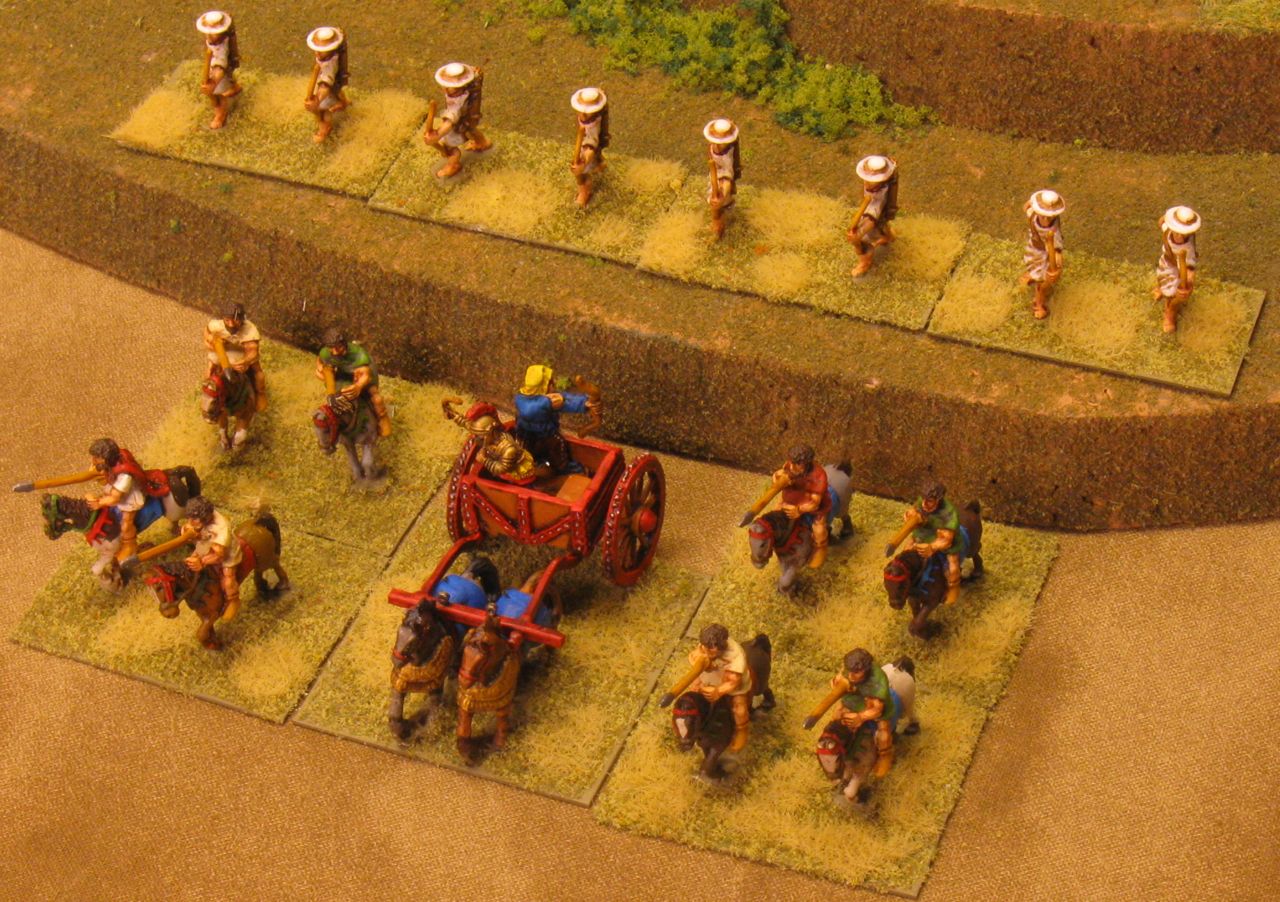
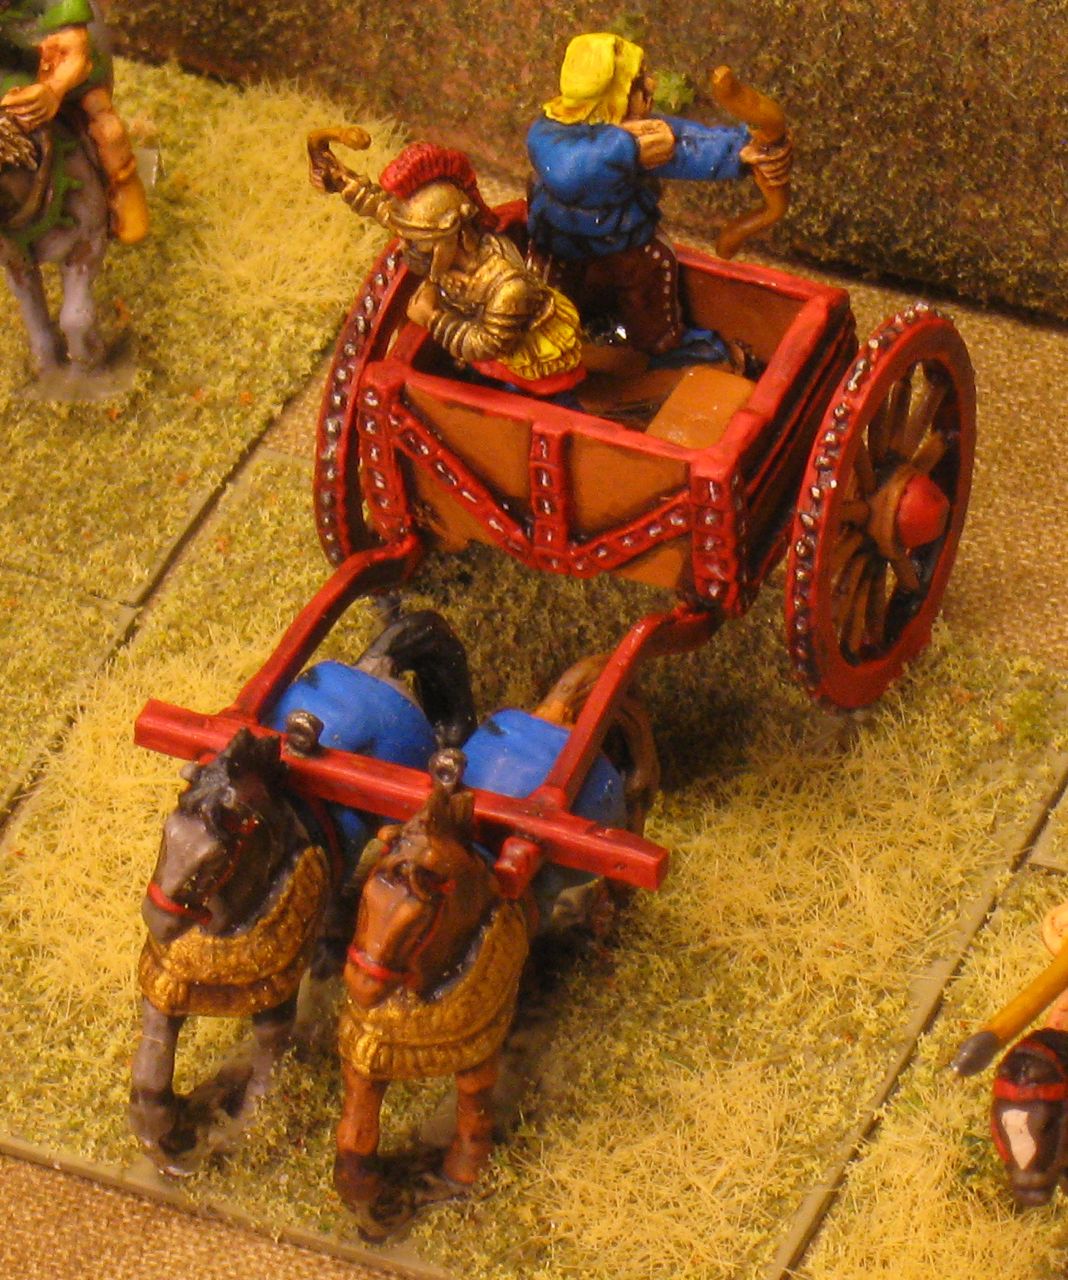
In round 2, Jim K and I (on the left, in the first image) played against Rich Baier with Warring States Chinese (II/4e: HCh(gen), HCh, 3Cv, 3Bd, 4x4Sp, 3x3Cb, 2Ps before first round losses) and Ted Hall’s Skythians (I/43a: 3Cv (gen), 9x2LH, 3Ax, 2x2Ps before first round losses).  Ted and I were relative beginners, so we faced off on my right flank while Jim and Rich fought over the other flank.

I deployed well, with some advice from Jim.  I placed 2x2LH far off to the right of the woods, my light infantry in column facing the woods, and the rest of my light horse and cavalry closer to the center.

My primary goal was to take the bad going with my infantry and threaten Ted’s opposing light horse. Rolling 6 pips on my first turn allowed me to achieve it quickly.

Ted responded by sending 2 light horse around my flank, and our groups of light horse faced off.  The bottom of this picture shows the result of this initial combat on my right flank, which pretty much decided the game: my light horse killed his, and then I turned his flank.  Although my initial rolls were lucky, I had my psiloi in reserve to help if I didn’t hurt him in the initial rush.

I ended up killing 5 of Ted’s light horse, breaking his command, and ending the game (since he was commander in chief).  He killed one of my light horse, which seemed lieke a good trade to me!  Jim and Rich may have traded an element each, but there were no decisive reuslts on our left flank.

I was split from that group to join Kevin Serafini (Kushan, II/46b) and John Loy (I/43a: commander in chief) in the third round.  Since John also played Skythians, we split our armies into separate mounted (John’s) and infantry (mine) commands. By now I’ve started to lose everyone’s names and army selections, but I know we were facing Larry Chaban (I/43a), Nick (II/24: 1x3Kn, 11x3Cv), and Tim (I/43a).

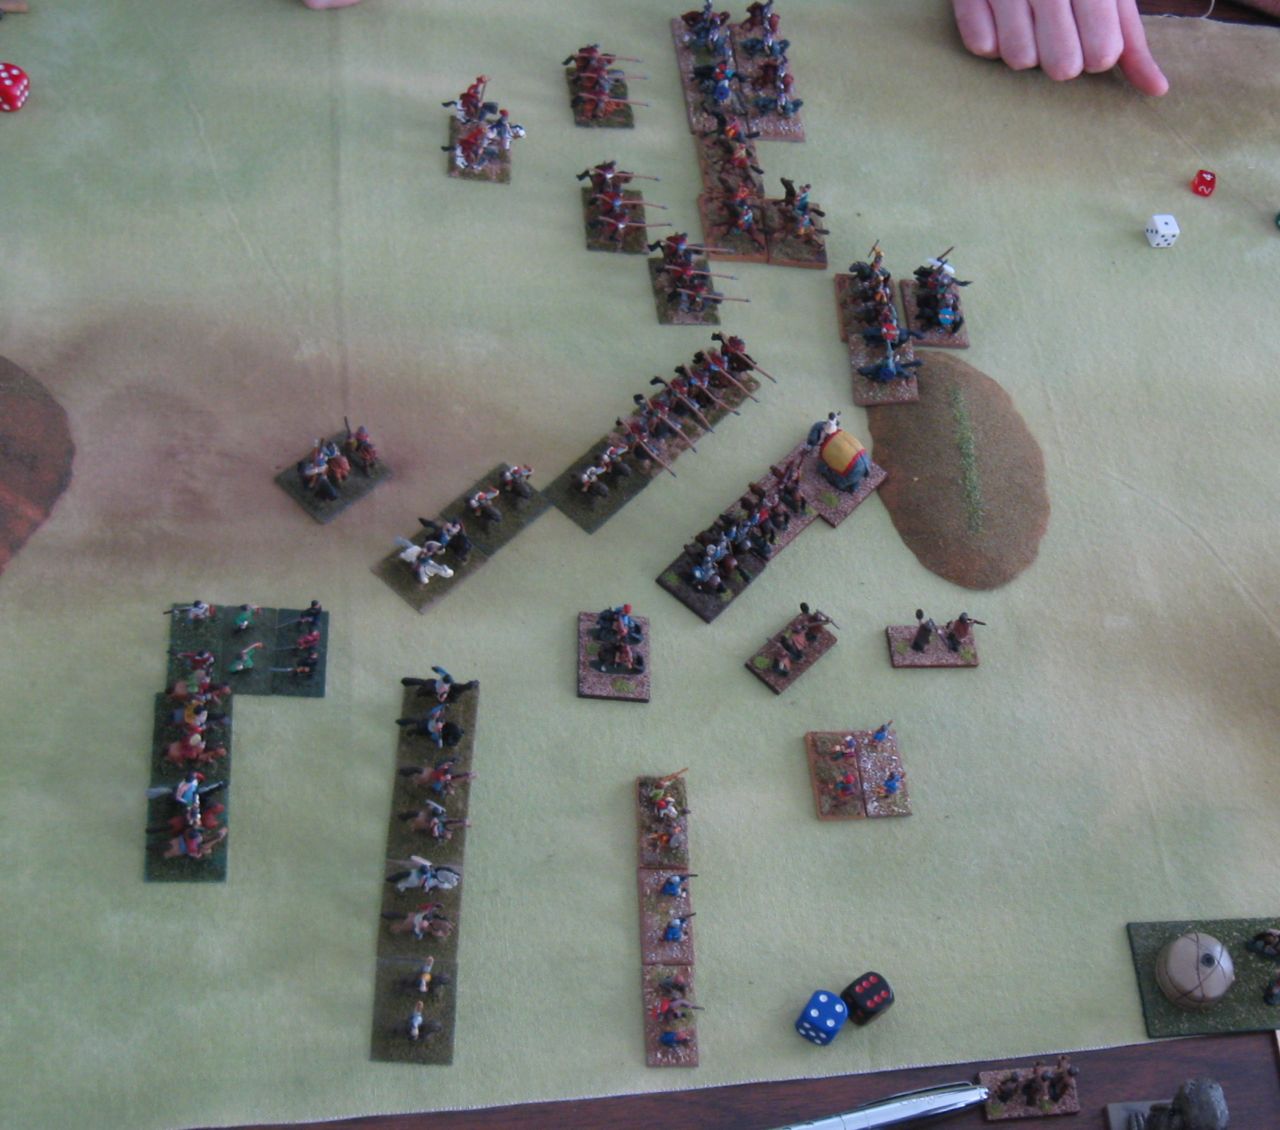
We got the terrain roll and set up first.  John placed all the bad going (rough) at one end of the board, and deployed the two mounted commands first with the plan of deploying my infantry after the enemy deployment, to take the bad going. As seen in the picture at the right, they deployed all their forces at the opposite end of the board, and I deployed my infantry in a reserve position behind Kevin’s forces to compensate for this flaw in our plan.

This deployment was almost immediately revealed to be a big mistake, as the enemy’s plan became clear.  Since they had fewer elements than we did, they didn’t want to fight on a wide front on this 72″ board, and risk being outflanked.  Instead, they denied our right flank and turned the table on us: they wheeled their entire line 90 degrees, and forced us to play across the narrow width of the table instead.

Luckily John and Kevin were able to get their faster mounted troops into a better position quickly, but I was left with few pips to move out from behind Kevin and protect our left flank from the impending charge of the light horse.

We did a fairly good job of salvaging the poor deployment, and in the end it came down to a close decision between which of our c-in-c commands would demoralize first.  We lost, but it was a very fun and tight game.  It made me consider the value of playing larger DBA games on a deeper board as well as a wider one.

I managed to do an adequate job of protecting the flank with a loss of 2 out of 7 elements, but I don’t think I took any kills in return.  If I had deployed facing my flank to start with, I think the biggest effect would’ve been to allow the other commands to take higher pip dice for maneuvering without endangering their flank.

After this game, we hung out for an hour or so for Rich’s game to finish, and awards were handed out.  Because he lost in the first round, Larry’s 2-year winning streak was broken, and Rich ended up in last place with no wins.  There were enough token prizes to go around: I got a nice little tower shaped “barker marker” (40mm square measuring piece).

I am very happy with my experiences at my first DBA tournament, and I’d definitely do it again.  I enjoyed playing Skythians, and I was happily not faced with any fiddly rules issues or armies I was unexperienced playing against.  It’s beginning to seem that I understand the rules of this game, but there are very few tactical problems I know the answer to yet.  I probably won’t take Skythians to an open tourney any time soon, but I’d consider them for a book I or themed event (especially since they’re currently my only book I army).

Regarding the special tournament rules for Skythians: I read some concern about the additional element in the army and the reduced aggression, from mailing list posts before the tournament.  However, I heard no complaints about it at the tournament itself, and I don’t think it was as overpowering as some worried it might be.

I figured there was nothing I could do with 9 light horse that I couldn’t do just as well with 8, so I chose an additional 3Ax instead.  I held that element until the last game, and it helped me retain bad going.  I’m glad I had it, but I consider it a slight change in army composition more than an additional element: I never had more than 10 elements after the first game anyway.  Since all the first round players were matched skythian vs. enemy, any relative diference in element count was balanced by the second round (though truthfully I don’t think there was much of a difference anyway).

My lower aggression allowed me to win the terrain roll the first game, but that didn’t help me win the game.  After that, since I wasn’t c-in-c, my aggression didn’t matter anymore anyway. 

Unfortunately I don’t expect to make it to Cold Wars, but I do hope to be at Stooge Con and Historicon for more DBA tournaments.

Thanks to all my allies and opponents for the wonderful games; to Kevin for a ride to and from the venue; and especially to the organizers of this fine event!  It was a wonderful day of gaming.

Blackbeard: Read the Rules

Well, we should’ve read the rules more completely.  Hopefully my re-read will help our next game.

  • We totally missed the KC rules and pirate-controlled KC’s coming into play other than by event cards.  Oops!  No wonder ther was no challenge for the pirates.
  • We missed the fact that cunning can be used for rerolls.

We’re likely to give the game another try, we’ll see how that turs out.

Game review: Blackbeard

Daniel nearly missed a fatal encounter with Blackbeard… or maybe he just knew when to run. Actually, the game wasn’t that bad, but I definitely have mixed feelings about it. I’d like to play it
again, to see whether I think it’s actually worth playing or not.

At its core, this is a straightforward “pick up and deliver” game with a pirate theme, and a “take that” element to provide challenges for the pirates to face. However, as it was produced by a wargame company (GMT), I think it has ended up twice as complicated as it needs to be to provide the same basic gameplay, and feels far more random than it should be.

The game took 3 hours to complete, not including setup time, for 3 players who hadn’t played before (though I read half the rules before we started). That’s within the 2-3 hour timeframe for the game, which is unusual for us, even with games we know.

The basic gameplay is what I expected from a “historical” pirate themed game. You sail your pirate ship(s) around the map to find merchant ships and take their stuff, while fending off attacks by warships. Then, sell the stuff in ports to get money, or attack ports to steal their stuff too.

Each player controls one or more pirates, and the pirates gain “net worth” and “notoriety” through their exploits. Pirates who retire convert their net worth and notoriety into victory points, while pirates
who die or fail to retire before game end only provide VP for their notoriety. When a pirate retires, you can get a new one and continue playing, or just use one of your other pirates already in play.

Some of the seeming complexity of the game comes from the way the rules are written. They’re verbose, repetitive, and hard to read without falling asleep. The play aid is 4 sheet sides, and doesn’t include basic things like the player turn order.

The other things that make the game feel too complex are rules that have little effect on gameplay. Maybe we just didn’t use enough of the “take that” cards (see below for more on that), but we found the effectiveness of warships, storms, and scurvy to be minimal. Playing a warship on another pirate typically felt like giving them free notoriety for killing it, and not like it was a serious obstacle.
Even the worst storm anyone faced didn’t send them back to port for repairs. No one was ever anywhere near running out of crew loyalty, speed, or combat.

And then there was the randomness. Merchant ships are chosen randomly and placed upside down in random locations. You then have a random chance of whether you find a ship or not, with the maximum chance of success at 50% most of the time. When you do find the ship and decide it’s worth looting, it contains a random amount of booty, and a random hostage.  This resulted in a huge disparity in the number of merchant ships looted by various players, and the total amount of loot this resulted in.

The main tactical decision with merchant ships is: Go to India where the loot chart is the fattest. Of course, that depends on the roll of the dice providing India with merchants…

The scarce resource in the game is your total number of actions over the course of the game. Actions come from cards in your turn, and you typically get 1-3 actions per turn based on the card you choose to use for actions. In so many words: when the card deck is almost finished, the game ends.

This mechanic has several effects. First of all, it’s very beneficial to play 3 action cards instead of 1 action cards if possible; but that’s usually not possible unless you have the right pirate. Also, it means that a 4 or 5 player game probably takes just as long as a 3 or 2 player game, because the total number of turns/actions is going to be about the same.

Finally, it means that using cards for their events instead of actions reduces the length of the game, by increasing the rate the deck is consumed. So although on the surface, it seems that by playing more
“take that” cards, you might be able to whittle down other pirates via attrition. In reality, this would only shorten the game so much that the extra damage wouldn’t matter.

I think the combat and storms could matter more in a longer game. But since your holds fill up after looting 2-3 ships anyway, requiring you to go back to port, you end up getting refits regularly anyway. I can see why the instructions include an optional rule to add +2 to all warship combat results.

We haven’t fully explored some aspects of the game yet. For example, I think it may be more worth attacking ports than looting ships. It’s a better use of actions, since it only takes one action to attack and loot a port, but at least 2 (and maybe more) to take a merchant ship. You might not succeed looting a port, but the chances are often greater than the chance of even finding a merchant ship.

Overall, I’m interested in playing again, to see if I’m missing anything, and to see if my greater familiarity with the rules makes it more fun. But my overall impression after one play is that it’s a
huge luck fest, that requires much more effort than I prefer for the amount of fun it gives in return.

Making Things to Make Things

Some folks get so caught up in building jigs that they never end up building the things they intended to make with the jig.  I think this is an unfortunate position to be in: halfway between making tools, and gaining the skills appropriate to work on the project you want to finish.  Although I don’t like building jigs for their own sake, many improvised tools are extremely useful to the project at hand and well worth the effort.

For example, I built this rack to hold plastic miniatures on their sprues while I’m painting them.  I’ve only used it for a few days and it has already saved me more time than it took to build.

The first version used a coat hanger instead of a wooden frame, and the whole thing wobbled so much it dumped my figures on the ground.  With this one I can pick it up by the top portion, and it’s well balanced and sturdy enough to carry between the attic to the porch for spraying primer and varnish.

The figures here are from my latest project: Games Workshop’s Battle of the Five Armies boxed game. It’s based on the excellent Warmaster rules (also by GW), and comes with a metric pantload of plastic 10mm figures.

Pictured on the rack here are the 4 units of goblin wolf riders, and 4 units of wolves.  I like painting wolves and they go really quickly for me, so I did these first.  This represents just under 1/3 of the sprues in the game, but I am guessing considerably less than 1/3 of the total time to complete painting it all.  That said, the paining went more quickly than I expected on the goblins, so I have hope I’ll be able to finish all the miniatures without going insane.

This signals a shift away from DBA painting for a bit, hopefully at least until the BoFA armies are finished.  I may sneak in a few elephants and rough going terrain pieces for variety.  I expect I’ll eventually get back to 15mm historicals to paint DBA armies for Mongol Conquest, more Chinese, and more Alexandrian Macedonians.

DBA Army II/4: Warring States Chinese

At the same time I bought the Mountain Indian DBA army from Museum Miniatures, I also got a pack for II/4a, Warring States: Ch’in Chinese. 

The Ch’in or Qin dynasty was formed in the latter part of the 3rd century BC. The first (and only) Ch’in emperor, Qin Shi Huang, is famous for completing the first version of the Great Wall of China, standardizing the written Chinese language, and for his excessive but very archaeologically useful burial of over 8000 life sized terra cotta warriors

The period of civil war that led to the Ch’in Dynasty was called the Warring States period for obvious reasons.  When the emperor died in 210BC, China fell back into civil war for a shorter period, and the Han dynasty emerged. 

In a later order to Museum, when I was ordering some Mongols, I threw in a DBA army pack of II/4c: Chao, since I was ordering overseas (and they were on sale). The biggest difference between the armies is that II/4a has 4x4Wb, and II/4c has 4x4Sp.  Ch’in soldiers are classified as warbands because they were particularly brutal on the battlefield, due to the fact that they were rewarded based on the number of enemy heads they collected during battle.

For some reason, both packs came with the same spear figures for the 4Wb and 4Sp units.  Since they are enemies of each other and have few other enemies, I think this would be very consfusing in a matched pair game.  So, although I started painting II/4a, I finished painting II/4c until I get some halebard figures to use as warband.

Unforuntately, Museum has a limited selection of Chinese figures.  I’d like to see a sword carrying figure other than the general, to build a proper blade unit for some of the warring state armies. The figures seem very well suited to the Ch’in chinese, but Museum uses the same figures for everything from 1100BC to 189AD, which is pushing it a bit.

I am extremely happy with the way this army turned out!  I think it’s one of the prettier armies I’ve painted.  Some of the faces on the spear and cavalry elements are a bit muddy, but overall the colors came out clean, it pained up quickly, and it looks great.

When my halebards come, I’ll paint them up, and I’ll have enough elements to field either II/4a or 4c, and probably a few other Warring State armies.  I also ordered enough supplemental figures to field a double II/4c, or Han Chinese using the same figures.

To paint the light blue and light green, I used a very light blue/green base coat, and mixed a wash of darker blue/green paint.  The wash is approximately 1/3 acrylic paint, 1/3 water, and 1/3 gloss varnish (Delta Ceramcoat brand, water based craft varnish).  I test for flow and coverage on my palette or an old figure, and adjust the water and varnish proportions until it flows the way I like it.  When it’s working, it does a good job of filling in the low spots while leaving the high spots lighter.  In the end it only requires a bit of touchup on the highlights and it’s good to go.

I’m not as fond of painting chariots.  Thes turned out well, especialy the red parts, but it’s not my favorite.  I used more different hair color patterns on the horses, which also turned out fairly well.  But the crossbowmen, spearmen, and archers were my favorite to paint here despite their very uniform appearance.

This army just collected its first win, in a solo match versus my Skythians.  I really like the balance of elements in the Chao army, but I was really hoping I’d learn something about how not to lose with the Skythians, since Battle at the Crossroads is coming up next weekend.

Last of the Later Achaemenid Persians?

Well, probably not the last, but I painted some more, anyway. 

To finish off my DBA Later Achaemenid Persian triple army, I chose multipurpose figures.  Based on the DBM army lists, I chose Cretan archers for the 2Ps elements, which are also allowed in Alexandrian armies, and Paphlagonian light horse for the 2LH elements.  These are Magister Militum Cretan Archer figures and Paphlagonian Light Horse. 

 I also needed to finish one more LCh or 3Cv element, and since I already have 7 3Cv elements I settled on a chariot.  I know chariots were basically unused at this point, except to help Darius III flee the battlefield more quickly, but they do look good.

The chariot is a bit of a mashup.  The chariot and driver are from Magister Militum, but the chariot was originally scythed.  The Magister Militum 2-horse chariot seemed even more out of place for a Persian army.  The horses are from an Essex scythed chariot that will certainly not fit 4 horses across on a 40mm base.  The archer is another Skythian from my Falcon army pack, painted to look pretty much just like a Persian.

This finishes the figures I need in order to field a triple Persian army.  However, I’ll likely paint a few more eventually.  I’d like to build a 3Ax general and a few Scythed Chariots.  I’ll also paint more Hoplites, because no one can ever have too many of those (if they have any at all), and I’d rather not use Spartans as my Hoplite mercenaries.

Skythian Camp

It has become apparent that in order to prevent being ridiculed while playing DBA in public (mostly kidding), I needed to paint a separate element of Camp Followers instead of modelling camp follower figures directly on my camps.  I also didn’t have a very appropriate camp for my Skythians, so I decided to kill two birds with one stone.

This is a generic camp model, though I chose a cart based on suggestions in the Osprey Skythian book that they used a ring of carts/wagons at their camp.

The base is 80 x 40mm plywood with a sticky magnet on it.  On top there’s an Essex cart, and a fire and supplies from a Museum Miniatures camp pack.  I added a 20 x 40mm section of sticky magnet to hold the camp followers down.

Sticky magnets are excellent. I’ve found they’re cheapest when you buy them in the form of business card magnets.

The camp followers could double as a Psiloi element in a pinch.  All Skythians had bows and knew how to use them, but they’re nomadic.  So I decided archers would be more appropriate than civilians with farm implements.  These archers are more Falcon miniatures left over from my army pack.