DBA at Legions… on a Friday??

I met JM at Legions this Friday, to play some DBA, and discovered a latent desire to play DBA in several other Legions gamers as well. They should really get out on a First Monday of the Month, since the Stooge crowd has other plans on Friday nights.

I arrived shortly after 9pm and waited for JM to finish up his Flames of War game while I tried to wake up… I really could’ve used a nap. I brought 5 armies so there would be plenty of different opponents, and ended up playing 4 games total.  Unfortunately, I forgot to take any pictures while I was playing…  I’m writing down my thoughts primarily so I’ll remember them.

In the first game, JM played II/12: Alexandrian Macedonians with the 4Ax option, against my II/7: Later Achaemenid Persians. I took my now-standard mix of 3x4Sp, 1x3Ax and 1x2Ps.

At this point I hadn’t waken up yet, and I don’t remember much of the game. But I do remember it was fairly tight, and I remember the pivotal event: I had my mounted force on my right flank, and I was able to surround Alexander (3Kn) on the front, one flank, and rear, for a +2 (or +3?) to +3 quick kill. Of course, it ended up 1-6 against me: I lost an element and the rest of my mounted fled in all directions. Alexander easily picked off one last element for the win… pretty much a historical match up the whole way.

In retrospect, the one error I know I made but failed to correct was to deploy three woods instead of two woods and a steep hill, for arable terrain. Oops! It obviously didn’t help me much…

During the first game, John ran home to get his DBA army, which he had never played yet: III/64, Nikephorian Byzantine. This is a bit of an oddball with its large base elements: 1x6Kn, 3x8Bw. In the second game I played against John, once again with my Later Achaemenid Persians. I tend to use them when teaching the game since it’s a fairly straightforward force from a rules perspective (if not a tactical perspective).

John had read the rules but never played the game, but despite the Byzantine general’s inexperience, my Persians remembered their recent defeat by superior Yuan cavalry and were fearful. I deployed two woods and one steep hill at three points of a triangle, 6-7″ from the edges. John won the edge with the steep hill, which I had planned for, but that left me with the two woods on my flanks, and not quite enough room to deploy my full force as widely as I’d prefer.

I deployed my spear block between the woods with my General in reserve, my bad going troops on the right flank, and my cavalry on the left. My 2x3Cv snuck in next to the woods, and my 2x2LH were in column behind my line, faced left to sweep out around the flank.

John deployed his bow elements on the hill (as I hoped), his cavalry facing my left flank with a rear line in reserve, and his light horse on my right flank in position to threaten my camp. He had a lot more room to deploy than the space between the woods, so he was cramped when trying to move in on my left flank.

On my right, he threatened my camp with his light horse. In response, I directed my psiloi through the woods towards his light horse and also redeployed my two light horse elements to the opposite (right) flank behind my main line. The psiloi forced his horse to retreat, gaining advantage on that flank.

Meanwhile, in the center he walked down from the steep hill as I wheeled my spear to reduce the room for his cavalry even more. Eventually the light infantry on my right flank joined in the battle against his bows while my light horse prevented his light horse from threatening my camp. In the end I killed some of his bows, while he punched a hole in my spear line with his Knight, leaving him with 2 kills and me with 3. But my spear line was now vulnerable, so I needed to get one more kill…

I advanced out of the woods toward his remaining bows, and flanked his light horse with my two light horse. I killed his light horse with mine and ended the game, but the bow fight was fruitless.

But wait! I think my light horse were out of command range and I didn’t have enough PIPs to move them both… but I’m not sure. We decided it was a Pyhrric victory at best, since we couldn’t determine the initial element positions closely enough to be sure of the command radius, and we were both glad we learned from that game.

In the third game, JM played Warring States Chao Chinese (II/4c) against my Skythians (I/43a). While he went to the rest room, I swapped out the 24″ board for a 30″ board so I’d stand a chance. I ended up being the attacker (no surprise), and he deployed with two woods on one side and an empty board on the other.  I got my preferred board edge and he got no terrain on his side at all.  If I were him I’d probably have used more terrain to ensure the Skythians had to attack a defensible position.

He deployed with all his bow on my left flank near the board edge, with the line extending to his cavalry near the center of the board. Wow, 30″ boards look a lot bigger, there’s plenty of room to get around the sides.

In response, I deployed my light horse in two columns of four with my general between them, and my bad going troops on my right flank in case he swapped some bow over to that side. My plan was to outnumber his cavalry on the right flank, possibly using my bad going troops to screen his bow if he swapped it to that side (he didn’t), and to ignore his slow-walking foot on my left.

This worked as planned, with a little help from JM. In the first turn, he launched his LH far out into my field, isolated and alone, and I picked them off. I don’t think this was the best move for his LH, since it’s easy to kill elements when you outnumber and surround them.

This initial Light Horse battle reminded me a bit of my very limited understanding of the tactics used in Go. JM used a PIP to move into a disadvantageous combat, despite my warning against it: he had a plan. I told him it may be better to force me to use my PIPs instead. This is similar to how I understand Go should be played. Technically, the rules say that you use stones to surround your opponent and capture their stones, but in reality good players use only the stones required to demonstrate that it is inevitable that you will eventually surround your opponent, and no more. If they force the issue you prove it to them, but there’s no use in either side expending any resources on a foregone conclusion.

Similarly, in DBA if you know the outcome of a situation is inevitable, then force the other player to spend PIPs to resolve it. Since DBA has randomness (unlike Go), they might not have the PIPs required, and may not be able to complete the attack. It may not be the most important way for your enemy to spend PIPs, especially if you can use other troops to increase the threat somewhere else. At the very least, making the enemy spend 1 PIP instead of you incurs a 2 PIP advantage overall.

This realization begins to show me how to see DBA primarily as a PIP management game, rather than a combat result game. 

After his second LH was inevitably destroyed, I moved on to the rest of his flank and faced his 3xKn (gen), though I thought it was a non-general knight. Oops! He killed a light horse or two while I surrounded his flank, but I never doubted the outcome: my concentrated forces eventually took out his general and I won.

In the last game, I played II/4c Warring States Chinese (Chao) against JM with II/12 Alexandrian Macedonian. Apparently we met in India somewhere, judging by the palm trees we used for terrain.

I was defending and once again, laid out 3 large terrain pieces: two woods and one steep hill in a triangle, directly in the deployment zone. This time I got the steep hill on my right flank and a wood on my left, and JM got a central wood opposite me. It was a very tight deployment for me between the bad going, with barely enough room for my 4x4Sp. I deployed my spear line centrally with 2x4Cb in the woods to the left, 1x4Cb on the hill to the right, my chariots behind the main line, and my light horse on my far right flank to the right of the steep hill.

He deployed everything on my left flank, with his artillery and bad going troops centrally in the wood. He advanced, and I brought my LH around the flank to threaten his Artillery if he left the woods. On the left flank, he wheeled in to line up his pike block between the bad going, and send his light horse around my flank to my camp. I responded by sending my bow through the woods to ZoC his pike block’s flank, and by sending my reserve HCh to protect the camp.

He shot one of my LH with his artillery, while my spear block moved up to take on his bad going troops. On the left flank, my two bow units successfully delayed the advance of the Pike block to meet my spear’s advance.

I ended up killing his 2LH, a few pike with my bows, and enough elements in the center to seal a victory.

I think JM put up a good defense, especially with his use of the artillery, but he was really trying to shove too many units into too small a space on my left flank, without any bad going support on his flank.

Update:  Oops!  We made a mistake: artillery can’t enter bad going off-road.  That would have changed things significantly on that flank.  

During my last games with JM, John coached Mike through his first game of DBA with some help from JM and I. Mike borrowed my Persians to face John’s Nikephorian Byzantines again, but they didn’t fare as well this time: John deployed as the attacker to set up some very good matchups, and wore down Mike’s cavalry with his bows.  It was a fine demonstration of the game mechanics, and Mike is also interested in playing again.

I managed to get out of the store at around 1:30am after paying my “play at the local game store” tax.

Overall, we all seemed to enjoy these games and learn from them. Playing with relatively new players fooled me into thinking I knew what I was doing… sometimes. And I really do enjoy the 30″ board more than 24″. Maybe Friday can be 30″ DBA night and first Monday of the Month can be reserved for 24″ boards?

Thanks for the great games! I’m inspired to paint more armies now so we can have more unique opponents.

Basic Impetus

At Legions today, we played Basic Impetus. This is a freely downloadable introductory version of the Impetus ancients miniatures wargaming rules. Rick and Jim played Polybian Romans, and Larry and I played Carthaginians. No one had really played the rules before, but at least Larry read them before we started.

The model basing uses the equivalent of 4 DBx sized bases for each unit. This is similar to Ancient and Medieval Warfare (AMW, which I also haven’t played), except you never need to remove bases so they could be permanently based on larger bases.

I couldn’t really field any proper armies without painting a bunch more stands, but I could fake it so we can play enough to decide whether to paint enough bases for two full armies. The common basing with AMW, also based on multiple DBx bases, would make this a useful way to encourage painting more elements. Incidentally, Command and Colors: Ancients also uses 4 blocks per unit, so with enough elements painted up I could play C&C:A with miniatures as well.

The Impetus rules are partway between highly detailed reductionist rules like Warhammer Ancients, and the extremely abstract DBA. Activation is IGO-UGO and every unit can be activated on every turn. Units have a few stats: Type, Move, VBU (both hit points and combat effectiveness), Impetus (combat bonus in the first round of combat), and VD (victory points for killing the unit, basically).

If the unit has a ranged weapon, it’s listed; otherwise all other weapons and armor are abstracted into the VBU number. Unlike DBA, javelins and slings are considered ranged weapons and not “close combat.” Some unit types such as skirmishers and light cavalry have special rules to fit their historical use, but for the most part everything acts fairly uniformly based on its stat line.

Movement is “normal” with one exception: when you meet enemies you must not line up exactly with the enemy units. Instead, you always overlap the lines partially on each side. This seems odd, but it ends up working well in practice: most combats end up with single overlaps, but no fights give you double overlaps.

When shooting or fighting, you roll a number of d6 equal to your VBU plus appropriate modifiers; each 6 or two 5’s are a hit. Those hits aren’t immediately applied to the enemy unit, but if a unit receives any hits, it must make a cohesion roll modified by the hits received. Failing the cohesion roll causes “real” damage by reducing your VBU for the rest of the game (or until you run out and rout).

The two-step combat system is probably the most fiddly part of the rules, but in practice it works well enough and isn’t too complicated. I think the whole “effectiveness equals hit points left” thing is based on the fact that historically, casualty rates in melee combat were very low, and almost all casualties were caused when one side was running away. The most important thing is to not run away in the first place.

In the game itself, I controlled the right flank with 2 units of Light Cavalry, 1 unit of Cavalry, 1 unit of Warband (strong light foot) and 1 unit of skirmishers. At first I did well: I was rolling lots of 5’s and 6’s, and pushed back the Roman flank. But later, the Romans started hitting me back. I kept on rolling 5’s and 6’s for cohesion tests, but I’m supposed to roll low on those, so I took heavy casualties. Eventually all five of my units were killed, and when one of Larry’s spearmen joined me, the game was over.

Overall, I enjoyed the rules and I expect Frank and Andy might like them a better than DBA. They aren’t as “weird” as DBA: you get to move all your units, you throw big fists full of dice, and you don’t need to remember a pantsload of seemingly random combat result tables. I’m hoping Daniel would still enjoy the more chess-like DBA, but I’m also hoping he ever has a chance to play it again…

The general character of the game itself was what I’d expect while learning a new rule set. There was a lot of “lively discussion,” rulebook consultation, and getting things wrong. The battlefield looks more impressive than a DBA game because the units are larger, even though there are fewer of them.

I’d like to give these rules a try, but first I’ll need to work up some armies and build some sabots (large bases to hold the individual stands) to make things easier to move around.

The Future is Here

Most people think “the future” involves jet packs and flying cars, but I disagree (even if you manage to make a jetpack that doesn’t ingest fossil fuels). The future, if there is one to be had, must lie along a different path.

In fact, the toys of the future cannot exist at all, in the traditional sense, because in the long run there simply isn’t enough “stuff” to go around. Inasmuch as the toys of the future will ever exist, they already do; but as William Gibson has said, “the future is already here – it is just unevenly distributed.”

I recently saw the latest sign of this future in the state of my Netflix queue. For the first time, the number of entries in our “Instant” queue has outnumbered the number of entries in our “DVD” queue. This bolsters my hope that someday soon, I’ll be able to watch whatever I want whenever and wherever I want (for a modest fee, of course) without having to buy something or plan ahead.

Those of you who have been watching pay per view and Tivo for the last 5 years may think I’m arriving late to the party, but the Netflix streaming-on-demand service is different enough that I disagree.

Backing Up

Assembling the bottom half of a Windsor chair is generally called “legging up.” So, I figure, assembling the back must be “backing up,” right? I hadn’t assembled a square backed chair before, so I had to figure out how to do it, with this one. Prepare to be bored (no pun intended): this is what I did.

Unlike most other windsor chairs, even other square backs (including many rodbacks), this chair’s two joints at the sides are at a significantly different angle (but not quite “perpendicular”) compared to the joints at the tops of the spindles. I decided this required assembling the rod and posts first, and treating it as a single unit when assembling the rest of the back. This turned out to work quite well.

I first tapered the post holes, and set the posts in place. Then I clamped the rod to the posts, in the correct orientation and at the right height. In this chair, the rod should be parallel to the floor. I set a bevel to the angle between the post and rod, and confirmed it was the same angle on the other side. I used that bevel to drill the angled holes in the posts.

After removing the clamped rod, I measured the distance between the top of the posts, so I could trim the rod tenons just far enough for the posts to be lined up properly. The posts can rotate on the rod to any angle, but I wasn’t sure how this would work in practice. It turns out that the distance between the bottom ends of the posts changes significantly with very small rotations at the post-rod joint. I measured the distance between the posts at the seat of the chair to make sure the post-rod angles were also correct.

It’s possible for the top and bottom post distances to be correct while the posts aren’t in the same plane (the whole back is twisted), so I eyeballed it while dry fitting it into the seat. Once I aligned the posts and rod correctly and dry fit them into the seat, I marked the orientation of rods and posts so I could reproduce it quickly in the presence of glue. I then sawed kerfs in the rod for the wedges, applied glue to the rod and posts, assembled everything, and wedged the tenons.

While the rod and post joints dried, I installed the spindles in the seat (“crack!”). In cases where my spindles hole angles weren’t quite right, I oriented spindles that weren’t quite straight, to compensate. I marked the spindle hole locations in the rod, and bored the holes by eye, sighting down the spindles. This was the weak spot: I’m not enitirely happy with the results of these holes, but I don’t have a better solution at the moment.

From here on out, it was pretty much the same as the other chair backs I’ve done. I dry fit the back, and marked the spindles at the bottom of the bow, to saw wedge kerfs to the proper depth. Then, I hurriedly applied plain old Elmer’s white glue to all 9 holes and 9 tenons, and fiddled with things until it I got it all in one piece.

Finally, I applied glue to the wedges and hammered them into place. I’m unhappy with my wedges: they’ve been cracking fairly regularly. I think I should probably use something other than maple. I think we used oak on my previous chairs.

Anyway, I warned you it’d be boring; there weren’t even any pictures. But I would’ve appreciated finding this blog post via google, a few weeks ago.

That Looks Just About Right…

This is a sketch of the rodback chair. I made it before I started working on the chair using tracing paper over a photograph of the chair I was inspired by. I changed things where necessary to show the chair I planned to build.

Rod Back chairs are a later (1800-1820) “degenerate” style windsor. They typically have much straighter legs and less deeply carved seats than earlier styles and most of them used a square stretcher pattern instead of the “H” stretchers here.

I like the more comfortable deeply carved seats of earlier chairs, but I prefer the turnings used on later chairs. So, I paired the seat shape and leg angles of an earlier Comb Back chair with the turnings and square back of the rodback. Compared to the photograph I traced, this seat is carved more deeply, the swell in the spindles is higher, the posts are different, and the leg angles are different.

I took a photo of my chair-in-progress, from approximately the same angle as the photo I traced. It looks pretty close!

I like the much slimmer look of my chair, compared to the sketch. I think the angles are a bit exaggerated in my chair because I was very close to it when I took the picture.

Since the chair isn’t finished yet, I’ll take this opportunity to be critical. The front legs of the chair are splayed a bit more than the plan called for; I’ll have to see whether I built it incorrectly or planned it incorrectly. It may be only because the front of the seat is higher than the chair I planned from. That’s the main thing that looks a bit odd with it, when I look at one portion of the chair critically, instead of standing back and admiring it.

It’s quite comfortable, but I haven’t spent a lot of time sitting in it yet since I haven’t epoxied the seat back together yet.

Today I trimmed the spindles. If it weren’t for the unfortunate crack, it would be basically ready for a quick sanding and a few coats of paint.

There are a few other things that didn’t work as well as I would have preferred, but worked out in the end. I didn’t orient the seat blanks properly. When carving the wood along the join, in some places I needed to carve in one direction on one side of the line and the opposite direction on the other side, which made things tricky. It’s easier to glue up seat blanks when both halves come from the same board.

I used wedged through tenons on the post-rod joint. This worked well enough, and it’ll be strong, but I had problems with drilling a through hole without breaking the grain out on the other side of the post. I think I need to replace my crappy 1/2″ bit, as I did with my 5/8″ bit. Although these bits from Highland Hardware got good reviews in Fine Woodworking, they’ve been horrible in my experience.

I’m also not completely happy with the wedged joints between the spindles and rod. They’re a bit loose. I may dab a bit of epoxy in, while I’m patching the cracked seat. In general, I need more practice carving spindles. That’s understandable, since I’ve been working on stools lately, and I’ve been using suboptimal spindle wood.

I’m in the home stretch now. I’ve been wondering whether I have enough stamina for another chair, but Marla tells me I can’t stop making chairs (or at least parts) until I’m done clearing the wood off the porch. I guess I’ll have to at least rough out a bunch of spindles, rods, and legs.

Nearly a Chair

My rodback chair is almost fully assembled. One more night to glue things up, and then it’s down to trimming and finishing.

In fact, pretty soon I’ll probably have two chairs! Well, two halves of one chair, anyway.

When inserting one of the spindles, the seat cracked. A few of the spindle ends might have been a bit too fat, but in this case the main problem was that this hole ended up directly over a crack on the bottom of the seat. Here, the crack goes all the way through the seat. I should’ve made this spindle loose rather than risk splitting the seat, if I had realized it might be a problem.

I expect I can salvage it, though I’m not sure which glue would be best to use here. Super glue might keep the crack from spreading, but it won’t fill the space to hold the cracked parts together. Maybe urethane (gorilla) glue would work better for that, but I’m not sure how to get it in the crack and keep it there; and I wouldn’t want it to push the seat apart even more.

Maybe I’ll use both. Start by applying super glue to the edges, and letting it dry. Then, clamp the seat lightly so it can’t expand any further, push some urethane glue into the crack, and apply tape on top to keep it in place while it dries.

The worst part will be finishing it. The crack will definitely be noticeable, and milk paint doesn’t stick to super glue. I’m not sure about the urethane glue, though.

I think the rest of my seat plank is not checked on the surface the way this one is. Both of my pine seated stools have check-cracks on the bottom, which are not a problem. The difference in this case is the spindles. With 9 holes across the back, I would have had to plan a lot farther ahead to avoid putting this crack in the middle of one of them.

A Perch

A woodworking update: I’ve completed a Perch using the plans Peter Galbert posted on his blog. I haven’t painted it yet, because I’m not sure I want another red stool.

Two of the legs and both stretchers were turned from the first batch of logs I found in the park. They started out looking like the firewood sitting on the floor in this image, and ended up looking like the leg on the lathe.

I turned this leg too soon after bringing the log in from the 20F weather outside: the wood was still frozen. I couldn’t get any clean cuts on it, so for the other two legs I just turned them round and let them warm up and dry a bit before finishing them. Although I planned to clean up the first leg later, it ended up way too warped to even consider this.

The third leg, this one’s replacement, I turned from some Hackberry dad left down here at Christmas time. When I first turned all the legs, I thought this might also be a hackberry log, but now I think it’s more likely Elm. I know these are not ideal leg woods, but they’ll be strong enough, and the details on bobbin legs are minimal and not easy to screw up, even with wood that doesn’t hold detail well.

More news on the Free Wood front: near Martine’s school, 3 or 4 trees toppled down on top of each other in the woods. One of them split and splintered on its way down. Someone was almost hit by another one, when they fell. I waited until they cut them into smaller pieces, and today we went and collected some. I have some long, straight, clear sections of I think Maple which will make some nice legs. I may have to bring a wedge and mallet and go back for more, this is really nice wood. I also got another cherry log because it was there, and some more of this open-grained greenish yellow colored wood I’m having such a hard time identifying properly.

In this picture, you can see my increasing collection of spindles, under my bench. These are all from the logs I’ve collected, and hopefully they’ll eventually turn into legs, stretchers, or wooden boxes.

It’s quite fun to rough out spindles from the log, but it feels like a big waste to create so much waste wood in the form of chips. But then I remember the city’s wood crew trucks, which chip all of the logs as soon as they clean them up. Even if only a tiny fraction of the wood I collect ends up being used in a project, it’s still better than leaving it on the ground and letting it rot. The rest will go to my in-laws’ where they’ll use it for chicken bedding, or burning for maple syrup.

There are some really depressingly nice, huge, straight, 2′ diameter, 6′ long logs in the park that I just can’t think of any good way to retrieve. It pains me to see them sitting there, ready to start rotting at any moment. I could probably get back bows out of those logs, if I could get them out of the park.

Peter Galbert does a few things differently than I’ve done on previous chairs and stools, so I learned a bit on this Perch. First, he drills his holes from the top down. Since they’re angled, the hole enters and leaves the seat at a different place: you need to know whether to drill from the top down or bottom up, in order to get your legs in the right place.

When I drilled from the bottom up on previous stools, I didn’t have problems with tearout: I just carved it away when I carved the seat. But this time, I left unsightly scars on the bottom, unfortunately. Let this be a lesson to me! I need to use a backing board or a better bit (see below).

Peter also leaves more of his seat uncarved than I am used to, before assembly. This was a very fun seat to carve, but I didn’t really enjoy the new, improved clamping challenges posed by finishing the seat after assembly. The shape of this seat is quite nice, and the lines flow well and make sense, once you actually do it. Again, Peter’s videos helped a lot in remembering the carving steps, and they’ll help for my next shield-shaped seat as well, I’m sure.

One detail worth noting on this image is the blood on the front leg: I cut myself while fondling one of my tools. It wasn’t even the cutting edge. But it wasn’t as bad as my previous cut, from sharpening my drawkife. Drawknives look dangerous and imposing, but most of the time you aren’t near the cutting edge. Except when you’re sharpening them.

Speaking of better bits, I bought another 5/8″ spur point bit. What an amazing difference! My old bit took forever to cut, dulled itself cutting through even relatively soft wood, and burnished the holes. It was one of the highly rated bits from Highland Woodworking, and it sucked straight out of the box. I replaced it with a no-name bit I got locally at Rockler, and what a huge difference it made! I’ve only used it on the Perch’s undercarriage so far, but it’s already far better than the other bit ever was.

This time, I think I finally cut my wedges thin enough. I can never seem to sink them deeply enough into the legs.

In this picture you can see the bins of childrens’ clothes and other “stuff” that will be sold at the annual Pittsburgh Mothers’ Center Kids’ Stuff Sale. But it may be more interesting to note the angle of the seat: yes, it really does pitch you forward as much as it looks like it will; but this is a good thing.

The future is looking bright, with respect to me keeping enough momentum to complete an actual chair before slipping into a different hobby for a while. I guess I’ll have to start doing some drawing to figure out exactly what it is I want to make.

And now, finally, the image you’ve been waiting for: the finished perch. Marla’s initial sit upon it sounded promising, so we’ll see how that goes.

Seat carving is an area where I seem to be improving. I look at the chairs I made in classes, and they’re downright rough and lumpy compared to my more recent stools. This pine is a real pain with tearout, especially where the curves leave high and low spots on the grain. But this time, I managed to scrape the seat enough to move straight to 220 grit, so that’s good.

I used the superglue to stop some checks in the bottom of the seat: hopefully this will prevent them from getting much worse over time, but we’ll see. The grey chair in the background isn’t a “real” windsor, it’s a factory chair I got at a yard sale for $2.

That’s it for now, it’s late. Damn Daylight Stealing Time, I never can get used to the time change.

Beer Batch #24: Lager? I don’t even know her!

Brewing in our house in the winter is problematic. Ale yeast usually wants temperatures above 65F, and lager yeast wants to ferment at under 55F. Our limited climate control generally varies the house temperature between 65F in the day, and 60F at night, and even the basement gets above 55 regularly.

So, I found White Labs San Francisco Lager Yeast. This is a lager yeast that ferments best from 58F to 65F. My theory is, this is the Anchor Steam yeast; Anchor Steam beer is theoretically a lager brewed at Ale temperatures. I have no evidence for this, but Anchor is from San Francisco, and their Steam Beer is a well known and resepected brew.

“Lager?” is a fairly generic beer, and just happens to use this yeast so it would ferment well in my house. For this batch, I wasn’t trying to create a specific style, I basically just used ingredients I had on hand.

Lager? I dont even know her!

Brew Date: Feb 8, 2009

Ingredients for a 5 gallon batch:

  • 1lb Munton Crystal Malt, 60L
  • 1oz Millenium hops, pellets 15AA
  • 6lb LD Carlson Breiss DME, Pilsen Light
  • 1oz New Zealand organic Hallertau hops, 8.6AA
  • 1tsp Irish Moss (for clarity)
  • White Labs WLP810 San Francisco Lager Yeast

Process:

  1. Steep crystal malt in 2.5-3 gal H2O for 30 minutes, approximately 160F
  2. Add Malt Extract
  3. Boil for 60 minutes total
    • Millenium hops boil for 60 minutes
    • Hallertau hops boil for 15 minutes
    • Irish moss boil for 15 minutes
  4. Chill wort, aiming for to 65-75F final temperature for 5 gallons
  5. Pitch yeast starter

Original Gravity: 1.056
Notes:

  • I started the yeast on Feb 3rd, using more DME than I expected, G=1.090 in the starter!
  • The yeast worked really well, both in the starter and in the primary fermenter.
  • Pitched yeast with the wort at about 65F; lower than I had hoped.
  • Fermentation was obviously active by 2am that day
  • Once again, Marla had to replace the airlock with a blowoff tube while I was at work, to avoid a huge mess.
  • February 15: rack to secondary fermenter; Gravity = 1.026
  • March 2: Gravity = 1.020
  • March 5: Keg it. Gravity = 1.019

So far, this beer basically tastes fine; it’s not extraordinary or different than much of anything, but it’s pleasantly drinkable. And, it fits with my general tastes: not too hoppy, with a bit of sweetness. My apparent attenuation (percent of sugar which was fermented; different yeasts act differently in this regard) is slightly less than expected for this yeast, so it might ferment a bit more in the keg and change over time. The bitterness is a bit odd, I’ve never used Millenium before.

Overall, I’m happy with this beer.

A note about the name: Marla introduced me to the “I don’t even know her!” line of jokes. Daniel’s variation seems to be “I just met her!” I was more familiar with the “yermom” line of dubious humor in college. “Lager? Yermom doesn’t even know her!”

A Catalog of Mistakes

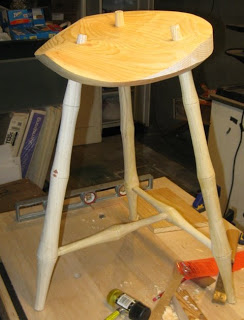
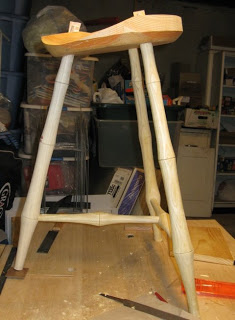
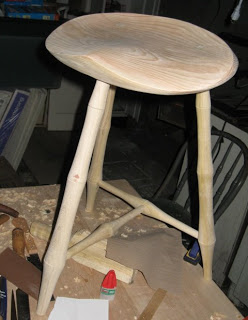
When this first stool is finished, I expect it will look basically fine, and will not betray the troubles which presented themselves during the construction process. Mistakes are easier to hide under a painted surface. Some mistakes required me to build new parts, so you’d have to look in my scrap bin for the evidence. Nonetheless, I’d rather not repeat these errors.

I’m going to write a list of all of the problems I would have rather avoided. I’m also going to try to describe why they happened, and find ways to avoid repeating them. I don’t necessarily think the results of this exercise will be useful to anyone but me, but maybe the example of the process I used will be. I intend to update this list as I go along until the stool is finished.

In both chair classes I took, I made relatively few mistakes. In retrospect, although I avoided mistakes at the time, I’m not sure I remember how I avoided them; and because I avoided mistakes, I didn’t learn how to fix them. As I expected, I wouldn’t really know how to make a chair (or even a stool, the easy half of a chair) until I did it by myself.

I’m sure this will bore you, unless you want to make fun of me. But I’ll probably refer to it again in the future, and “future me” is as much of a part of my target audience as you are.

Problem: Seat holes were drilled at the wrong angle. This required major adjustment during reaming, and left gaps around the legs in the seat top (which were luckily filled when I wedged them).
Cause: Although I used a bevel gauge to site the leg angle, I didn’t also use a square to make sure I was square to the sight line.
Solution: Use a square.

Problem: 2 side stretchers were cut too short and I needed to turn replacements.
Cause: I didn’t know how long my folding rule segment was.
Solution: Remember the rule is 7″ long.

Problem: While drilling a leg hole, the leg rotated in the V-blocks, ruining the hole and requiring a new leg.
Cause: Insufficient clamping strenth.
Solution: Use better clamps.

Problem: All 5/8″ holes took too long to drill and/or were burnished; bit required constant sharpening.
Cause: Dull drill bit. It seems to really suck.
Solution: Get a new bit, or try a new grind on the old bit.

Problem: A leg split during stretcher assembly, requiring building a new leg. Two side stretchers had minor cracks during stretcher assembly.
Cause: Tenons were cut too large, or with a taper; inappropriate wood used to turn the leg.
Solution: Learn the proper size to cut the tenons, and how to achieve consistent results. Don’t use open-grained wood for legs, it splits too easily.

Problem: A stretcher tenon was too small. I fixed it by gluing cloth around it to increase the diameter where it was inserted into the leg.
Cause: Tenon cut too small.
Solution: Learn the proper size to cut the tenons, and how to achieve consistent results.

Problem: Tapered leg tenons have a shoulder where the depth reference mark is, making it hard to seat them properly.
Cause: The tapered tenon cutter’s major diameter is smaller than the depth reference diameter on the stool’s plan.
Solution: Use a smaller depth reference diameter, or stop using the taper cutter (use the lathe instead).

Problem: Leg wedges didn’t drive very far into the seat.
Cause: Wedge angle too great.
Solution: Cut thinner wedges at a lower angle.

Problem: Leg wedges were hard to start in the tops of the legs.
Cause: Leg slot was squeezed shut by the seat.
Solution: File a v-notch in the wedge slot before inserting legs into the seat.

Problem: When wedging the legs, the cookies leftover from turning the legs broke off the bottom, and chipped the bottom of the legs.
Cause: I didn’t trim the cookies off after turning the legs.
Solution: Trim the cookies.

Problem: Stool wasn’t levelled properly: it rocks slightly on some surfaces.
Cause: My bench isn’t perfectly flat.
Solution: Move my bench around on the floor until it’s flat, or wedge one of the legs.

Things which were harder than they should have been, or took longer than they should have, even if they weren’t necessarily mistkaes :

  • Cutting wedges for the legs
  • Drilling 5/8″ holes
  • Trying to trim oversized stretcher tenons to the perfect size, off the lathe

Creative solutions to problems I’d prefer to avoid (Yes, I know you likely have no clue what I’m talking about, but I have to take notes somewhere and it might as well be here):

  • Glue one or more layers of cloth to a round tenon to increase the size of tenons if you trim the tenons too small or ream the leg holes too large. I learned this in Brian Cunfer’s class.
  • When I split a leg, but already had the undercarriage partially assembled, it was impossible to insert the leg in the undercarriage enough to measure a drilling angle for it. Instead, I mounted my broken leg in the v-blocks to set its reference line parallel to the table, and then replaced it with the good leg before drilling using my reference angle. Since the legs are both straight, and differing leg diameters only move it horizontally, the angle came out correct.

There’s certainly no danger of perfection in my craft. But my willingness to screw up, and to say “good enough” when it’s good enough helps me get something done, and allows me to enjoy myself overall, even if the process isn’t going as perfectly as I might prefer. I can’t get better without doing it, but in order to do it at all I need to make some mistakes.