Friday’s main event is always Big Battle Doubles. Since JM wasn’t in attendence, The Grey Wardens couldn’t make a return appearance. Luckily, Dave Schlanger set me up with Mark Pozniak. After we settled on playing Mark’s Ancient British, II/53, we chose the team name Woad Kill. The final army composition was 12xLCh, 6xLH, 15x3Wb, 3x2Ps. This is not a power army by any means, but it can definitely win through outmaneuvering (and high die rolls).
Somewhat unfortunately, Warband is a finesse troop in DBA. I say “unfortunately” because historically these guys were more likely to yell “Waagh!” and run straight ahead. This is only “somewhat” unfortunate because warband are fun to play the wrong way, since they maneuver so well.
 |
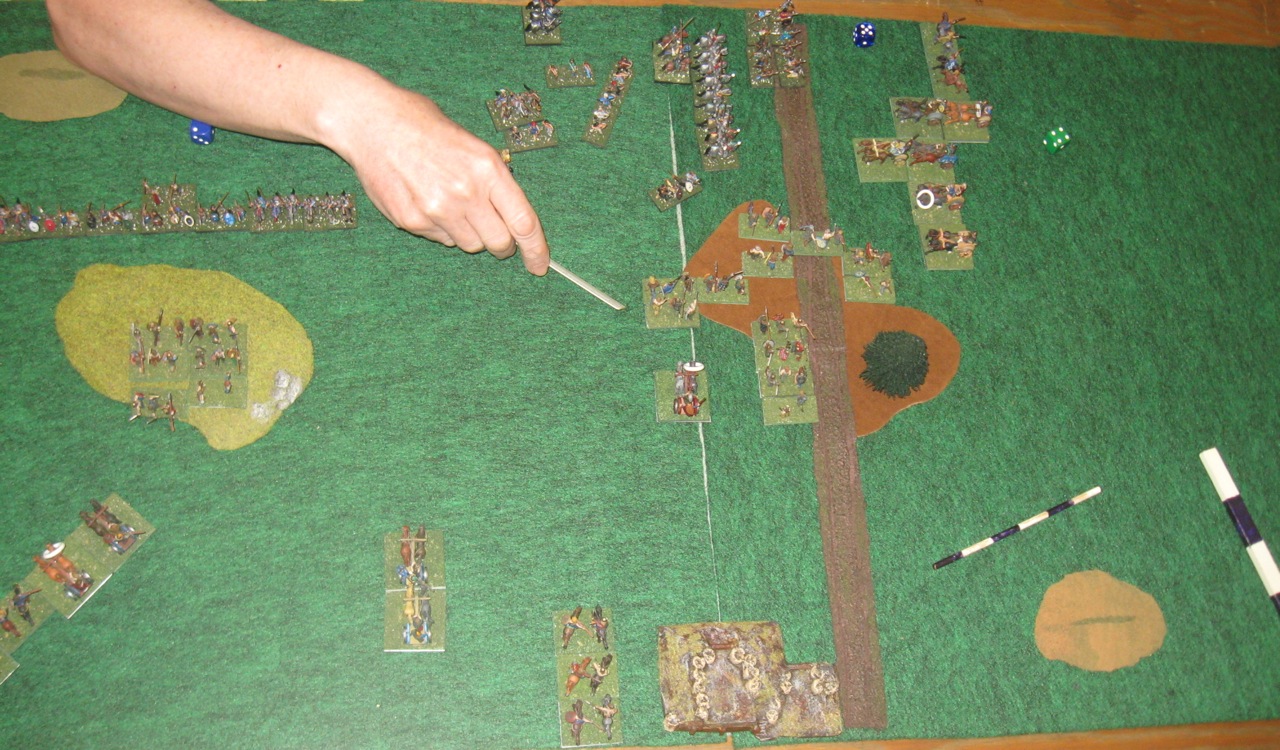
| Game 1 deployment vs. Doug Austin’s Bosporans with Sarmatian ally |
The first image demonstrates our final defensive plan: two large pieces of bad going in the center, daring the enemy to approach our central CinC command and camp; two pieces of bad going near the board edges to constrict a flank. It also shows the command split we used for all three games:
- 3xLCh, 1xLH, 5x3Wb, 1x2Ps (10 el, BP: 4)
- 3xLCh, 3xLH, 6x3Wb, 1x2Ps (13 el, BP: 5)
- 6xLCh, 2xLH, 4x3Wb, 1x2Ps (13 el, BP: 5)
One flank command (low PIP) would hold on and try not to die for as long as possible. The center command and other flank command would work together to attack the enemy’s weakest flank. In this picture, the enemy deployed ideally for us, by putting most of their army on our preferred defensive flank.
During planning conversations with Mark, I had three primary concerns with this plan and command split. First, the low PIP command consisted of both warband and mounted, and with 10 elements it might not have enough PIPs to accomplish its missions. Second, combining two commands which were split by a piece of bad going might lead to command and control issues. Finally, what would entice the enemy to approach us centrally? In practice, only some of these ended up being real problems, and we only defended once anyway.
Round 1
In the first round, we faced Team Bosporan: Doug Austin and Bill Connely. They played the same army Doug used when JM and I faced him at Cold Wars: Bosporans (II/25) with a Sarmatian ally (II/26). They also had a 0 aggression, but we won the terrain roll. Doug set up very similarly to last year: a central low-PIP command consisting of primarily artillery and bow, with his CinC command split on both sides of that command; and the allied block of knights (with 1xLH for variety, this time) on our left flank. The first picture above shows the final deployment.
We knew we had enough bad going troops to take and hold any piece of bad going, but our goal was not to hide in bad going and delay the game. Instead, we intended to look like a Warband army but act like a Mounted army. The bad going provided a safe “home base” and staging area for the warbands, but it couldn’t be a final destination if we wanted to finish the game on time.
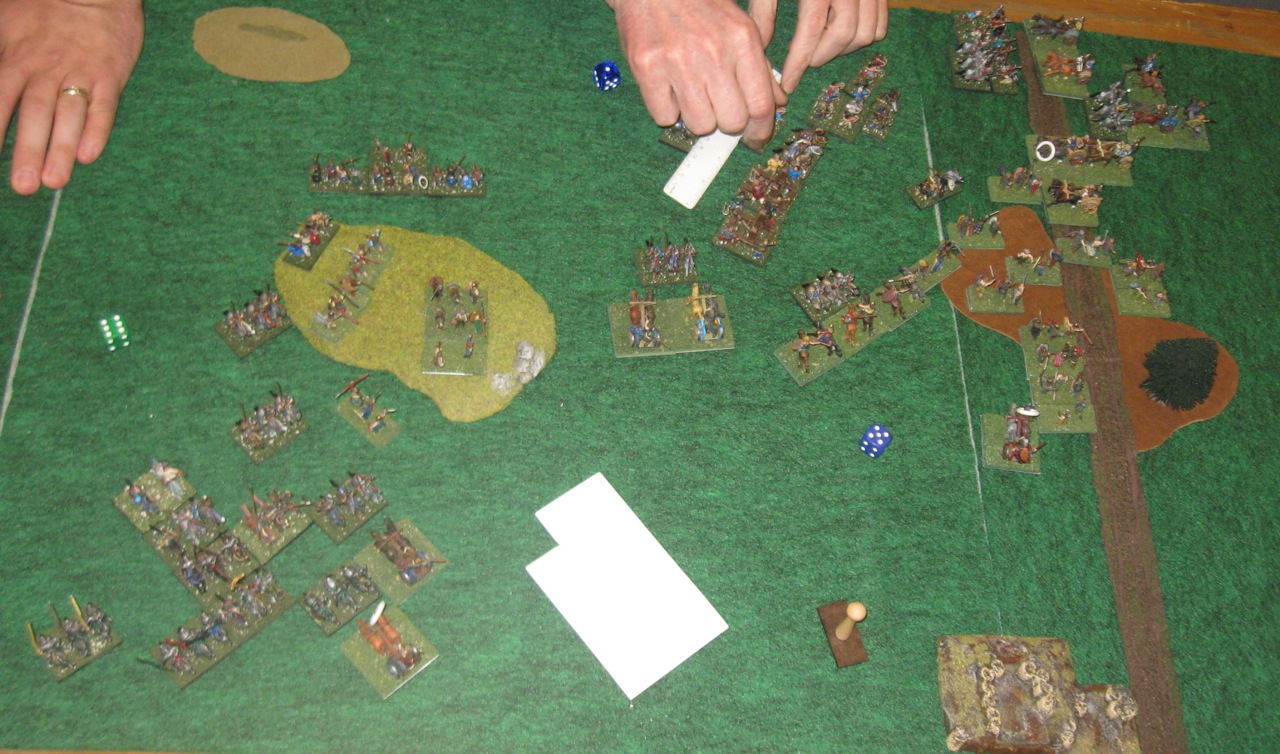
 |
| Game 1 in progress: attack the right flank. |
As the game progressed, we advanced into the bad going, defended on the left flank, and attacked quickly on the right. Our cavalry and warband reached their right flank before their knights reached our left, but Doug retreated from our advance and competently maneuvered to avoid our attack. This would’ve gone a bit differently on 30″ deep boards, with an extra few inches to use in their backfield. In the center, nothing really happened: they didn’t approach, so I held our central mounted in reserve to act where they were needed the most.
 |
| The End is Nearly Nigh |
In the end game, my left flank warband were able to aid in the defense and even tried to pick off a few CinC elements (or at least suck away some PIPs). We delayed the inevitable break of our low PIP command for a long time, but eventually it did break. I allowed the elements to flee enough to get in the way of oncoming knights before trying to hold them, but there were only a few turns left. With time running out, Doug graciously recognized they would lose eventually, and allowed the game to come to a conclusion on our right flank instead of retreating and delaying until time ran out. In the end, we killed enough elements to break their CinC, and won 84-16.
Regarding my concerns about this plan: The low PIP command was not too large, and did have enough PIPs, even though it was acting both in the open and in bad going. The key to success here was the fact that it had a passive mission to “not die.” It would have failed if it were required to attack. Command and control wasn’t a big issue in this game, because the central command was only required to work on one side of the woods. It didn’t really matter whether the enemy approached us centrally or not: instead of advancing aggressively in the center and risking attacks from bad going, they tried to maneuver to our right flank and faced the warband there instead. I didn’t see this flexibility before I saw the plan in action.
Round 2
 |
| Vs. Two Davids, after a few turns |
In the second game, we faced Two Davids with “some kind of Romans” and Sub-Roman British (King Arthur). They were also aggression 0, but they won terrain. We applied basically the same plan we used in the first game to the enemy’s choice of terrain since it was similar enough to our own.
Much of this game hinged on a minor but costly mistake shown in this picture: the CinC command sent a column of warband down the road to “help” in the woods, but they ended up out of command. This sucked PIPs from the CinC while severely hampering the ability of the right flank command to maneuver there and attack effectively. We were able to maintain this PIP debt for longer than we expected, but eventually the Davids killed off enough elements in the woods to control them completely, and it was all downhill from there.
Another noteworthy part of this game was the Davids’ deployment and initial maneuver. They deployed their line behind the deployment line, and placed their third command in front of their main line near the center. As seen in the image above, they wheeled the two overlapping lines away from each other, in a beautiful maneuver I can only compare to the blooming of a flower. It was very instructive to watch and learn from, but as David Kuijt said, “It doesn’t always work out that way.” (Hold that thought, and read the Saturday update once I post it…)

I don’t know what would’ve happened if we had anticipated the command and control issues, and decided not to send the central warband toward the right flank. The real battle here ended up being in the center and the right flank woods, not on the far flanks, so the extra force and PIPs would have been helpful.
In the end, we hardly killed anything, and lost 94-6. I enjoyed the game a lot, and seeing the flower bloom taught me enough to make it worth losing. Command and control was more of an issue, obviously, but the low PIP command still had enough PIPs. I think the tides could’ve turned somewhat to our favor in the woods, but the Davids had the overall PIP advantage and we were fairly evenly matched in combat, so they were bound to win if the dice acted as expected (and I’m not one to bet against them).
Round 3
 |
| Alex and Jon Bostwick, not the One True Boudicca! |
The Long Island Bostwicks (Jon and Alex) read our team name on Fanaticus, and decided that they weren’t going to be outdone by us, so they took Ancient British as well. They totally out-woaded us! They must be extroverts, or something.
Unfortunately, no one else was familiar with the recent Beastie Boys video (and trailer). I wanted to bring a super fresh, old school beatdown to the table: “We’re the real Boudicca!” “No, we’re the real Boudicca!” I’ve listened to and grown up with the Beastie Boys since middle school, so as long as they’re still rapping, I know I’m not old yet…
Once again, everyone was aggression 0, and they won the terrain roll and defended. Since we have the same army, this wasn’t a big deal. Their command structure was different than ours: they put all of their mounted in one huge CinC command, and split their warband into two commands. They had no psiloi, and took more warband instead.
They deployed their mounted command centrally with one warband command on their flank. Their mounted had some elements in reserve behind the lines, and there was a road in place allowing them to redeploy as necessary.
As usual, width is better than depth. We decided to create a longer line and outflank them on each side. Cavalry is superior to warband, so we didn’t want to face their cav with our warband. By putting two commands next to each other, we had enough mounted to meet their cavalry with one or two elements in reserve, and the third command’s mounted elements were still available to provide a superior force on one flank.
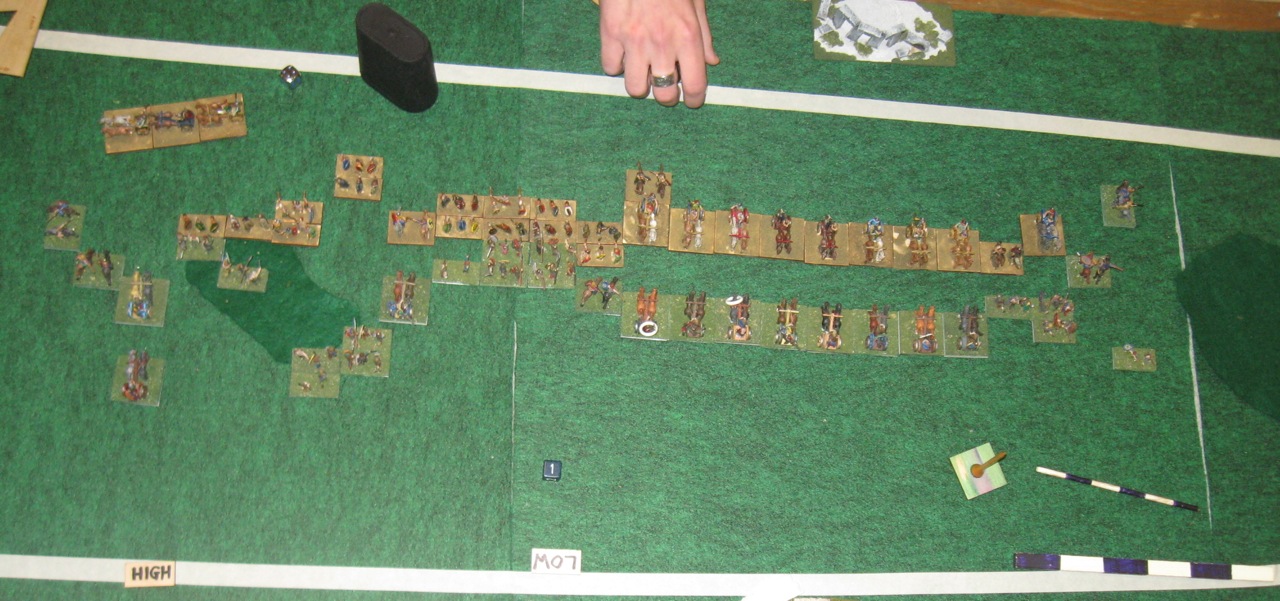
Their third command placement showed a bit of father-son rivalry. Alex wanted all the warband on one flank, while Jon wanted the third command on his side. I think Jon may have had the better answer, but Alex got his way and commanded both warband commands on our left flank. Unfortunately, this meant that the reserve chariots were out of command by the time they reached the flank. This sucked up their PIPs, and once I tamed their warband on the left flank it allowed us to use all three commands against their CinC command.
We were going neck-and-neck until one turn when I broke both of the warband commands: one by killing 1/3 of the elements and the other by killing its general. After that, it was only a matter of time; but we ended up killing enough CinC elements to end the game before they lost 18 elements. We won 86-14. No, we’re the real Boudicca!
Once again, the low PIP command had plenty of PIPs, since its mission was to advance in a straight line and attack in the open in a single line. There was some potential for command issues on the left flank, but I kept the general in a useful position and it wasn’t a real problem.
Summary
I had a lot of fun in this event, as usual, and I’m glad to have partnered with Mark. Thank you very much, Mark! You won so many other events that I hope I didn’t hold you back very much in BBDBA.
Besides having fun, I learned a lot. At the time I couldn’t identify many specific lessons, but now that I’m writing it up, they are a bit easier to identify.
- My approach to planning in past BBDBA events seems mostly on the right track. I considered most of the same aspects Mark did, but valued their importance differently. It’s not clear how useful considering all possible enemies is, given the limited field you’re likely to face unless you reach the finals.
- 10 elements aren’t too many for a low PIP command, even if they’re of a variety of element types. The more important aspect of their success is their mission.
- It’s very important to pay attention to command and control radius. Yeah, I already knew that in theory, but I need to pay even more attention to it.
- If you split a command to work on two areas of the board, you can share its PIPs with two other friendly commands. However, you may also present that command to two separate enemy commands, making it more vulnerable to enemy attack. If it is your CinC command, it may make the CinC easier to break.
- On the other hand, using multiple commands against one enemy command is an important aid to your success. Balancing this with avoiding exposing your command to too many enemy commands may be difficult.
- The Blooming Flower tactic is an interesting, useful, and dangerous way to deploy your commands flexibly in two overlapping lines.
BBDBA seems to warp time in an odd way. For me, time seems to be controlled by the overall flow and pace of a battle, and not wall clock time. As a result, when I’m finished with a big battle game it feels like it was just as long as a single DBA game, and I wonder where half the day went.
Thanks to my partner and my opponents for a wonderful day of BBDBA!