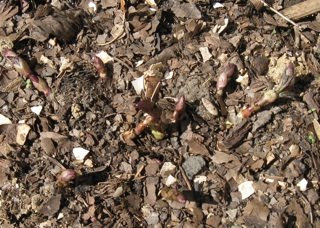
Hops, May 2009

Hops like to grow up to 20 feet high or higher, ideally. Normal farm growing techniques recommend running 1-2 strings from each hops plant, with 1-3 bines running up each string.

Installing a pole 20-25′ high is a huge pain in the butt, and catastrophic failure is a lot worse than with shorter trellises, so I’ve decided to try the “width instead of height” strategy. My poles are about 9′ high, but I’ve strung up 8 vertical lines. I have about 10-11 bines trained up the twine.

Last year, I only got 2 sprouts, which is typical for the first year. It seems likely I’ll get a useful amount of hops this year.

Unfortunately, I accidentally broke off the top of the strongest bine, when training it a week or so ago, so that one’s not getting any taller. Last year, when I broke off a bine, two horizontal shoots grew out of it. This year, I doubt I’ll be that lucky. The plant is putting its strength into other bines already.

These are Ultra hops. I hadn’t used this variety before I planted it. It’s a newer hybrid variety, with relatively low alpha acids, but an aroma similar to Hallertauer. I chose it because it’s hardy and produces a high yield. Hopefully I’ll enjoy the way it tastes, as well.

With home grown hops, you don’t know what the alpha acid content is unless you pay to have it measured, or experiment over the course of multiple batches. This makes them less useful for use as bittering hops, but they’re still useful for finishing.

Beer Batch #25: Crippled Kriek

I wanted to brew a cherry beer, but I didn’t find a specific recipe I liked the look of. Crippled Kriek is a first attempt at getting what I want.

I called it “crippled” because I expected a cherry beer that didn’t taste like a proper Kriekbier, but instead, I got a beer that didn’t taste much like cherry. The rest of the flavor came out as I intended, and it’s a good beer; it just doesn’t taste like cherry.

Crippled Kriek

Brew date: March 29, 2009

Ingredients for a 5 gallon batch:

  • 1/2 lb Crystal Malt
  • 1/2 lb Chocolate Malt
  • 1/4 lb Roasted Barley
  • 6 lb LD Carlson Light Golden DME
  • 1oz Hallertau hops, 8.6AA for 60 min
  • 1oz Hallertau hops, 8.6AA for 10 min
  • 1tsp Irish Moss
  • 49oz Cherry Puree (3.3lb canned)
  • 1/4 gallon yeast starter, using WLP500 abbey ale yeast and WLP810 SF Lager

Same process as usual: Steep the grains, add the DME, and then boil for an hour. I added the cherry puree directly into the primary fermenter, after measuring the original gravity.

For the yeast starter, I used some 2nd generation Abbey Ale yeast, in hopes of getting some of its taste profile, and some 2nd generation San Francisco Lager yeast, because I knew it would ferment in my chilly house temperatures. In the end, I think the ale yeast failed and the lager yeast succeeded.

Original Gravity: 1.062

Notes:

  • Started yeast on March 26 using 1c DME in 4c water, and boiling for 30 min
  • Pitched yeast at 70F
  • April 8, 2009: Gravity = 1.014
  • April 9, 2009: Gravity = 1.014; rack to secondary
  • April 21, 2009: Gravity = 1.014; rack to the keg

The taste is a lot more clean than I had hoped for. I’d prefer the more interesting flavor which the Abbey Ale yeast would impart, but instead I think this is just the lager yeast.

For the recipe, I started with my gruit recipe (but without the herbs) and added the Roasted Barley to give it a bit more of a chocolatey/smoky flavor and a darker head. This part of the flavor turned out just as I had hoped.

In retrospect, I should have paid attention to the recipes which called for 10lbs of cherries. Another possibility would be to add the cherries in the secondary fermenter, instead of the primary.

As usual, it’s a good, drinkable beer. It just didn’t come out how I wanted it to.

Clear Your Beer

I feel inspired to write about home brewing tips and techniques I’ve found useful. I am by no means a master brewer; my skills are squarely in the “Jack” category. However, I also don’t consider myself a beginner.

If no one finds this valuable, then hopefully at least someone will find it interesting or entertaining. If you’d rather read the words of a Master, pick up a copy of “The Complete Joy of Homebrewing.” It is an extremely useful book.
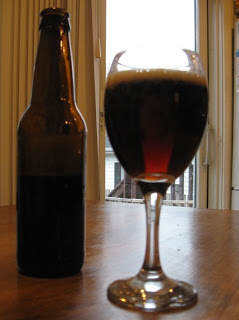
For a long time, crystal clear transparent beer simply didn’t matter. And then one day, someone invented glass drinking vessels. Once people were able to see what they were drinking, appearance became more important. Brewers invented new techniques, even new styles of beer, when presented with the prospect of drinking out of glasses.

So, just go get yourself some “It Comes In Pints” mugs. Relax, don’t worry, and have a homebrew.

Although most beers are best when they are “crystal clear,” some styles are not considered correct unless they are cloudy. For example, a Belgian witbier (wheat beer with coriander and bitter orange) such as Hoegaarden must be cloudy.

I’m an extract brewer, and I’m not as concerned with correctness as with making beer that tastes good to me. But if you drink your beer in a glass, it can be unappetizing to look at a murky, cloudy pint, possibly with bits of floating debris. The human mind is not easily fooled: even if you don’t need a blindfold or a ceramic mug to make that beer taste as good as it really is, your Significant Other probably does.

I haven’t read a lot about home brewing in many years, so I’ll concentrate on the “how” more than the “why.” There are a few factors which contribute to cloudy beer. I’ll describe the processes I’ve settled on which eliminate these sources of cloudiness enough to satisfy me.

Cloudy beer is caused both by materials which are suspended in the water in the beer, and by solids left in the beer which are mixed back into the liquid when it is dispensed. To make your beer less cloudy, you first want to remove unwanted materials from suspension, and then remove the precipitated solids from the beer.

The first step towards clearing your beer happens in the boil pot. Near the end of the boil, you can add ingredients which help take unwanted proteins out of suspension, so they can precipitate and be removed from the beer. My preferred “fining agent” is Irish Moss, which is readily available in home brew stores. I’ve bought it in a powdered form, and also in a slightly more granular form which looks and smells like bits of dried seaweed. I add about 1tsp, 15 minutes before the end of the boil for a 5 gallon batch (2.5-3 gallons in the boil pot).

Looking back at my old beer notes, it seems that sometimes I rehydrated the Irish Moss in water before adding it to the boil. I haven’t done that lately; maybe I don’t know what I’m missing? Then again, maybe it doesn’t matter.

Another fining agent I’ve used is Knox Gelatine, but I don’t remember exactly how it is used. Looking at my notes, it seems that the gelatine is added to the secondary fermenter and not during the boil. Lately, I’ve had no problems with just tossing the dry Irish Moss into the boil along with the later addition of hops, so I’m going to stick with that.

After you’ve removed as much material from suspension as you’re going to, you need to remove the precipitated solids from the beer. Professional brewers use filter systems to do this, but home brewers generally don’t have this luxury. Instead, the general process is to allow time for the solids to precipitate, and then leave them behind when you transfer the beer into a new vessel. Yeast also lives in suspension for much of its life, but luckily the techniques used for removing solids from your beer will also encourage yeast to leave.

Many of these points are probably very obvious to most brewers, but someone might say “Oh, I didn’t think of that.” So I’ll restate the obvious.

  1. If you’re steeping any grains before the boil, use a grain bag to contain them. This lets you remove as much of the excess grain as possible before you start the boil, and reduces the amount of solids in the wort.
  2. When you dump the wort into your primary fermenter, use a strainer. If you use loose-leaf or plug hops, they will act as a filter to catch even more solids before they enter the fermenter.
  3. After the beer has stopped obvious activity in the primary fermenter (no more than 2 weeks), transfer it to a secondary fermenter for another few weeks before bottling or kegging it. You don’t want the beer sitting on dead yeast for longer than 2 weeks, but you do want to give it more time for the yeast to flocculate and solids to precipitate.
  4. Use a siphon instead of pouring, when you transfer your beer. Move the vessels around carefully without shaking them, let things settle for a while before starting the siphon, and don’t move the siphon around once it has started. A racking cane is indispensible. Don’t introduce oxygen into the beer after primary fermentation has started; it’ll confuse your yeast.
  5. This is the hard part. When you siphon, resist the temptation to move every last bit of liquid into the secondary. Instead, leave the murky bottom layer of goo behind, and dump it: it’s good for your plumbing. You might be throwing a pint of beer away, but you end up with less goo in the rest of it.
  6. If you’re bottling, siphon the beer into a bottling bucket, and again skip the muck at the bottom of the secondary fermenter. You need to mix the priming sugar thoroughly with the fermented beer, but you don’t want to mix any remaining solids into the beer at the same time.
  7. Make sure you don’t add too much priming sugar. More sugar grows more yeast in your bottles.
  8. When pouring beer from bottles, let the bottles sit still, pour gently, and don’t pour the yeast off the bottom of the bottle. This applies to purchased bottle-conditioned beer as well.
  9. Instead of bottling, keg your beer and use bottled CO2 for carbonation. I was surprised to discover recently that around here, used soda kegs cost less than $4o. Kegs are a lot easier to use than bottles, and require a lot less cleaning and sanitization. They provide an economical way to store and dispense your beer, and you’ll generally end up with less cloudiness than with bottles. Because you store the beer under carbonation and without oxygen, it stays fresh for quite a while (possibly months).
  10. Don’t move your kegs around or shake them, if possible.

As I said before, most of this is likely to be obvious to a brewer, and uninteresting to everyone else. Sorry about that. If you had a homebrew when I told you to before, you probably wouldn’t mind so much.

Hop, hop, hop…

…hop, hop, hop, etc.

My hops bines sprouted. The first signs of hops this year came before I even planted the rhizome last year. At last count, 11 buds had sprouted, compared with a total of 2 for all of last year.

Luckily hops are resistant to frost. April Showers aren’t supposed to be frozen!

It Comes in Pints?

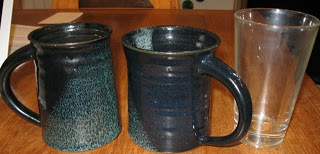
Dee got my “It Comes in Pints?” reference, so I thought I’d post a picture of my “It Comes in Pints?” mugs.

For those of you not familiar with this quote, it’s one of my favorite lines from The Lord of the Rings: Fellowship of the Ring. After entering a human Inn for the first time ever, Merry, Pippin, and Frodo sit down for a few beers.

Pippin: “What’s that!?”
Merry: “This, my friend, is a pint.”
Pippin: “It comes in pints? I’m getting one!”

My sister Sarah is a potter, so a few years back I asked for an “It comes in pints” mug, inspired by the ones they used in the movie. The mugs above are what she came up with (the pint mug is shown for size comparison). They fit a pint with room for head (which is generally hefty on my home brews).

Thanks, Sarah!

Hofbrauhaus

“It comes in litres? I’m getting one!”

Hofbräuhaus Pittsburgh opened today, for dinner. They’re still laying brick sidewalks and pouring concrete outside, but they’ve started pouring beer inside. It’s located in Southside Works, about 2 blocks from my work.

For the last few days, they’ve been training. Those with a special invitation could go eat free food while tormenting the waitresses-in-training with special orders, though you still had to pay for beer.

Well, Daniel works in Southside Works proper, instead of just next to it, so they all got invitations at his company. He went for lunch on Friday, and they invited our family for lunch on Saturday.

It was a nice day, so I rode down with Martine on the trail-a-bike, and Marla and Ezra drove out to join us (I still need to work on that). We met Kristan, and then waited for Daniel and Levi to arrive via bus from their St. Patrick’s Day festivities. They let us in before Daniel arrived to facilitate things. It turns out the “Invitation” was really nothing more than instructions to ignore the huge “We aren’t open, we’re in training” sign.

The food is provided in huge portions and would be expensive if we were paying for it. They have a veritable plethora of meat products whose construction you wouldn’t want to observe, as well as a larger than expected selection of “not German, strictly speaking” food, including vegetarian options. It tasted fine, but my dish was easy: Caesar salad with blackened salmon. Marla had Alfredo and enjoyed it. I tasted the Tilapia, which was also just fine. I guess I’m not a very good food critic, but my tastes lean more towards non-european ethnic foods.

The building itself is as just as you’d expect: it’s the nicest looking giant faux German beer hall in town. It has huge ceilings, and the “long bench” table seating. They don’t seem to use the “meet your neighbors” dining style as it would be done in Germany, but we had a fairly large party in a fairly empty hall, so it didn’t really matter.

Finally, the beer! Well, it’s German beer, Hofbräu beer. It’s now brewed on premises, but they got a bit of a head start; I think they had Penn Brewery contract brewing before they opened. They had the Hefeweizen, Lager, and Dunkel when we were there, but in general they’re also supposed to have a Light and one seasonal beer. Dan and I had a liter of the Hefeweizen, and the wives ordered a sampler. I think I prefer the Hefeweizen out of the choices they had there, with the lager taking a surprise 2nd place. It’s not Belgian, but they give you a whole liter to make up for the lower alcohol content. It’s also only a bit over $7 for 1l, which is less than some 20-35cl servings of Belgian beer on tap at Sharp Edge.

Now that I’ve gone once, I won’t be disappointed to follow my original plan, which was to not go at all for a few months, while I let everyone else try out the New Popular Restaurant. Though, they have around 500 seats inside, and they’re supposed to have several hundred more outdoors (though those aren’t done yet), so I don’t expect they’ll be really crowded until Oktoberfest.

Beer Batch #24: Lager? I don’t even know her!

Brewing in our house in the winter is problematic. Ale yeast usually wants temperatures above 65F, and lager yeast wants to ferment at under 55F. Our limited climate control generally varies the house temperature between 65F in the day, and 60F at night, and even the basement gets above 55 regularly.

So, I found White Labs San Francisco Lager Yeast. This is a lager yeast that ferments best from 58F to 65F. My theory is, this is the Anchor Steam yeast; Anchor Steam beer is theoretically a lager brewed at Ale temperatures. I have no evidence for this, but Anchor is from San Francisco, and their Steam Beer is a well known and resepected brew.

“Lager?” is a fairly generic beer, and just happens to use this yeast so it would ferment well in my house. For this batch, I wasn’t trying to create a specific style, I basically just used ingredients I had on hand.

Lager? I dont even know her!

Brew Date: Feb 8, 2009

Ingredients for a 5 gallon batch:

  • 1lb Munton Crystal Malt, 60L
  • 1oz Millenium hops, pellets 15AA
  • 6lb LD Carlson Breiss DME, Pilsen Light
  • 1oz New Zealand organic Hallertau hops, 8.6AA
  • 1tsp Irish Moss (for clarity)
  • White Labs WLP810 San Francisco Lager Yeast

Process:

  1. Steep crystal malt in 2.5-3 gal H2O for 30 minutes, approximately 160F
  2. Add Malt Extract
  3. Boil for 60 minutes total
    • Millenium hops boil for 60 minutes
    • Hallertau hops boil for 15 minutes
    • Irish moss boil for 15 minutes
  4. Chill wort, aiming for to 65-75F final temperature for 5 gallons
  5. Pitch yeast starter

Original Gravity: 1.056
Notes:

  • I started the yeast on Feb 3rd, using more DME than I expected, G=1.090 in the starter!
  • The yeast worked really well, both in the starter and in the primary fermenter.
  • Pitched yeast with the wort at about 65F; lower than I had hoped.
  • Fermentation was obviously active by 2am that day
  • Once again, Marla had to replace the airlock with a blowoff tube while I was at work, to avoid a huge mess.
  • February 15: rack to secondary fermenter; Gravity = 1.026
  • March 2: Gravity = 1.020
  • March 5: Keg it. Gravity = 1.019

So far, this beer basically tastes fine; it’s not extraordinary or different than much of anything, but it’s pleasantly drinkable. And, it fits with my general tastes: not too hoppy, with a bit of sweetness. My apparent attenuation (percent of sugar which was fermented; different yeasts act differently in this regard) is slightly less than expected for this yeast, so it might ferment a bit more in the keg and change over time. The bitterness is a bit odd, I’ve never used Millenium before.

Overall, I’m happy with this beer.

A note about the name: Marla introduced me to the “I don’t even know her!” line of jokes. Daniel’s variation seems to be “I just met her!” I was more familiar with the “yermom” line of dubious humor in college. “Lager? Yermom doesn’t even know her!”

Bad news, Good news: Penn Brewery

The bad news: last fall, Penn Brewery on the North Side had their rent raised, and declined to renew their lease. They’ve already contracted their brewing out to Lion brewery in Wilkes-Barre, and the restaurant’s last day open was Friday.

The good news: the owner and the landlord came to an 11th hour agreement on Friday, which renews the brewery’s rent for 5 years. Hopefully the restaurant employees haven’t all quit yet.

By the Keg: EEBC’s Session Ale #21, “Grisette”

Last year I got sick of recycling beer bottles, and the tremendous waste associated with this. Recycling glass is better than throwing bottles away, to be sure. But fifty years ago (or today, in almost any other country) bottles were regularly cleaned and reused. Why not now?

Some consider the “give a hoot, don’t pollute” ad campaign, and its modern “recycle” replacements to be nothing more than a giant exercise in externalizing costs. Companies reduce the cost of their products by using inexpensive disposable/recyclable containers, and forcing taxpayers to pay for their disposal. After moving to disposable packaging, companies had so much money left over they could afford TV ads to tell people not to throw trash on the ground.

It turns out that in some cases, bottles are still reused today. I started making an effort to buy my beer in refillable Growlers (half gallon jugs) as often as possible. I rode my bike to East End Brewing Company on growler days, and filled up at D’s occasionally out of convenience.

But growlers have their own problems. The beer is relatively expensive: you nearly pay bar prices, at D’s. And you need to refill them fairly often. This led me to consider filling one of my soda kegs (aka “Cornelius Kegs” or “Sixtels”) at EEBC, but I never got around to it.

Then, I tried Session Ale #21: “Grisette.” This is a small (low alcohol) Belgian style beer. It is excellent! It’s spicy and flavorful, and doesn’t send me under the table (or my foot into my mouth?) too quickly.

Both of my homebrew kegs were empty, so I got one filled with Grisette (well, Marla did: thanks!) and it has been great. The beer stays carbonated (with some help from my CO2), and I won’t need to refill it often. Even better, a 5 gallon keg costs as much as 5 half-gallon growlers, so it costs as little as an average beer in a case (in Pennsylvania, anyway).

For anyone who brews beer, I definitely recommend considering kegging your beer instead of bottling it. It’s faster, more convenient, and when you use CO2 to dispense your beer, it stays fresh almost as long as in bottles. I bottled my Gruit, the first bottling job I’ve done in a long time, and it was no fun at all: label removal, bottle washing, and then floor washing after the mess of filling everything up.

The main downside of kegging is the startup cost. Luckily, Dad found some kegs at a scrap metal yard around the time they were being phased out in soda vending locations, and bought them by the pound. But knowing what I know now, I’d still invest in kegs if I had to buy them.

And as a side perk, you can probably get your keg filled at a local microbrewery, for only slightly more than the cost of brewing a batch.