NERF Mod and Repaint: Ezra’s Velocity Mod

This spring, Ezra had an idea for a NERF blaster mod: graft a battery powered flywheel onto a barrel extension, to accelerate darts shot from a spring-powered blaster.  This is the result.

In-progress shot of the accelerator mod

We cut off the front of a Rebelle flywheel blaster and part of a Modulus barrel extension, and joined them by epoxying them to a plastic bulkhead.  Each half was attached separately, so the whole thing could be disassembled and reassembled easily using the original screws.  The most challenging part was keeping parts aligned when joining to the bulkhead, to maintain a straight path for the dart.  In retrospect, it probably would’ve been easier if we had temporarily installed the internal barrel parts and used a dowel to keep everything in alignment.

Internals, showing the switch placement, battery pack, flywheel, and front barrel segment.
Mod assembled and fit to a blaster, prior to painting

After constructing the mod, Ezra also wanted to repaint it to match, as well as repainting a blaster to match.  He wanted a bit of a “postapocalyptic junk” aesthetic, so we chose a rusty brown and applied metallic highlights. The bright blue and orange parts were maintained for safety reasons.

Repainted barrel accelerator mod, disassembled; flywheel and battery pack visible at top
Repainted blaster, barrel, and shield parts

Now I just need a shot of the finished product!

After the glue joint broke the first time, we added screwed-on metal braces to hold the halves together.  Next he wants a better stock and a spring power mod in the same blaster.


Halloween 2017: Ezra’s Gaara Costume

Woohoo, I’m not an entire year late yet!  Since I have some newer projects I’d like to post, here’s an older one I haven’t gotten to yet.

Gaara costume
Ezra as Gaara
Gaara
Gaara

Ezra’s Halloween costume for 2017 was Gaara: a character from the Anime/Manga series Naruto.  The main props we needed to build for this costume were his sand gourd, and the leather bandolier. The clothing portions were all done with street clothing for simplicity.

Here are a few pictures of the finished costume, with a few more showing how it was constructed and made to work.

Gaara costume, backGaara manipulates sand, and so he always carries with him a giant gourd-shaped container made of sand. This prop defines the character, but it’s huge and potentially unwieldy.  Construction was theoretically simple: use paper mache.  However, it wasn’t easy.

As a base, we used punching ball balloons, chosen because they’re larger and thicker than ordinary balloons. For our first few attempts, we taped the balloons together before applying paper mache.  This was a problem when one of the balloons deflated, and the half-finished shell shrank and wrinkled.  Extracting the bad half and replacing it didn’t work well, so we eventually ended up building up the second balloon separately and attaching them with masking tape and then paper mache after the shell was hard.

Gaara's sand gourd prop
Gaara’s sand gourd prop

The cork on top was a natural cork from the craft store, and the lip was formed using Crayola Model Magic, which is basically an air-dried clay with the consistency of foam.  It’s easy to work with, light, and takes paint well.

The whole giant peanut was painted tan, and then the seals were painted on after tracing the outline from a stencil, and cracks were hand-drawn.

Gourd harness
Test fitting the gourd harness. It’s usually worn under his shirt.

After the gourd was completed, it was obvious that the decorative pleather bandolier would not be strong enough to support it without it sliding around and looking horrible.  To solve this problem, I constructed a harness out of leftover nylon straps and buckles.  The picture here shows Ezra trying on the harness for fit. In actual use, the harness went under his black shirt, and the attachment buckle went through a small hole in the shirt.

Gaara costume, side view
The leather bandolier and buckles are slightly clearer here

The buckle was sewn to the red sash around the gourd, and clipped onto the harness.  This made it removable, so he could take it off at school, and supported the weight completely without putting any stress on the leather bandolier.

The leather bandolier was not difficult: I made a pattern out of paper, cut, and sewed it up.  The multiple matching metal buckles came from a snakeskin leather purse from the thrift store, and were hot-glued into place.

The pleather came from one of our many trips to Pittsburgh Center for Creative Reuse, and the white sash and foot wraps were muslin cloth. He rounded it out with red hair dye and Halloween face paint for the eye liner. The forehead tattoo worked better with acrylic paint than cheap Halloween face paint.

No User Serviceable Parts Inside

It used to be that electronic devices were printed with the warning, “No user serviceable parts inside.” That was never true, and it still isn’t. They’ve stopped printing this on most devices, but not because it isn’t true.

Instead, they’ve eliminated any obvious way to disassemble the device. This prevents people from hurting themselves if they’re skilled enough to use a screwdriver, but not skilled enough to avoid shorting a capacitor and blowing themselves up. Luckily, it doesn’t prevent people from learning how to repair things themselves.

Ezra’s hand-me-down iPod had a failing battery. Instead of buying a new one, or paying to have the battery replaced, we got him a battery replacement kit for Christmas, and shared the experience of disassembling and repairing the device.

No User Serviceable Parts Inside?
Ezra unscrews an RF shield

The procedure went smoothly, but not perfectly. Unfortunately the home button did not function after we were finished with it, but Ezra wasn’t bothered by this, since he already uses an on-screen home button. He declined my offer to order another replacement part, and now he knows what the inside of an iPod looks like.


Wooden Weapons

The kids aren’t allowed to get wooden weapons at the Renaissance Festival, because then I don’t get to make them.

A wooden hammer (maul) prop I made for Ezra’s Dwarf costume. Wooden curtain rod, pine wood head, craft foam and fake leather on the handle.
Details of the hammer head show the Gunnerkrigg Court symbol carved into the side of the head, just as Ezra requested.
Short swords for Martine’s Ranger costume. Pine board blades, and masonite reinforcement at the hilt. Handles wrapped with pleather.
The props in use.


Fantasy Dwarf Helmet

Before I can post this year’s costume creations, I need to do last year’s.

Here are some in-process photos of a fantasy Dwarf helmet I made for Ezra’s costume last year.

It all started with a baseball batting helmet I found at Pittsburgh Center for Creative Reuse, and some chunks of 2×4 I glued into blocks.
I cut the helmet down and roughed out horns on the blocks.
I carved the horns with a spoke shave, and sanded them. They’re bolted into the helmet using large lag bolts from behind, with hot glue to fill in the gap between horn and helmet.
Details were applied using flexible craft foam attached with hot glue.
I sprayed the entire helmet black, and then painted most of it metallic steel. After spraying a protective varnish, I added fur to the horns.
The finished costume included a “wizard” beard that we braided, scale armor made from aluminum flashing that I had when I was a kid, one of many home made cloaks, and a wooden hammer I’ll show off in another post.

Line6 FBV: Part 2

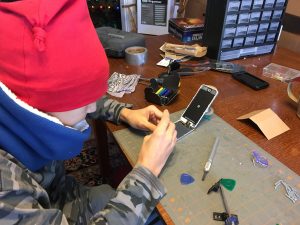
I’ve started looking into the Line6 FBV protocol again, after letting it sit for a year. This time, I had another Line6 pedal that is compatible with the Amplifi. By observing serial traffic between the pedal and amp, I was able to emulate the basic functionality of the pedal using an Arduino.
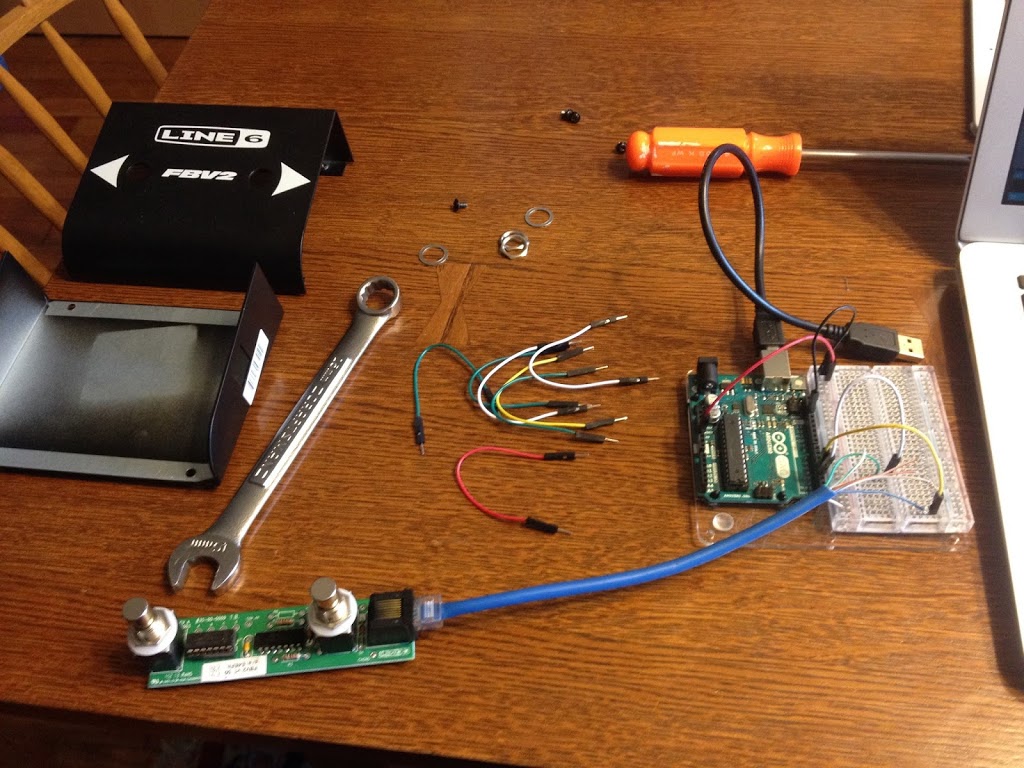
Hardware

I am vague in this section, because I do not know if the circuits I built are truly safe for the Amplifi hardware. I didn’t have any problems with the amp, but I did generate enough electrical problems via USB to cause my laptop to spontaneously reboot several times… that can’t be good, right? Any attempts to mess with your hardware will probably void your warranty, and a mistake could blow up your amp or burn your house down. You have been warned.

I used the same input/output circuit found on the FBV2 pedal. Sending data to the Amplifi did not work without both of the balanced signals on the cable. I believe this may be using RS-422 signaling, which requires that differential input. If so, a proper RS-422 chip might work better than the Schmitt triggers, but I haven’t tested it.

The serial specifications are the same as I used on the FBV2, and the same as MIDI uses: 31250 baud, 8N1. I used a higher serial speed for USB debugging channels, to reduce the chance of interrupting an incoming byte.

I assumed the connector wiring was the same as on the FBV2 pedal, and verified this is the case. However, the amp supplies far more than 5v, and the voltage will need to be regulated to be compatible with a 5v or 3.3v Arduino.

On the Arduino side, listening to both sides of an amp/pedal conversation, USB debugging, and controlling an LCD and buttons all at the same time was much easier using an Arduino Mega, which has multiple hardware serial ports. I wasn’t able to get SoftwareSerial or AltSoftSerial to do what I needed here.

I used an Adafruit character display I2C backpack with four on-board buttons to mock up a user interface. I can’t find this board for sale anymore on adafruit.com, so I’m glad I got an extra.

Protocol

The data sent between amp and pedal is sent in packets of the same basic format, and it matches what I found on the FBV2: “F0” followed by a length byte, and that many bytes of data.  The interesting parts are the messages those packets can contain.

By recording the traffic between the amp and pedal while interacting with the pedal, I was able to identify many of the features of the communication protocol. However, there are also spontaneous handshake packets sent between the devices, and I have no clue what they’re for.

The messages themselves start with one byte that identifies the type of message, followed by message-specific data. Messages sent from Amp to Pedal had message IDs with the high bit off (0x00-0x7F), and messages from Pedal to Amp had IDs with the high bit on (0x80-0xFF).

Here are the message IDs I have identified, with my hypothesis as to what each one is used for. I made up all the message names based on what I think they’re for.

01 00

Every ~100ms, the amp emits this Heartbeat message, and the pedal emits a standard response (80, see below).  I don’t know what this is for, but I assume it’s a heartbeat so the amp knows the pedal is still connected.

04 NN BB

I call this the LED message, because when it is sent, the pedal turns an LED on or off.  NN specifies which LED is changing state, and BB is 00 for “off” or 01 for “on.” Values of NN I have observed:

  • 61: Tempo. The amp flashes an LED on and off to mark the current “tap” tempo for effects.
  • 20, 30, 40, 50: Patch LED A, B, C, D
  • 21, 31, 41, 51: Unknown.
  • 02, 03: Unknown; Wah/Vol LED, maybe?

When patches are changed by the pedal, the amp responds with a set of messages to update the pedal state for the new patch. Included are an LED message for each Patch LED, configuring its state, as well as some of the other unknown LED numbers.

08 C1 C2 C3 C4

The Small Display message sends 4 ASCII characters. When the amp is in Play mode, a message is sent whenever the patch changes, with the characters representing the bank and patch, such as ” 01A”. When the amp is in Tuning mode, this displays the note the amp thinks you’re playing, whenever it changes.

10 NN DD C1..C16

The Large Display message sends a longer text message to be displayed on the pedal. In practice, I have only observed messages with NN=00 and DD=10, followed by 16 (0x10) bytes of ASCII data. I am guessing DD is a byte count. NN might be a line number if the target device has a multi-line display, but I don’t know of any such device.

In Play mode, the amp sends the patch name in this message whenever the patch is changed. In tuning mode, the amp sends a string of characters that visually depicts how far off-pitch you are from the note sent in the Small Display message.

For example, when the note is perfectly tuned, it displays:

I---- ** ----I

When the note is off-pitch, it uses > < arrows to point which way to tune the string.

80 00 02 00 01 01 00

Message 80 with this specific byte sequence is sent by the pedal in response to each Heartbeat message it receives. I don’t know what the byte sequence represents, and it doesn’t seem to change depending on the state of the pedal’s buttons or LEDs. It may be a device-specific ID or some other kind of identifying information.

If I remember correctly, I found the amp starts to spam packets at the pedal when the pedal stops responding to heartbeats. It was easy enough to add a response handler for this, so I did.

81 NN BB

The pedal sends this Button Press message whenever a button on the pedal is pressed or released. NN represents the button number, and matches the NN sent in the LED message response: 20, 30, 40, and 50 are used for buttons A, B, C, and D. BB is 01 when the button is pressed and 00 when it is released.

The “tap for tempo” and “tune” features are implemented in the amp, not in the pedal. The pedal tells the amp when buttons are being pressed, and the amp tells the pedal what to display; it’s up to the amp to interpret the button presses as a patch change, tempo change, or tuning request. This makes development of the pedal software much simpler, and allows the amp to change its features in firmware without requiring a new pedal.

82 NN VV

The Expression message is sent whenever the pedal’s expression pedal changes position. NN has always been 0 in the messages I observed, but it probably denotes which expression pedal is being adjusted, in cases where more than one expression pedal is supported. VV is the value of the expression pedal: 0-127.

Startup, Patch Change, Mode Change

The pedal powers up when it is connected to the amp, and after a brief pause sends a few startup packets. In full packet form, the pedal sends:

f0 02 90 00 
f0 02 30 08

Each line is one packet containing a message of length 2. The first one is message 90, value 0; the second one is message 30, value 08. This is the only case I’ve seen when the pedal sent a message without the high bit set. Either my interpretation of the message ID high bit isn’t correct, or I did not read the packet data correctly. I have no idea what these messages mean.

In response, the amp sends these two packets:

f0 01 40
f0 03 31 01 16

I don’t know if this startup sequence varies depending on the hardware involved, but it doesn’t seem to change depending on the device state.

Then, the amp sends packets containing a complete set of state to the pedal: Small Display, Large Display, and an LED message for each LED. The pedal only needs to remember these values and only change its LED and display when new settings are received from the amp.

Whenever the pedal sends button presses that are interpreted as a patch change by the amp, the amp replies with a complete state set, just as when the pedal starts up.

If the pedal user presses the button corresponding to the currently selected patch, the amp interprets this as a tempo change.  Shortly after, the tempo LED messages will start arriving at the updated rate.

If the pedal user presses the “tuning” button combination, the amp enters Tuning mode. In Tuning mode, the amp sends Small Display and Large Display messages in real time as the user tunes their guitar. Further button presses reset to Play mode.

The future…

Before I left for vacation in August, I made plans for a few devices. These plans are on hold until I get another flash of inspiration, unfortunately.

First, I plan to replace the microcontroller in my FBV2 pedal with an ATTiny85 running emulation software that implements the two FBV2 buttons as “next patch” and “previous patch.” It listens to the incoming packets to determine the current patch, and calculates the button value to send for the left and right buttons based on the current patch. I got as far as emulating this behavior on the Arduino Mega, but didn’t successfully emit messages from the ATTiny.

The ATTiny is inexpensive and small, but unfortunately its limited feature set makes debugging very challenging. I may have to build an amp emulator with the Arduino Mega, just to debug the pedal emulator running on ATTiny…

My second project was a full 4-button pedal with expression. I mocked up all of the required functionality on the Arduino Mega, using the Adafruit LCD character/button shield. I will replace the on-board buttons with beefy pedal switches. Tempo will be marked by changing the LCD backlight color, and all tuning and patch names are displayed.

When I was working on this more actively, I thought I might be missing a large chunk of the FBV Mkii controller’s functionality: MIDI over USB. Thinking about it again, I’m not so sure. It feels like it would be a lot easier to implement MIDI in the device driver rather than in the pedal hardware. Maybe the USB port is connected to the same internal serial lines as the RJ-45 connector, and the device’s drivers convert the simple button press messages into MIDI messages before they make it to userspace?

This is a fun project… sometimes. The rest of the time, I don’t work on it, because I’m doing something I need to do, or something fun, instead.


Reverse Engineering: Line 6 FBV2

The Line 6 FBV2 is a control pedal for use with older Line 6 amplifiers and effects processors. I bought it to use with our Line 6 Amplifi 75 guitar amplifier.  Unfortunately, it isn’t compatible with this newer amplifier, so it’s been sitting on the shelf for over a year.

After starting to play with an Arduino development kit recently, I decided it was time to revisit the FBV2 pedal to see if I could make it do what I wanted.

A quick disassembly revealed a single small circuit board with only 2 ICs and a handful of other components.  This looked like it might be easy to reverse engineer and see how it worked.

Line 6 FBV2 circuit diagram, approximately.

I followed the traces from the 8-pin RJ45 connector to the ICs and switches on the board, and drew a rough circuit diagram. Looking up the part numbers, I found an inverter and a microcontroller. The pinout from these parts let me identify the transmit, receive, and power pins on the connector.

The microcontroller is branded NXP, made by Phillips: P87LPC760. This doesn’t seem to be made anymore, so it seems not worth getting a replacement and programmer for it.  My first idea for making this usable was to read the output from this device and convert it into something my Amplifi 75 can understand.

I hacked apart a spare ethernet cable to use its RJ-45 connector, and connected the FBV2’s transmit, receive, and power pins to my Arduino’s breadboard.

FBV2 disassembled and attached to the Arduino

I had heard the Line 6 devices used MIDI, so I approached this as if it were a MIDI device. I didn’t bother building an electrically correct MIDI interface, which requires an optoisolator, because this device was being powered by the Arduino board (via my laptop), so there was no danger of a ground loop.  Besides, this device should already have an optoisolator if it needed one, but it didn’t; so how important could it be?

I wrote a sketch using the SoftwareSerial library to interpret the output of the FBV2 as a MIDI stream: 31250 baud, with the default start/stop bit options. I mirrored the bytes over the USB serial port to the serial debugger in the Arduino IDE to inspect the byte sequences emitted by the FBV2 when the left and right buttons were pressed.

After a bit of fiddling, I was able to read the output. There were 2 basic data sequences:

  • Left button: F0 03 81 67 01 F0 03 81 67 00
  • Right button: F0 03 81 20 01 F0 03 81 20 00

These certainly seemed like MIDI sequences, but they weren’t quite right:

  • F0: System Exclusive. This is typically followed by a byte sequence terminated by F7. I don’t see that, so I though perhaps the byte stream was automatically terminated by a control byte (<= 128 decimal).
  • 03: At first I assumed this was the only data associated with the System Exclusive event; but, see below.
  • 81 67 01: This is a Note Off event on channel 2; note 67, velocity 1. 
  • 81 67 00: Note Off, channel 2; note 67, velocity 0.
  • 81 20 01: Note Off, channel 2; note 20, velocity 1.
  • 81 20 00: Note Off, channel 2; note 20, velocity 0.

This was all very hopeful, but eventually I realized it may not be important what this device outputs. Instead of converting this output to whatever the Amplifi 75 needs, maybe it would be better to replace the microcontroller with something a bit more accessible, and just program it to output what I needed instead.

My next few lines of inquiry weren’t fruitful, but I have a plan for what to try next.

I decided to pop out the microcontroller, which was helpfully mounted in a socket, and attach a few Arduino IO pins directly to the microcontroller outputs. This effectively replaces the FBV2’s brain with my Arduino, allowing me to program it to output whatever I want.

I wrote scripts to test a huge variety of MIDI control sequences: Control Change and Program Change events on all different channels with different controls and values, and the original MIDI-like sequences produced by the FBV2 pedal. Nothing seemed to be recognized by the Amplifi 75.

What I really need is a pedal compatible with the Amplifi that I can reverse engineer and see how it works. But if I had that, I wouldn’t need to make the FBV2 work, and there would be no point to completing the project.

It got late enough that I tore everything down and put it away. 

Then, after a bit more searching online, I found some information that will give me a new start. A company called VLoTech created a github project that reads and writes FBV pedal board data, for the larger FBV pedal boards that are compatible with the Amplifi 75.

This project showed me that the F0 03 sequence is more likely to be a byte count for the subsequent commands.

I also realized that I didn’t measure any timing information from the FBV2 when I read its data sequences.  It may be that the F0 03 81 67 01 and F0 03 81 67 01
sequences are “on” and “off” events that need a time delay between them in order to have an effect on the target device.

Next time I pick this up, hopefully later this week, I plan to try some of the other byte sequences documented in the fbv_tools project. 

To be continued…

    A Dream: Google PRIME

    I had a pretty intense dream last night.  I’m sharing it here with the hope that someone will steal my ideas and make them into a short story, novel, or movie. I don’t have the skills for this, but I’d like to read the rest of the story…

    I was running through the downtown streets of a big city during some apocalyptic catastrophe. Buildings were crumbling and falling around me as I looked for shelter. I found a small but ornate black stone building in the style of a 19th century bank, with a Cold War era “Bomb Shelter” sign, and a Google logo.

    I entered the building, and found stairs leading down, where I expected the bomb shelter to be.  At the end of my descent I found myself in a huge, dark room with a low ceiling.  The underground space stretched farther than I could see in all directions.  Groups of people were sitting on foam mats, so I joined them.

    I knew that this place was only for Primes, and I knew that I wasn’t a Prime even though I didn’t know what a Prime was; but I stayed anyway. I found another man who was also not a Prime, but they let us stay.

    Some time passed and our group found ourselves in a different room: smaller, friendlier, and a lot more like I’d picture a postapocalyptic refuge to look like. We hung out on couches and survived, basically. There wasn’t really enough water, and there was a radiation danger.  Eventually I figured out we were on a space ship.  There was an action scene where we fought off the bad guy space ships, which were all shaped like giant tanks.

    At some point I learned or knew what a Prime was, and my dream became lucid, or transitioned into waking thoughts about the ideas the dream contained.

    The synopsis is: Google is secretly using its data mining and search technology to identify the best candidates for repopulating the earth after an apocalypse-scale catastrophe. It looks for the best combination of health, longevity, genetic diversity, and compatible personality to ensure the survival of the species from a very small population.

    The people identified by this process are known as PRIMEs, or Primary Repopulation Individuals for Mother Earth. In the event of a catastrophe, Google collects these individuals and brings them to its “ark” for want of a better word: a survival bunker of some sort, supplied with the technology and supplies to allow humanity to survive whatever has happened.

    At this point my mind was concentrating on how this concept might be turned into a short story, and the implications of someone like Google using their massive data collection for this kind of purpose.

    I imagined a man running through the downtown streets of a big city during some apocalyptic catastrophe.  This time, Men in Black (or equivalent) asked him “Are you so-and-so?” and told him to come with them when he confirmed his identity.  He protested: he needed to find his wife and child and help them.  The Men collected him, and brought him to the Google vault.  He was a PRIME.

    Like many things the real Google actually does in real life, dream-Google’s PRIME program is a double-edged sword. On one hand, PRIME has a noble goal: to save humanity in case of an apocalyptic catastrophe. On the other hand, dream-Google’s algorithms entirely define what that surviving humanity will look like.  They choose who lives, who dies, and the genetic shape of the future human race.

    What happens next?

    Fall-In 2013

    Another year, another Fall-In convention.  The more conventions I go to, the less new and different I have to say about them, so I’m going to go over some of the “big picture” items that I usually ignore, and only briefly cover the events themselves.

    Walter White helps me with my
    convention registration issue.

    Gaming conventions are great fun, and they’re a wonderful way to get a big dose of gaming in over the course of the weekend.  I learn more in a weekend at the convention than the entire time between conventions. My room for Cold Wars 2014 is already reserved, and I should probably go book for Fall-In as well.

    As usual in recent years, I played nothing but DBx games: DBA and HotT.  Fall-In is the smallest of the HMGS-East conventions, but there are enough players and GMs to field a full schedule of DBA and HotT games, from Thursday evening to Sunday morning with minimal breaks.  All the DBA games were run using 2.2+. Nobody plays 2.2 anymore, and 3.0 isn’t released yet.

    Ancient and Medieval wargaming is in a bit of a funk at the conventions these days.  Although we have enough players to fill DBA tournaments, there is very little support in the vendor hall. The space where Wargames Minis used to be is still a huge hole in the back of the hall, and many other vendors seem not to bring their 15mm ancient and medieval figures in recent years.

    If you’re interested in buying painted armies, there seems to be a big selection of DBA armies in the flea market; so there’s that, at least.

    Luckily, Gale Force 9 have their bulk MDF bases back in stock, hopefully permanently.  I stocked up on 25mm scale HotT bases on Friday before they ran out.

    As I paint more armies, each army I paint becomes less and less useful to my overall collection.  When I had 2 armies, painting a third was a huge benefit: on average it would see use 1/3 of the time.  Now that I have over 30 armies, each new army I paint provides only a minuscule benefit over the ones I have.  I play DBA so infrequently outside of conventions that the only way I can guarantee I’ll play an army is if I paint it for a specific themed event.

    With that in mind, I built 3 armies in preparation for Fall-In 2013.  I painted Neo-Assyrian Later Sargonid for BBDBA, but didn’t end up using it.  The Two Davids campaign event always provides a good motivation to paint a new army, so I painted Georgians.  There wasn’t any other event at the same time as the 25mm DBA event, so I rebased a 25mm Early Polish army, though I didn’t paint the figures.

    Mark Bumala is annoyed that Rich forgot the terrain mats.

    Every convention, The Stooges from Pittsburgh run a Prologue event: an element-themed tournament on Thursday night.  This time around the theme was “Long Pointy Things.” Eligible armies required at least 4 elements of Pike. These aren’t historical formats, and don’t tend to produce historical matchups. They often result in fairly balanced army matchups, but some metagamers try to turn it into an “armies that beat the element theme” event.

    After winning 3 rounds undefeated, John Manning’s nearly naked Sumerians carried their Long Pointy double entendres to victory. I brought Seleucids.  Although I tend to consider Alexander and his Successors as the main source of DBA Pike armies, I didn’t face any other Classical pikes. John Manning beat me with his Sumerians; I beat Mark Bumala’s Low Countries; and Roland Fricke beat me 5-3G in a very close battle with his Low Countries army.

    I really like the later Sumerian army, but it’s only because their heavy chariots are donkey-pulled 4-wheel carts.  At this point, the army composition is so similar to a Successor army that I just can’t justify painting the army without a themed event to play it in.

    They did that?  Their C-in-C hanging out on our left
    flank should be easy to pick off…

    The first Bookend event is Big Battle Doubles, held all day on Friday.  Typically this event is run in two separate player pools, using either round-robin or swiss pair matchups in each group depending on the player count.  After three preliminary rounds, the winners of each pool are supposed to play a final to determine the overall winner.

    In recent conventions they’ve been using a historical theme, and this time around it was chariot-era biblical armies.

    Team Two Davids won their pool as they usually do. Spencer Ginder and his wife, team Comedy and Tragedy, won the other pool.  Since both teams live in the DC area, they decided to finish the final outside the convention.  I haven’t heard the final results yet.

    Team Comedy and Tragedy: Christine and Spencer Ginder

    I partnered with Jack Sheriff, making him the second player I’ve partnered with more than once. We formed The Team With No Name, despite Dave Schlanger’s attempt to retcon us into The Team Who Shall Not be Named. I’d be happy to join forces with him again; we both have the right combination of laid back but competitive.

    We decided to take Neo-Assyrian Later Sargonid with a Saitic Egyptian ally. I planned to paint a Sargonid army with an ally for BBDBA before I partnered with Jack, but he had the army so I didn’t need to finish painting it.

    In the first round, we faced Mark Burton and John Svensson, whose team name I forget, and their Lydian army. They defended and tried a bold, daring deployment that put most of their forces on our weaker right flank, but exposed their commander in chief on the end of their line.  Truthfully, they put up a good fight and lasted several turns longer than I anticipated; but they lost in the end.  We won 78-22.

    In the second round, we faced team Comedy and Tragedy and their New Kingdom Egyptians.  We lost 2-98.

    Versus The Stooges. Before: Deployment.

    We were determined to take our lessons learned into the third round, where we also faced New Kingdom Egyptians with the same composition.  This time, they were piloted by the Stooges: Larry Chaban and “Diceman” Rich Baier from Pittsburgh.  I came all this way to fight you?

    Jack Sheriff is known as “the butcher,” and in this game we all helped him earn his title.  In the end we lost 41-59, but it was one of the closest BBDBA matches I’ve seen. We were close to testing whether it was possible to gain more points as a loser than as a winner.

    Versus The Stooges. After: Carnage.

    The victory conditions for BBDBA say that you win if you have broken the enemy’s C-in-C command, or have killed more than half the enemy’s elements and also have more elements killed than they do.  Big Battles uses a triple army, 36 elements, so half the elements are 18.

    Near the end of this game, we were tied 17 elements to 17. They broke one of our commands early on, but we broke two of theirs shortly after.  It was their turn, which meant that it was their turn for their elements to flee off the board, but also their turn to attack us and kill more elements.  Unfortunately they were able to kill 18 elements before we could catch up, securing their victory. They won 19G-17G/CinC: a Pyrrhic victory if there ever was one.

    After this battle of epic proportions, the four of us decided to go to dinner rather than participate in the Friday evening event.  On Roland’s advice, we drove a few miles away to a “Mexican” restaurant. This turned out to be a high quality Latin-American restaurant that was an absolutely amazing find for Lancaster, PA: El Serrano.  After the loss of the Thai restaurant, and Tony Wang’s going down hill, it was great to find another place to eat good food.  I had the Lomito and two excellent Margaritas, and didn’t regret missing a DBA event for the experience.

    Pyramid event, final round.

    On Saturday, I ran a Pyramid event.  In this format, the loser of the each round joins forces with the winner in a multi-army battle in the next round.  The 8-player pyramid results in 3 rounds culminating in an 8 player 4-on-4 battle.

    This time around, I chose an Alexandrian Successor theme. In the final round, Larry Chaban as C-in-C of the Athenian Empire defeated Dan Loych, C-in-C of the Ptolemaic Empire, to secure Greek dominance over their Macedonian underlings.

    A new target! I mean, Otto.

    Saturday afternoon, there was only one event: a 25mm book II/III tournament.  I usually don’t play 25mm, but 2.2+ normalized the rules across 15mm and 25mm, so I decided to take an army rather than do nothing. I could have taken my Early Spartans, but a wall of spears with a single Psiloi is fairly boring.  I decided to rebase some painted Medieval figures I had into an Early Polish army, instead.

    In the first round, I beat John Svensson’s Normans 4-0. Next I faced Jeff Franz and his Skythians; he didn’t roll enough 6’s for PIPs, so I beat him 3G-1.  Finally, I faced John Manning’s Hsia-Hsia and won 4-2 to end in an undefeated victory. And so, I qualified for the NICT again even though I am unable to attend Historicon.

    Saturday Night is the other Bookend event: the Two Davids Campaign Theme.  This convention, the theme was God Wills It!, a Crusader theme. I played the Georgians, alone in the corner as usual.  I’m not very good at parties.

    I never took a vassal, but I won 2 rounds out of 5 (“Beat up on kids” according to Larry), killed a general, and ended the game independent, netting me 7 points and a solid middle-of-the-pack position.

    Sunday Morning, instead of going to Perkins for their extreme bowel cleansing service, I decided to play the Hordes of the Things open.  I brought Professor Hans’ Metal Minions.  I won one round and lost 2.  Scott Kastler’s magician army was a very interesting opponent.

    It was another great convention, and I look forward to Cold Wars in March.  In the mean time I have at least 3 DBA armies to paint, and I plan to field a new HotT army for the Sunday open as well.

    You should join us! It’s fun, and there’s beer.

    DBA Army III/70b: Georgians

    Here is my recently completed Georgian army for DBA 2.2+.

    DBA Army III/70b: Georgians. Essex miniatures.
    Georgian 3Kn General and 3x3Kn.  Essex Miniatures.

    I painted this army for the God Wills It! First Crusade Campaign Theme, which will be run on Saturday night at Fall-In 2013.

    The primary factor for me choosing this army was that the slot was still available in the campaign.  However, I also had a number of the figures on hand, as leftovers from other projects.  I chose the rest of the figures based on what Jack Sheriff used in his Georgian army.

    Unlike Jack’s figures, most of mine are stock, unmodified Essex miniatures.  The exceptions are four Light Horse models, which were Bulgar archers.  They had large toggles on the front of their coats, which I removed to make them look almost identical to the Essex Kipchak/Cuman figures.

    III/70b: 4x2LH. Essex Miniatures.
    III/70b: 2x4Sp. Essex Miniatures.

    The Knights are a mix of Essex Georgian knights and other similar knights.  The general and his supporting figures are a generic Eastern European command set.

    I had a hard time finding any definitive information on colors and shield patterns for this army. I would not use this army as an example of what Georgians are supposed to look like.  I was inspired by a few other painted Georgian armies online, and pictures of

    As usual, these are painted primarily with Vallejo acrylics. I use a combination of painted highlights and several colors of ink washes for shading.  Shields are hand painted.

    III/70b: 2x3Bw. Essex Miniatures.


    III/70b: 2x2Ps. Essex Miniatures.