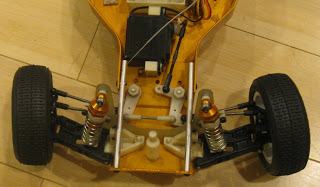
After getting my RC10 back in service, it became apparent that I would need new tires some day. The rear tires had very little tread or traction left, and the ground clearance was barely sufficient to run it on short grass.
Unfortunately, the original RC10 wheels are a small obsolete size, and modern tires aren’t available to fit them. My options seemed to be:
- find vintage wheels and tires on ebay or other sources
- buy JC Racing wheels that use standard buggy tires but allegedly fit on the original RC10
- rebuild the rear end to fit modern buggy wheels
The JC Racing wheels look really nice, but they take a long time to ship from the UK, they’re expensive, and I’d need to salvage the wheels every time I replaced the tires since they cost so much. Also, there isn’t nearly as much challenge involved in slapping new wheels on the car as there is with rebuilding the entire rear end.
There are many threads on various RC forums regarding the various ways you can adapt your gold pan RC10 to run modern 1/10 scale buggy wheels. Unfortunately they tend to skimp on the details and expect you to figure stuff out yourself. Truthfully, there are so many minor differences in early RC10 buggies that this might be the best bet. But hopefully the story of what I did will help others who have the same problem.
I’ll deal with the front and rear wheels separately, because the front is much easier than the rear.
Front Wheels
Currently, RC10B4 wheels are still available, and they fit just fine on my original 3/16″ axles. I started with DE Racing “Borrego” wheels for the B4 buggy, with 3/16″x3/8″ bearings to fit them. I bought JConcepts Barcode front tires.
 |
| DE Racing Borrego front wheel, and original RC10 wheel |
Overall, this setup mostly works, but it isn’t perfect. The larger diameter wheel fits just fine, but the wheels are also wider. This causes the tire to rub on the front A-arm at full steering. This can be adjusted with servo travel on the transmitter, but it must increase your turning radius somewhat.
The Barcode tires were completely useless on grass, I may as well have been driving slicks. Since my options were either to drive them for a few days and buy replacements, or save them for indoor driving and buy replacements, I opted to save the bar codes and buy even more wheels and tires.
I got Associated B4 wheels all around, hoping they might work slightly better than the DE Racing wheels. For the front, I got Pro-Line 4 rib tires, a modern version of the original tires on the car. Overall these worked very similarly to the bar codes: they’re a bit too wide, but otherwise they work fine. They also don’t have great traction on the grass, but they have a heck of a lot more tread.
Rear Wheels
When I say “rear wheels” here, I really mean the entire rear end of the car.
There are two basic problems with using the original RC10 with newer wheels. First, the old RC10 axle is weird. Instead of being a constant diameter 3/16″ axle as in the front, it has a fat section near the center of the car, tapering down to a narrower part where the wheel mounts. The taper keeps the wheel from rubbing on the hub, but modern setups use a thick conical washer for this instead. The second problem is the wheel offset: the old hubs don’t stick out as far, so modern wheels end up rubbing on the rear arms.
The basic solution to both of these problems is to replace the original hubs and axles with RC10B4 hubs and axles. Unfortunately since you’re changing the hub location, this has a bit of a cascading effect and requires replacing quite a few parts. For reference, I’ve found it useful to refer to the RC10B4 manual pdf (Google it if the link ends up broken), to find modern part numbers for the required replacement parts.
I opted to stick with the RC10B4 pin drive on the rear wheels for now, but it should be easy to use hex drive wheels with a hex adapter if the B4 wheels become unavailable.
I’ll try to detail everything I ended up actually using, without any of the extra parts I didn’t use; but I may forget something. Most of these parts are shown on page 10 of the manual referenced above.
- Associated 9584 rear hub carrier
- (4) 3/16″ x 3/8″ bearings
- Associated 9670 rear axle RTR
- Associated 7368 3/16″ axle shims
- (2) Associated 9671 B4 RTR dogbone
- Associated 7377 axle spacers
- Associated 7369 universal roll pins
- Associated 5407 O-rings
- Associated 9608/9608B wheel spacer
- 4/40 threaded rod, for longer camber links
- 8/32 wheel locknuts
 |
| RC10 gold pan with RC10B4 rear hubs |
The assembly is mostly straightforward. Remove the old wheels, hub carriers, and camber links. Save the ball link parts for use with the new hub carriers and camber links, and reassemble the hubs as shown in the manual above.
The B4 hub carriers have a narrower hinge pin hole, so open them up with a 1/8″ drill bit. As long as your hinge pin is loose in the old A-arm, it doesn’t matter if it’s a bit tight in the new hub carrier.
Since the new hubs are offset farther out than the old ones, you need longer dog bones to compensate, or they will fall out when your suspension is fully extended. Some people have replaced their dog bone linkage with CVD links, but I was not willing to risk getting the wrong part since it cost so much more than the dog bones.
On the original RC10, the rear dog bones are held in place using springs in the hubs with small nylon spacers on the differential side. In modern cars, O-rings are used at both ends of the linkage. The B4 RTR dog bones are just at the limit of maximum workable length using a reasonable camber angle. The important part to get these to fit correctly is to remove the nylon washer from the differential side of the link, before replacing it with a rubber O-ring. When you’re finished, you should be able to bottom out the shocks before the dog bones bind up, but they won’t fall out going over jumps.
The wider hub offset also affects your camber settings. You need longer camber links in order to maintain the original camber setting. On my car, I had to increase the distance between the ball link ends to about 0.75″ in order to maintain a good camber setting. This was enough of a change that I bought a long piece of threaded rod to build new camber links, rather than risking stripping the original plastic ball link ends by using them when they’re too loose.
 |
| RC10 with B4 wheels and Traxxas/Pro-Line tires |
I started with DE Racing Borrego wheels and Barcodes tires, just like in the front, but these tires don’t have any more traction when you put them on the rear wheels.
For my second attempt, I used Traxxas step pin tires and Associated B4 rear wheels. These have a lot more traction on the grass than any of the other tires I’ve used on this buggy. On the grass, the buggy used to oversteer a lot on corners, but now it pushes like crazy. I like the overall look of the car with these tires. The combination of pin and rib tires mirrors the car’s original look.
I may want to install a slightly smaller pinion to compensate for the larger wheel size, but otherwise I’m happy with these modifications. I should still be able to use the old wheels, so I can compare the handling to see if it’s any better now.
My original buggy had bushings throughout instead of bearings. This project replaced almost half of the bushings with bearings, so I now have reduced friction as well as more modern wheels.


