Hittite Camp

Here is a camp I built for my Hittites.  It is based on images in the Osprey book Hittite Fortifications, c. 1650-700BC.

The wall is built in two sections, each of which is the maximum size allowed for a camp: 40mm x 120mm.  The left section with the gate will be my camp for a single Hittite army, and I’ll add the extra wall section when playing BBDBA with a Mitanni ally.

The walls and towers are constructed of styrofoam cut on the bandsaw.  The crenellations are made of mat board, and the exposed beams are short pieces of balsa.  I brushed on water based primer and varnish, since spray paint and superglue destroy foam.  

At this point I’m officially finished with any modelling required before After Tax Day BBDBA.

DBA Army I/19: Mitanni

DBA army I/19: Mitanni, from an Essex army pack

This is my recently completed Mitanni (I/19) DBA army.  All figures are Essex, from their prebuilt army pack.

For this army, I painted quickly instead of looking for perfect results.  The people (infantry and chariot riders) are all flat painted and washed with Army Painter Strong Tone.  When I got to the horses and chariots, I decided not to go with “the dip” and instead used Devlan Mud in some areas and painted highlights elsewhere. 

Mitanni chariotry

Mitanni have 6 light chariots, the most available in any DBA army.  These models don’t match the typical shape of Mitanni chariots available from other manufacturers, but they’re close enough for me. Mitanni was a loose coalition of a variety of different peoples, so they probably had a variety of chariots available as well.

As usual, I found building and painting the chariots to be fiddly and annoying, but I like the way they turned out once I finished.  The horses are a bit bright for this time period, and the colors are based on guessing and assumption more than actual evidence. 

I paint the crew, assembled chariot, and horses separately, and then do final assembly.  I stick the chariots to nail heads to hold them during painting.  This time I was careful to angle the chariots when I mounted them, so they can all line up front-to-back without bumping each other.  The general gets blue on his horses, and points at things instead of shooting them. 

Mitanni infantry

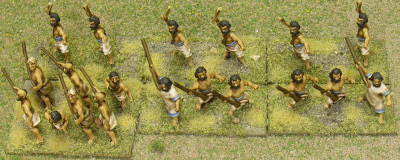
As you can see here, the slingers in the back row are my “stumpy brigade.”  Two of them lost a hand, most likely by being run over by a chariot: I don’t think they had threshing machines in the 14th century BCE.  I was surprised to see that Essex made you assemble the slingers: the sling was separate and had to be glued into place.  Annoying!  I’m also not that pleased with the figure selection in the horde.  I know that product code has more poses, because I used them with my Hittites; but I got a lousy mix, with 3 of one particularly distinctive looking figure.

This army will be a matched pair and an ally to my Hittites.  I purposefully put them on different bases (thin metal instead of thicker wood) than the Hittites, so they will be easy to distinguish on the battlefield despite the similar color schemes (offwhite).

Viking Forge Elephant: MCC-14

Viking Forge Carthaginian Elephant: MCC-14

I did not paint this Viking Forge Carthaginian elephant, but I did add details to the blanket and apply a dip.  It’s a part of my Later Carthaginian beater army that I bought at Historicon last year.  I’m showing it here as a part of my elephant comparisons.

I have two of these elephants and they have a driver and two crew each.  The spears have broken off, they should be taller.  The crew are separate figures, but I can’t tell how the elephant itself was cast.  The head must be separate, judging by its overhanging ears, but I’m not sure if the body is one or two pieces.

These are by far the largest elephants I have.  They’re taller, fatter, and longer than Essex models, and the ears are impressively large.  The pose is quite static, but it gives the impression that the beast is so large that it can’t make any sudden, drastic motions.

Left: Black Hat CA13; Right: Viking Forge MCC-14

The sculpting of the elephant itself is excellent, but the crew are pudgy and unimpressive, without a lot of detail.  The driver is distinctly KKK-like, and I don’t know what this is intended to represent.

The second picture shows a Black Hat Carthaginian elephant on the left, and Viking Forge on the right.  The Black Hat elephant is shorter, but the crew is much taller and thinner.  The proportions are completely different.

I would not likely buy any more of these Viking Forge elephants, but only because they’re out of scale with everything else I have, and the crew is pretty terrible.

Black Hat Elephant: CA13

Here are two Black Hat Carthaginian elephants, product code CA13: “Carthaginian Elephant.” The elephant comes with one driver and two different crew figures.

These are interesting models.  The sculpting is quite good, and the end result is completely satisfying.  However, I have several complaints about my overall experience when building and painting these.  These concerns are likely my problem more than Black Hat’s.

The most noticeable difference between this elephant and the rest I’ve built is how they are assembled.  The elephant, including its head and the driver, is sculpted in a single piece; the box on the back and crew are separate castings.  Black Hat did a wonderful job maintaining a high level of detail with a single casting.

You’d think that assembly of a two piece model would be easier than elephants with two body halves and a head, with an optional howdah.  Nope!  Unfortunately, the boxes for their backs were filled with flash that is difficult to trim out, and then the box doesn’t fit on the back of the elephant without a lot of trimming.

The shields molded on the side of the elephant are a bit oval, I’m not sure why.

The crew figures are also quite odd, though it doesn’t show at all on the final model.  From the waist down, they look like they’ve been packed in a box on the back of an elephant for a year of campaigning… so I guess that makes them accurate?  The crew are flattened from the waist down.  Detail of cloth and armor is still there, but it’s all squashed.  I’m sure this is to allow the figures to fit in the box, and it’s not visible once they’re in there, but it looks weird before you assemble everything.

Left: Essex Indian elephant; Right: Black Hat African

While I was painting this elephant, it felt miniscule, like a pigmy compared to other elephants I’ve painted.  However, once I actually compared it to other elephants, it doesn’t seem that small.  It’s definitely smaller than an Essex elephant, but it’s not as small as the Museum or Chariot models. It’s tall and skinny, but not as long as the Museum elephant.  The ears are tiny.

I’m not very happy with the proportions of the elephant compared to its crew.  The crew is bulky and the box looks huge on its back.  I think this adds to the feeling that the elephant looks small.

Chariot Successor Phalangites

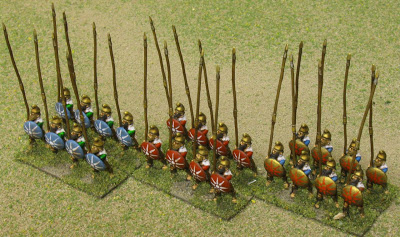
Here are some Chariot Miniatures Alexandrian Successor phalangites.  I painted them to have better pikes for my Lysimachid army in the Two Davids Successors campaign at Cold Wars.

Overall, I like the figures quite a bit, and they turned out well with minimal effort due to my cheezing out and using Army Painter dip.  Chariot Miniatures are nicely sculpted with nice deep details that take ink well.  The poses tend to be a bit more static than modern sculptors, but I think this works well for regular heavy infantry.  They’re slim and slightly smaller than Essex figures, but close enough to be compatible.

I have only two minor complaints about these figures.  First, their right arms are too short.  You’d have to go out of your way to notice this if you aren’t painting them, however.  My other complaint is more about the Magister Militum web site than the figures themselves.  These pikemen have beards.  I wanted pikemen without beards.  However, these seem to be the only successor phalangites in the catalog that have beards, and also the only ones that were photographed from the rear on the website.  Doh!

I had trouble resisting the temptation to paint a stand or two as garden gnomes; the beards and hats made it almost irresistable.

The Offwhite Tower

Behold The Offwhite Tower,  impenetrable stronghold of the Pretentious Elves.

After showing off the preview of this tower, I’m not sure I have much useful to say about it.  It’s a Hordes of the Things stronghold, suitable for use with 25mm basing.  As buildings should be, it’s slightly smaller than true 25mm/28mm scale; but it’s also about 14″ tall, so it’ll probably be the tallest thing on the table most of the time.

I turned the tower on the lathe, in two pieces.  Then, I carved shallow areas for the windows, and scribed vertical lines to define the brickwork and shingles.  Finally, I added cardstock details around the lower windows and door.  It’s based on masonite with stones, flock, and static grass.

The Elven general stand was painted by Bob Barnetson and is representative of the army that will defend this Stronghold.

Preview: The Offwhite Tower

It’s been so cold out lately that I haven’t been spraying matte varnish outside because it doesn’t turn out matte.  But, I have been modelling and painting.

Here’s a work-in-progress shot of the Offwhite Tower, stronghold of the Pretentious Elves.  Yeah, I really should’ve chosen Horde instead of Alliance…

I turned this on the lathe in 2 pieces, carved windows, and scribed the brick work.  I added a few details around the windows with cardstock. The tower’s overall height is about 14″.  It looks great with paint on it, but I still have to finish off the base.

This will be the stronghold for my 25mm Hordes of the Things elf army.  Now I just need to cut some felt for 25mm terrain.

DBA Army III/40d: Leidang

Here is my latest DBA army: III/40d, Norse Viking and Leidang.   JM and I specified the 15mm figures for two Leidang armies (one for each of us) from a mix of manufacturers: Khurasan, Legio Heroica, and Black Hat.  Although I don’t think the figure/pose selection is perfect for the period, it’s close enough for us and I am very happy with the resulting army. We didn’t buy all army options, only those we’re most likely to use.

The army arrayed: Valdemar II and his followers

This obviously does not look like an ordinary Viking army, because it isn’t.  We chose figures for the mid to late portion of the (d) army list, so the 12-13th century. The selection was based on a few sources: Osprey’s The Scandinavian Baltic Crusades and Medieval Scandinavian Armies (1), as well as WRG’s Armies of Feudal Europe 1066-1300.  Scandinavians in this period looked basically like Southern Europeans of a few hundred years earlier, except possibly hairier, more warmly dressed, and with fewer horses.  I’m a bit dubious about the hair; personally, I’d start shaving if I needed to wear mail armor regularly.

I’ll go over the individual manufacturers with the pictures below.

The full army list is: 1x3Kn (Gen), 8x4Bd or 3Ax, 2x2Ps or 3Bw, 1x4Sp or 7Hd.  I painted only 7x4Bd, 3x3Ax, and no Horde.
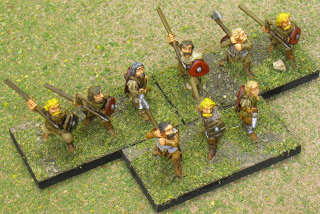
3x3Ax: Black Hat Lithuanian/Prussian axemen and spearmen

According to the DBM army lists, the auxilia and psiloi represent Finnish levy troops.  Although these aren’t Finns, we liked the figures enough to call them “close enough.”  These are Black Hat Lithuanian/Prussian axemen, spearmen, and archers.  These and the bowmen below are probably the best sclupted 15mm figures I’ve ever had the pleasure of painting.  I highly recommend them. A+!

2x2Ps: Black Hat Lithuanian/Prussian archers

The detail of the sculpts is astounding, including belt buckles, gaiter laces, and woodgrain on the axe handles and shields.  The heads are a bit meatier than I’d prefer, but the face sculpts more than make up for this. Unlike many detailed figures, these are not carrying around a waist full of pouches, bags, bedrolls, and other junk that is a pain to paint and would’ve been left at camp during battle anyway.  There are a lot more poses available than I saw at first glance: the same pose is often dressed in different combinations of furs and cloaks. 

These figures worked well with washes.  I used a variety of natural tones on their clothes, and a wash of Devlan Mud tied them all together well.  The faces were shaded with Ogryn Flesh wash, and I painted highlights on the hair.

3Kn(gen): Legio Heroica feudal cavalry command

The Knight General is a command pack from Legio Heroica’s fine line of Feudal cavalry.  A better figure choice would have made these guys look a bit more knightly, with kettle helms or closed helms and probably some horse armor.  These are solid figures with nice horses, and the riders even fit on the horses properly.  The main downside is the quality of the face sculpting, though it’s mostly hidden. A-

This is the first army I’ve painted with substantial shield designs, and one of the last shields I painted was the general’s.  I decided this army would represent the Danish, in the era of Valdemar II “The Conqueror.”  The coat of arms he used is still part of the Danish coat of arms: three blue lions on a gold shield, with 9 red hearts. 

Dannebrog was a total square in the 14th c.

The only other connection I attempted to make with Valdemar II is in the flag.  Denmark’s flag, Dannebrog, has its probably fictitious origin story under the reign of Valdemar II.  It is said that a red flag with a white cross dropped from the heavens and inspired the disheartened Danes to win the Battle of Lyndanisse in Estonia in 1219.  This flag is the approximate shape and proportion of Dannebrog as depicted in the 14th century Gelre Armorial, which is quite different than today’s Danish flag.

2x3Bw: Khurasan Frankish crossbowmen

The two optional 3Bw elements are represented here as crossbowmen.  Crossbows were used more and more through this army’s time period, so we decided crossbowmen would be more appropriate than archers.  These figures are Khurasan Frankish crossbowmen.  We probably should’ve chosen some hairier guys, or maybe a few kettle helms. They’re very nice sculpts except for the faces, which are rather featureless.  A/A-
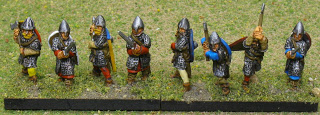

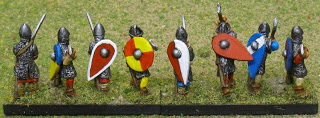
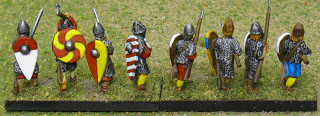
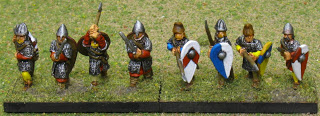
The remaining figures are the multitudes of blades, and one element of spearmen.  For these, we chose Khurasan’s Saxon Huscarls (with axes), German Milites (with swords), and Saxon Select Fyrd (with spears).  Most of the shields are kite/almond shaped, which is expected for an army this late, but we tossed in some round shields which would still be in limited use.
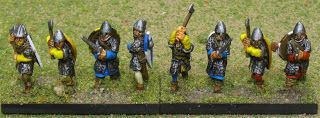
The only complaint I have about any of these sculpts is with the faces on the German Milites and Saxon Fyrd.  The clean shaven faces under nasal helms have almost no facial features. I admit they’re almost totally covered, and it’s only a minor problem, but the Huscarl faces are so much better that it’s a noticeable contrast.  A/A-
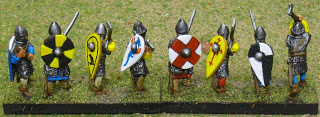
It was only as I was cleaning and assembling these figures that I realized a flaw in our figure selection: all of the figures except the spearmen were using two handed weapons with their sheilds on their backs.  Oops!  The upside is that during battle I get to see all my shield painting, instead of a bunch of Danish mail armor.
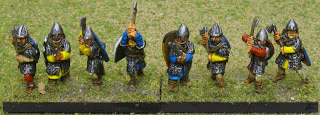

The other thing we could’ve chosen a bit better is the helmet selection.  There would be more kettle helms in use during this period, and a few more closed-face helms as well.  The figures we chose were purposefully limited to two mail order transactions, which is an unfortunate compromise to make, but I’m not sure my entertainment level would increase enough to warrant paying for shipping a third time.  I will look for some additional suitable figures at Cold Wars, however.


For the shield color and pattern selection, I used the same sources cite above, along with some other Internet research.  I found one interesting site intended for use by SCA participants attempting to register Viking heraldry even though it didn’t actually exist.  Along with speculation about how to fit Vikings into the rules, it has an interesting description of Scandinavian heraldry and a survey of the colors most commonly used.


Some of the shield patterns are directly from Osprey books, but most are simple divisions of the field in the common Scandinavian colors.  Unfortunately the sheild bosses don’t leave much room for symbols on the shields.  Apparently Scandinavian heraldry didn’t change as much over time as other heraldry, though, so I wouldn’t expect the complex patters that emerged in the rest of Europe.

As with everything, it’s all a matter of how picky you want to be and how much research you want to do.  I did as much research as I wanted to do, and came up with something “close enough” in my own mind.  I spent as much time painting them as I could while enjoying it.  Now it’s just time to learn how not to lose with them.

Bike Shelf

After seeing the hand made bike shelves available at Knife and Saw, Marla and I were inspired to find a better bike storage solution than a hook in the ceiling.  Unfortunately I ride enough that the convenience of storing the bike right inside the front door outweighs the ugly factor.

So, Dad and I designed and built this shelf.  Thanks for your help! It’s more pragmatic than pretty.  I like the shape and proportions better than the Knife and Saw shelf, but we used practical high quality plywood instead of pretty hardwood.  I’ll put a better finish on it once the weather is warm enough to do this outdoors.

Tlingit Camp

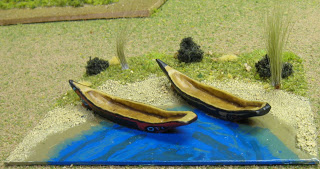
Here’s a picture of the camp I built for my Tlingit army.  Since the Northwest Americans are a Littoral army, they will always have a waterway when they place terrain, so I decided their canoes would make a good camp.  I left room to add a totem pole, but I haven’t been inspired to build it yet.

The canoes are longboats from Museum Miniatures, modified to look a bit more like Tlingit canoes on the front end.  The rear end isn’t right, but it’s the way the canoes  looked when I got them.  The paddlers with the canoes were totally inappropriate for precolumbian North America, so I didn’t use them.

The patterns on the sides of the canoes, barely visible here, are based on images of Tlingit canoes I found via Google image search and in Flickr.